
Complete Fixes To Solve iPhone 14 Pro Randomly Asking for Apple ID Password | Dr.fone
Complete Fixes To Solve Apple iPhone 14 Pro Randomly Asking for Apple ID Password
Apple ID is a crucial part of the Apple ecosystem that enables users to access a wide range of services and applications. It is a unique identifier that links all Apple devices, services, and applications together.
However, sometimes iPhone users may encounter an annoying issue where their iPhone randomly asks for an Apple ID password without any apparent reason. This problem can be frustrating and disruptive! It can interrupt your workflow and prevent you from using your phone normally.
Fortunately, we have comprehensive solutions to help you resolve this persistent issue once and for all. Let’s dive in and return your device to its happy, non-nagging self!
Part 1: Common Causes for Random Apple ID Verification Pop Up
The random Apple ID verification pop-up can be caused by a range of factors, from simple settings misconfigurations to more complex account-related issues. So it’s important to identify the root cause to find the appropriate solution that addresses the underlying issue.
Take a closer look at these common reasons why your Apple iPhone 14 Pro may be randomly asking for your Apple ID password:
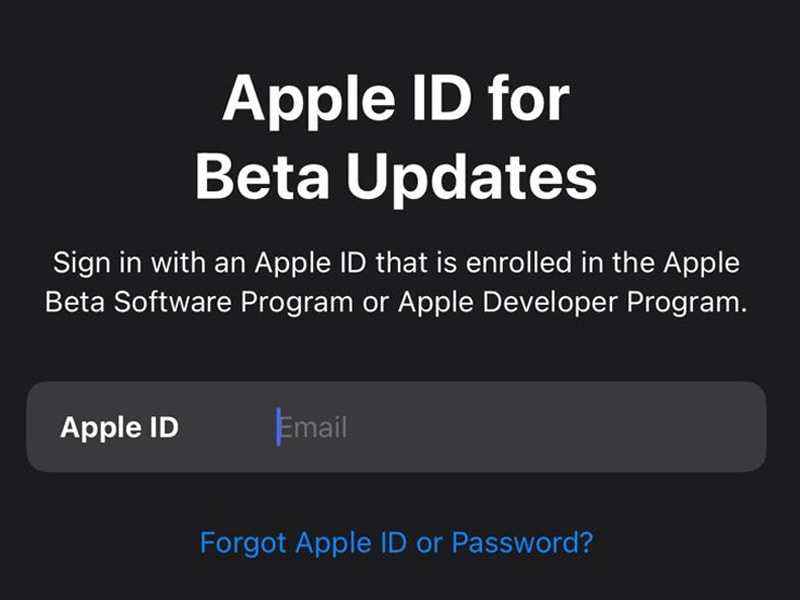
- iOS Software Update****:
One of the most frequent causes of the Apple ID password prompts is when your Apple iPhone 14 Pro has undergone a software update. The update may require you to re-verify your Apple ID credentials to ensure security and privacy.
- iCloud Account Settings****:
If the settings are not in sync with your Apple ID credentials or if there are inconsistencies, it can trigger repeated password prompts.
- App Store/iTunes Purchase****:
If there was an issue when you purchased or downloaded something, your Apple iPhone 14 Pro might prompt you to verify your Apple ID to complete the purchase.
- iCloud Keychain****:
The iCloud Keychain is a feature that stores your passwords and other sensitive information across your Apple devices. If there are inconsistencies or conflicts with the iCloud Keychain data, it may prompt you to verify your Apple ID password.
- Network Connectivity****:
Sometimes, network connectivity issues can cause the Apple ID password prompts to appear repeatedly. If your Apple iPhone 14 Pro is struggling to establish a stable internet connection, it may trigger verification prompts.
These are some of the common causes that can trigger the random Apple ID verification pop-up on your Apple iPhone 14 Pro. Now, we’ll delve into the solutions to help you resolve this matter.

Part 2: Solutions To Stop iPhone Randomly Asking for Apple ID Password
After we’ve concluded the “Why does my iPhone keep asking for my apple ID” question, let’s explore solutions to help you end this annoyance. Here are eight methods that you can try to stop your Apple iPhone 14 Pro from repeatedly asking for your Apple ID password:
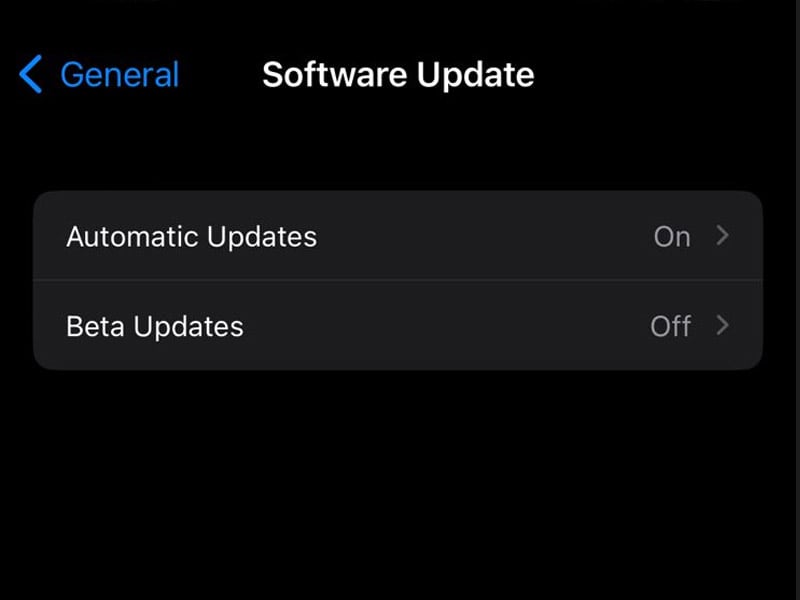
Method 1: Update iOS.
Ensure that your Apple iPhone 14 Pro is operating on the most up-to-date iOS version. Software updates usually incorporate bug fixes and security improvements that can address the problem effectively.
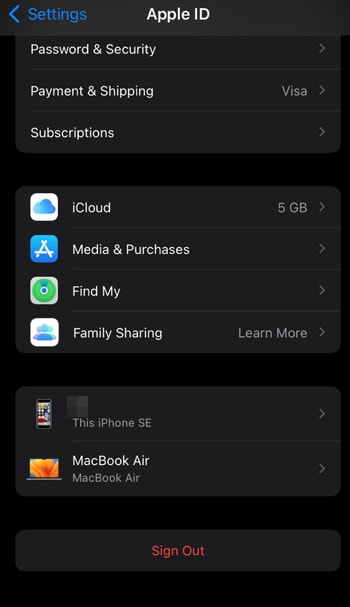
Method 2: Sign Out and Sign In to Apple ID.
Sign out and then sign back in your Apple ID. This method can refresh the credentials and resolve any authentication issues.
Method 3: Remove Apple ID with Wondershare Dr. Fone
If you forget your Apple ID and cannot access your device, Wondershare Dr. Fone’s Screen Unlock tool can help. This powerful tool lets you remove your Apple ID from your device, even if Find My Service is enabled.
Before we begin, it’s crucial to remember that this process will erase all data from the Apple iPhone 14 Pro device. Now, follow the steps below if your iPhone keeps asking for an Apple ID password:
- Step 1: Launch the Dr. Fone Screen Unlock
Open Wondershare Dr. Fone on your computer and navigate to the Toolbox > Screen Unlock to activate the feature.
- Step 2: Choose Remove Apple ID
In the next window, select the option to Remove Apple ID to initiate the process of removing your Apple ID.

- Step 3: Connect Your Device
Link up your iOS device to the computer using a USB cable. The software will display the connectivity status on the next screen. Click the Unlock Now button to proceed.

- Step 4: Confirm Screen Lock and Two-Factor Authentication
The software will ask if your device has a screen lock. Confirm whether you have a screen lock enabled on your device by clicking Yes. Then, it will also confirm if your device has Two-Factor Authentication enabled.
- Step 5: Put Device in Recovery Mode
The program will display on-screen guidelines to help you put your device in Recovery Mode. Follow the instructions that match your iOS model. If it doesn’t work, you can also try DFU Mode by clicking Try DFU Mode on the bottom-left of the screen. Then, follow the instructions.

- Step 6: Recognize the Apple iPhone 14 Pro device Model and Select System Version
Once your device is in Recovery Mode, you can see its details on the next screen. Then, select the System Version and Start to proceed. You can manually set the details if there are any differences in recognition.

- Step 7: Download iOS Firmware
The software will start downloading the corresponding iOS firmware. If the firmware download is slow, you can copy the link and download the iOS firmware.
- Step 8: Confirm the Prompt to Unlock
Once you download the firmware, it will be verified by the software. Click Unlock Now until a prompt window appears. It will ask you to enter a code to continue. Enter the code and click Unlock to start the process.

- Step 9: Monitor Apple ID Removal Progress
Keep your device connected and avoid any disconnections. Once the Apple ID is unlocked, the software will prompt the completion. Click Done to conclude the process. If the Apple ID is not unlocked, you can click Try Again.

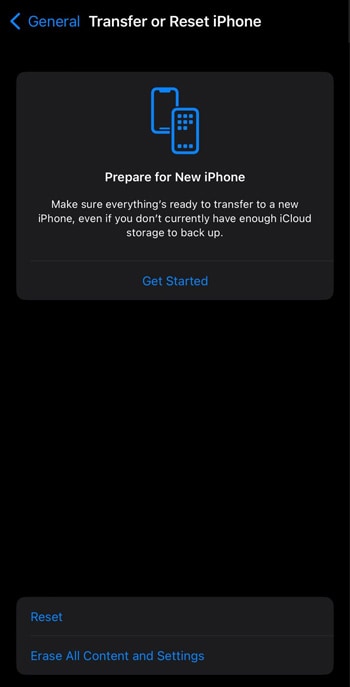
Method 4: Reset iCloud Account SettingsResetting your iCloud account settings can help clear any inconsistencies or conflicts that may be triggering the password prompts. Open Settings, and navigate to General > Transfer or Reset Phone > Reset.
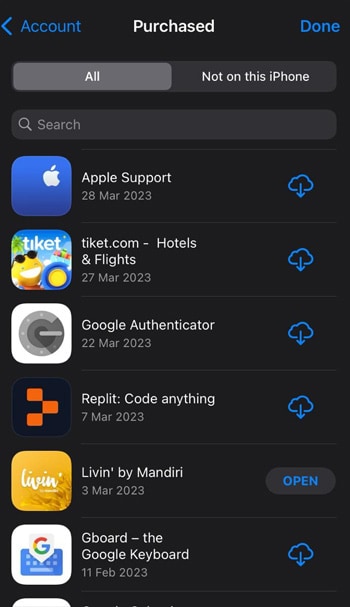
Method 5: Check App Store/iTunes Purchase
Verify and complete any pending app purchases or downloads from the App Store or iTunes. If there was an issue with a previous transaction, resolving it can stop the password prompts.
Method 6: Disable iCloud Keychain
Turning off iCloud Keychain and then turning it back on can help refresh the data and resolve any syncing issues. Go to Settings > [Your Name] > iCloud > Keychain > Toggle off and on.

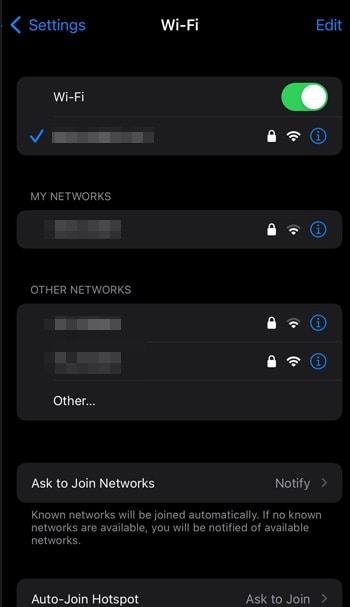
Method 7: Check Network Connectivity
Make sure that your Apple iPhone 14 Pro has a reliable internet connection. Weak or unstable networks can trigger password prompts. Try to switch between different Wi-Fi networks or use cellular data.
Method 8: Contact Apple Support
If none of the above methods work, contacting Apple Support can be a viable option. They can provide further assistance and guidance in resolving the issue.
These are some of the methods that can help you stop your Apple iPhone 14 Pro from randomly asking for your Apple ID password. Don’t forget to always back up your data before changing your Apple iPhone 14 Pro settings.
If the issue persists, it’s recommended to visit an authorized Apple service center.
Bonus Part: How To Get Your Apple ID Password Back if You Forget It
It’s not uncommon for people to forget their Apple ID password at times, especially with the ever-increasing number of online accounts we manage. But fret not! There are reliable password manager tools available, such as Dr.Fone Password Manager. It can help you handle this issue seamlessly and regain access to your Apple ID.
Let’s explore some of the Dr.Fone Password Manager tool:
- Password Recovery:
Allows you to recover your Apple ID password quickly and easily, even if you’ve forgotten it. With its intuitive interface and step-by-step guidance, you can reset your Apple ID password hassle-free.
- Data Security:
It prioritizes data security, ensuring that your Apple ID password and other credentials are securely stored and encrypted. It provides a safe and reliable way to manage passwords without compromising privacy.
- iCloud Backup and Restore:
It enables you to create a backup of your iCloud data, including your Apple ID password, and restore it whenever needed. This feature can be handy if you need to retrieve your password from a previous backup.
- Cross-Platform Compatibility:
It is compatible with various platforms, including iOS, Android, Windows, and Mac, making it a versatile password management solution that you can use across different devices.
If you forget your Apple ID password, Wondershare Dr.Fone can be a valuable tool to help you retrieve it and manage your passwords securely. Its features make it a comprehensive solution for handling password-related issues.
It’s essential to use secure and unique passwords for your accounts. Then, consider using a reliable password manager like Dr.Fone Password Manager to simplify your password management process.
Full Guide to Unlock Apple iPhone 14 Pro with iTunes
With such countless passwords, forgetting passwords on occasion isn’t surprising. What are your possibilities for iTunes unlock phone if you run over such circumstances and lose your password? Certainly, when this question springs up, you must not get terrified. We are here to direct you through the process of fixing this issue.
Losing a passcode is entirely normal and can happen to anyone. So, if you are also among the lot, we will elaborate on how to unlock iPhone with iTunes. After thorough research, our experts have laid out some essential unlocking methods for our readers. So, if you need to get things straight, read this detailed guide to go over your issue.
Part 1: Why Was My iPhone Disabled?
Using a lock screen passcode to secure your iDevice is an excellent way. However, it can become troublesome when you forget the key to your phone. Moreover, you may get stuck even if your screen breaks. On the other hand, someone may take your phone and type a few incorrect passcodes.
If your screen displays “iPhone disabled,” the most probable reason is an excess of wrong passcode attempts. However, this can sometimes occur without you understanding if the phone is in your pocket.
It would help if you erased your Apple iPhone 14 Pro to eliminate the lock and passcode, then re-sync it with iTunes. Then, you can restore your phone from an iCloud or an iTunes backup, but if you have never used a backup on your phone, your phone will have nothing. This guide illustrates how to unlock disabled iPhone with iTunes.
Part 2: How to Unlock iPhone with iTunes
At first, iTunes was only a media software used to play, download and see sound and video documents. Later in 2011, it became a valuable tool to support information and adjust it across numerous devices.
It added the ‘Restore’ option that can assist clients with unlocking their iPhones when they forget their passcode.
In any case, one has to know that iTunes is not an expert unlocking tool. Apple seldom updates iTunes, and its last update was long ago. Consequently, it has numerous tech bugs. As a result, the unlocking process using iTunes takes a lot of time. During the process, you may experience different error codes like 3004, 1100, 3194, 4000, and 4013. That makes it a tedious process.
Requirements for Windows PC:
- For iTunes unlock phone, your PC should have installed Windows 8 or later and the most recent iTunes variant.
Requirements for Mac:
- Open the Finder window if you have macOS Catalina or a more recent one.
- Open the most current version of iTunes using macOS Mojave or older.
- You must have a USB connector.
Steps (For Windows)
Step 1. Connect the locked Apple iPhone 14 Pro to the PC
Connect your locked Apple iPhone 14 Pro to your PC through a lightning or USB connector. Open iTunes on Windows PC.
Step 2. Put your Apple iPhone 14 Pro in recovery mode
To enter a Recovery Mode, press a combination of buttons on your Apple iPhone 14 Pro. Doing such, you will see a recovery mode screen on your Apple iPhone 14 Pro. To place the Apple iPhone 14 Pro in Recovery mode, follow these:
- iPhone 8 or above (second and third generation): Press and release the volume (+) button. Press and release the volume (-) button. Hold power/side button until seeing the recovery mode on your screen.
- iPhone 7 and 7 Plus: Press the top (or side) and volume down buttons simultaneously until the recovery screen shows up.
- iPhone SE (first generation) and iPhone 6S: Hold the home button and the power/side button simultaneously until the recovery mode screen shows up.
Note: If you see the passcode screen, switch off your Apple iPhone 14 Pro and do the process again until you see the Recovery mode screen.
Step 3. Restore your Apple iPhone 14 Pro
As the recovery Mode screen shows up on the iPhone, you will find your Apple iPhone 14 Pro on iTunes unlock phone screen. Then, a box shows up with a message saying there is an iPhone issue. It will expect you to update or restore your phone. So, click on Restore.
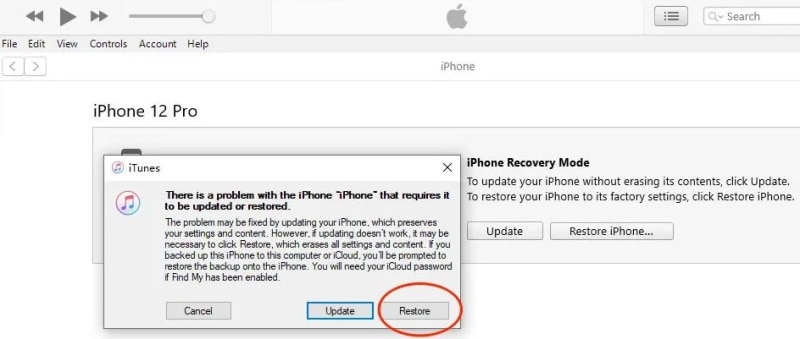
Step 4. It then asks you to confirm whether you are sure you need to restore the Apple iPhone 14 Pro to its default factory state. It does so because your media and data will be all erased. Then, click on Restore and Update.
Step 5. Then, “iPhone Software Update” may spring up. Click Next, and afterwards, click Agree. iTunes will begin downloading the software and restore your Apple iPhone 14 Pro when the download is finished.
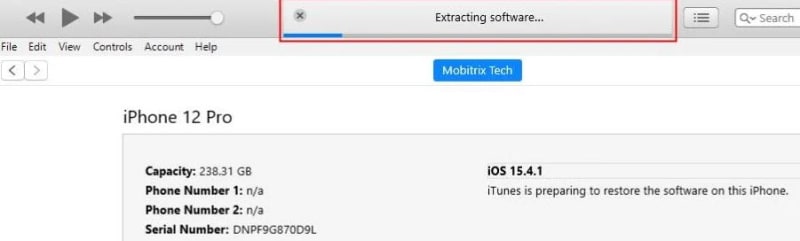
When the “iPhone software update” is downloaded, iTunes will show that it will erase your Apple iPhone 14 Pro and restore it to iOS 15.4.1. Then click on Restore.
The above bar will show “Extracting software… “. It implies iOS 15.4.1 iTunes is planning to restore the software on this iPhone.
Step 6. Your Apple iPhone 14 Pro will show the restore progress bar with the white apple logo. The length of the process relies upon how much data is on your cell phone. Generally, it takes 20 to 120 minutes. When done, your Apple iPhone 14 Pro will restart naturally. Furthermore, after your Apple iPhone 14 Pro restarts, you can reset your Apple iPhone 14 Pro. For example, you can make a new passcode.
Part 3: Unlocking iPhone without iTunes
1. Unlock it with Find My in iCloud
Find My is a famous element in Apple devices that allows you to find your lost phone through Maps. The component has been updated from that point forward, and presently it can be utilized to erase your Apple iPhone 14 Pro. Additionally, you can use it to erase your information without a passcode.
Steps to Unlock:
Step 1. Open iCloud.com on a mobile or internet browser.
Step 2. Enter your Apple ID and password as inquired.
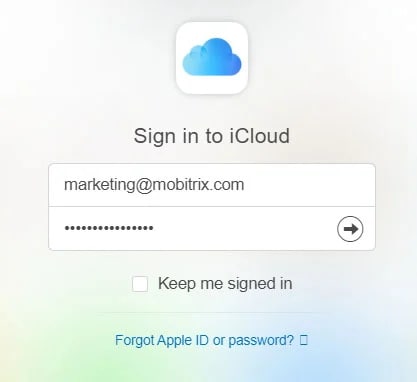
Step 3. After signing in effectively, click on Find My and enter your Apple ID and password. Click on Sign In.
Pick your locked gadget under the “All Devices” area.

Step 4. Click on ‘Erase iPhone’. Click on ‘Erase’ again.
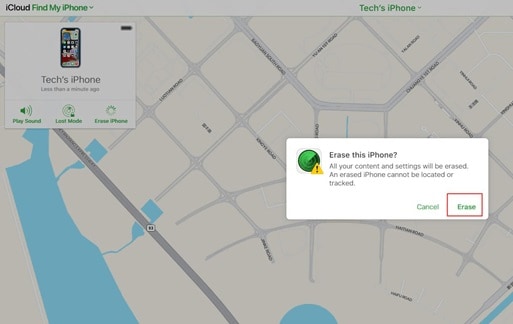
Step 5. Enter the Apple ID password to proceed.
Step 6. A check code will be sent to unlock your locked gadget. Enter the code to proceed.
Step 7. Presently, enter your number. Then, click Next and then Done.
Step 8. The iCloud will effectively begin the erase, and you can see the Apple sign with a white advancement bar noticeable on your locked iPhone. After an effective erase process, your Apple iPhone 14 Pro will restart.
Step 9. Swipe up on the Apple iPhone 14 Pro screen to begin once more.
Step 10. iPhone will show that it is locked to the owner. You have to sign in with your Apple ID again, enter the password, and tap on Next. You will currently be enabled to make your new passcode.
2. Dr.Fone-Screen Unlock
If you are searching for an elective way to unlock your Apple iPhone 14 Pro with iTunes, you can pick Wondershare Dr.Fone-Screen Unlock.
This software is an ideal iTunes elective that doesn’t need a passcode to unlock the iPhone. Whatever the situation, Dr.Fone can determine the issue in no time. It can eliminate Face ID, Touch ID, or a 4 to 6-digit passcode in no time. Moreover, it works with almost any iOS version at the moment. Here’s the alternate way to iTunes unlock phone:
Step 1. Connect your iDevice to the PC
From the Dr.Fone program on your PC, select “Screen Unlock” the tool.

Then use a USB connector to connect your iOS gadget to the PC. Then, click the “Unlock iOS Screen” option on your screen.

Step 2. Boot your iDevice in Recovery/DFU Mode
Before deleting the Apple iPhone 14 Pro screen, it is necessary to boot it in Recovery/DFU. You can follow the steps on your screen to do so. Moreover, the Recovery mode is the suggested way for your situation. However, you can use the DFU mode if this doesn’t work.

Step 3. Confirm Phone Model
After turning the DFU mode on, the program will show your phone information. In addition, it will show its model and software version. You can choose the correct data from the dropdown menu if it isn’t accurate. Then, it is time to download the firmware required for your phone model.
Step 4. Remove the Lock
After downloading the firmware, tap Unlock Now to begin the unlocking process.

Doing so will unlock your Apple iPhone 14 Pro within no time. However, kindly note this unlocking process will likewise wipe your Apple iPhone 14 Pro’s user data. Indeed, each solution removes your data. Therefore, you must be careful enough to back up your files before doing this process.
The Bottom Line
We hope you found out about how to unlock iPhone with iTunes. We likewise discussed what to do when you need an alternate method to iTunes. We know that using iTunes can be somewhat complicated; hence, the other options can help you a ton. However, we strongly suggest Dr.Fone-Screen Unlock for a more refined unlocking process.
Apple iPhone 14 Pro Backup Password Never Set But Still Asking? Here’s the Fix
Part 1: Why Do iTunes Ask Me for iPhone Backup Password?
When you use iTunes to create a backup, the backup will probably have a password that iTunes automatically create. This is for privacy reasons. Hence, it might ask for an iTunes backup password never set by you!
In most cases, this occurs when the Encrypt Backup option is activated. As an official iOS feature, its purpose is to provide iOS users with the iTunes backup encryption for further security.
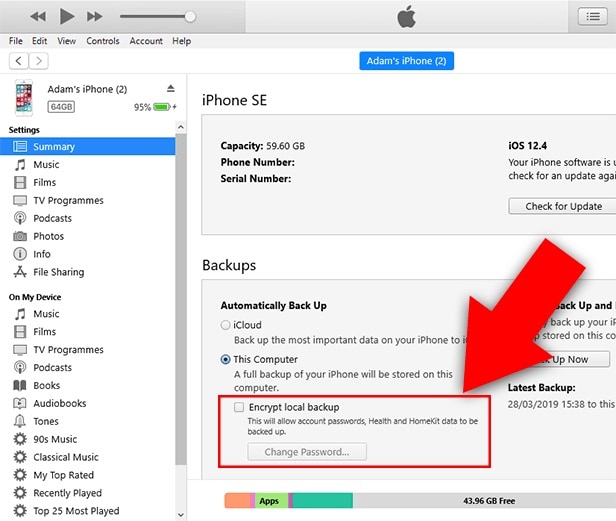
Unfortunately, this capability may also become problematic if you inadvertently take a backup without being able to provide the password. For example, you may have to enter the password for your Apple iPhone 14 Pro backup unlocking never set by you.
But the good news is you have some possible fixes. So, let’s talk about them.
Part 2: 4 Possible Ways to Fix Asking for iPhone Backup Password
Many iPhone users have problems with iTunes when they back up their devices.
One of the most common issues is that people are asked for their iPhone backup password never set, but they need to know what it is. This can be frustrating because you can only back up your device if you have the password.
There are a few possible ways to fix this problem. Try resetting your password or using a different computer to back up your device. You could also try using a third-party software tool like Dr.Fone - Screen Unlock.
1. Try all passwords you use on iPhone
When iTunes prompts you for an iPhone backup password never set, what should your initial course of action be?
To get out of this predicament in the simplest way possible, try entering every potential password you will likely have used. In most cases, individuals will use the same password for many accounts.
A significant possibility is that you encrypted the iTunes backup with the same password from the iCloud account.
Therefore, before doing anything further, try all passwords to configure your iTunes account. For example, try entering 0000, 123456, name123, or 1111.
2. Find the password from Keychain on macOS
You may also attempt to find the password for the iTunes backup using the keychain approach if you are working on a Mac.
The likelihood of success with this approach is relatively low. However, it is still worthwhile to try it, particularly if you have also synchronized your iTunes account with your Mac.
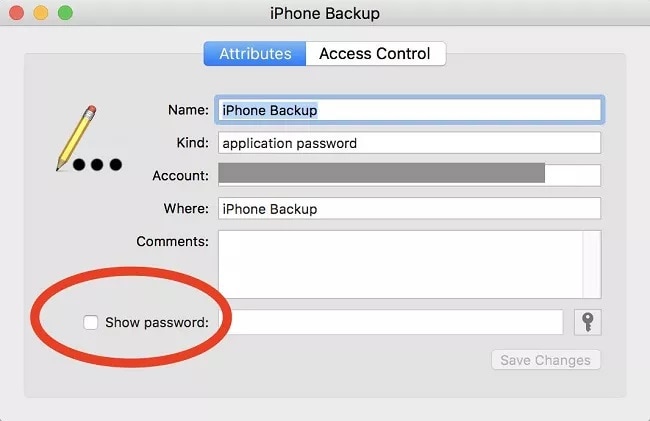
- On your macOS, go to Utilities by clicking the Applications menu item. At this point, launch the Keychain Access app and look for your Apple iPhone 14 Pro backup.
- To open a new dialogue box, double-click the most recent backup file, and you will see one appear before you.
- On this page, choose Show Password to get the password for the Apple iPhone 14 Pro backup. However, you will first be prompted to provide the administrator password associated with your iCloud account to recover the password.
3. “Reset All Settings”
Resetting the password is another option at your disposal if you encounter the Apple iPhone 14 Pro backup password never set problem. How you do this will be different depending on the version of iOS that you have installed.
Here are what you can do with your iOS smartphone if it has iOS 11 or a later version:
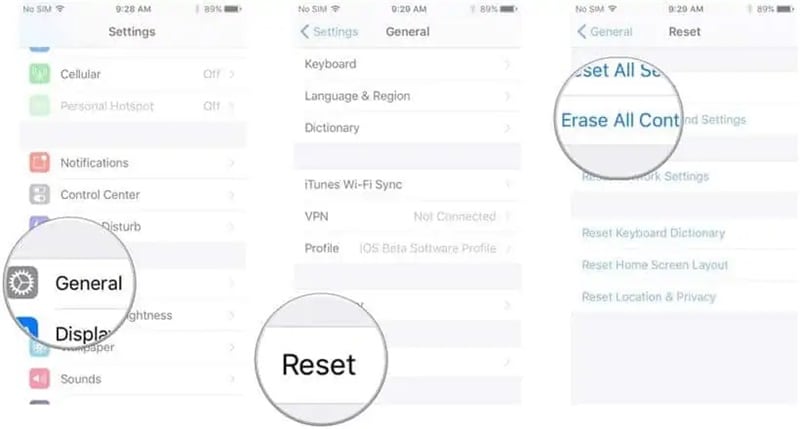
Step 1: Unlock your Apple iPhone 14 Pro, and then open the Settings app on your device.
Step 2: After locating the General menu, go to the Reset menu and then hit the Reset All Settings button. Please confirm your action by providing the password for your Apple iPhone 14 Pro.
Step 3: Once the reset has been completed, your previous password will be deleted.
Step 4: The next thing you should do is take a fresh backup of your Apple iPhone 14 Pro using iTunes, and then establish a new password for the backup that iTunes creates.
You will need to use an alternative strategy, which includes a factory reset if you use an older version of the iOS firmware than iOS 11.
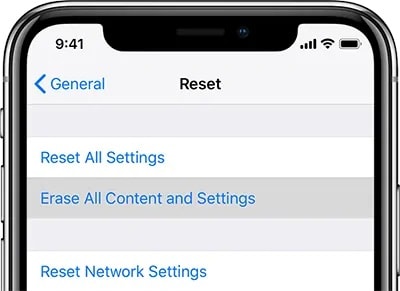
Step 1: Before continuing, it is highly recommended that you create a backup of the data on your Apple iPhone 14 Pro using iCloud.
Step 2: After you have opened the Settings app, go to the General menu, then to the Reset menu, and finally to the Erase All Content and Settings option.
Step 3: Confirm that you want to reset your Apple iPhone 14 Pro to factory settings, and wait until it is done.
Step 4: Once the factory data reset is finished, you must restore your iCloud backup. To do this, follow the steps for setting up iOS until you reach the Apps & Data option.
Step 5: Create a new backup in iTunes and change the password for the existing backup in iTunes.
You should be aware that resetting the Apple iPhone 14 Pro device to factory settings will not make your encrypted backups accessible again.
On the other hand, it does make it possible for you to generate a fresh backup in iTunes that is not encrypted.
4. Dr.Fone-Screen Unlock
First step: After installing Dr.Fone on your device, please run the program and look for the red button labeled “Screen Unlock.”
Step 2: While in the interface for Screen Unlock, navigate to the bottom right of the screen and tap on the feature labeled “Remove iTunes BackUp Encryption.” This will allow you to proceed.
Step 3: When brought to this screen, please use a USB cord to connect your iOS device to your personal computer. If Dr.Fone can identify this relationship, the following picture will appear for you to see.
Please read the following three notes carefully before clicking the “Remove Now” button:
- Check to ensure that “Find My iPhone” is not turned on.
- During this procedure, you should not launch “iTunes.”
- During the process, your Apple iPhone 14 Pro will restart.

Step 4: If you have an iTunes backup, Dr.Fone may automatically verify it and delete it. This encryption will be removed once the percentage on the progress meter reaches the end. This procedure won’t take a lot of time at all.

Step 5: The encryption of the iTunes backup has been successfully erased! Your backed-up data may be quickly restored, transferred, wiped clean, and backed up again. Hence, you can enter the password to unlock your Apple iPhone 14 Pro backup never set in the first place!

The Bottom Line
There are four ways to fix the problem if iTunes keeps asking for your Apple iPhone 14 Pro backup password. The first method is to try all the passwords you use on your Apple iPhone 14 Pro. You can try finding the password from Keychain on macOS if this does not work. Another option is to “Reset All Settings” on your Apple iPhone 14 Pro.
Lastly, Dr.Fone-Screen Unlock is a program that can help you bypass the passcode and get into your backups. So, what are you waiting for? It’s time to avoid the problem of iTunes backup password never set.
Also read:
- [New] 2024 Approved Expert Advice on Crafting Effective YouTube Video Tags
- [New] 2024 Approved Leading Soundstage Viewing
- [New] In 2024, Real-Time GamCapture Hacks and Insights
- [New] Savor Success Ideas to Bolster Cookery Channel Brands
- [New] Sound Excellence on a Shoestring - Superior ASMR Mics Affordably
- [Updated] Revealed Top 5 Ingenious WhatsApp Shortcuts
- 3 Easy Ways to Factory Reset a Locked Apple iPhone 12 mini Without iTunes | Dr.fone
- How to Bypass Apple iPhone SE (2022) Passcode Easily Video Inside | Dr.fone
- How to Successfully Resolve the Critical Fatal Error (Code 1603) in Software Setup
- How to Unlock iPhone 12 mini? | Dr.fone
- In 2024, Complete Guide For iPhone 13 Pro Max Lock Screen | Dr.fone
- In 2024, Complete Guide on Unlocking iPhone XS with a Broken Screen? | Dr.fone
- In 2024, Top 10 Web-Based Subtitle Editor Tools
- Navigate the Tech Landscape: Windows 11 Installation on MacOS Through Parallels
- Title: Complete Fixes To Solve iPhone 14 Pro Randomly Asking for Apple ID Password | Dr.fone
- Author: Amelia
- Created at : 2024-11-10 16:41:04
- Updated at : 2024-11-17 06:42:15
- Link: https://iphone-unlock.techidaily.com/complete-fixes-to-solve-iphone-14-pro-randomly-asking-for-apple-id-password-drfone-by-drfone-ios/
- License: This work is licensed under CC BY-NC-SA 4.0.