
How to Unlock Disabled Apple iPhone 8 Plus/iPad Without Computer | Dr.fone
How to Unlock Disabled Apple iPhone 8 Plus/iPad Without Computer
Forgetting the Apple iPhone 8 Plus or iPad passcode could be the worst nightmare for plenty of iOS users. If you are also locked out of your Apple iPhone 8 Plus, then don’t worry. There are several ways to learn how to unlock a disabled Apple iPhone 8 Plus without a computer. Surprisingly, you don’t need to take the assistance of a computer to unlock your iOS device. This guide will make you familiar with how to unlock the iPad passcode without a computer. Read on and learn how to unlock the disabled Apple iPhone 8 Plus without a computer right away.
Part 1: How to unlock disabled Apple iPhone 8 Plus without computer using Siri?
Accessing Siri is the first thing that comes to iOS users’ minds whenever they get locked out of their Apple iPhone 8 Plus . It might surprise you, but you can also take the assistance of Siri to unlock your phone. Most users prefer this technique, as it doesn’t require a computer and can unlock an iOS device without erasing its data.
Though, before you proceed, you need to know the limitations of this method. Since it is considered a loophole in iOS, it doesn’t always yield desirable results. It has been observed that the method only works on devices running from iOS 8.0 to iOS 10.1. To learn how to unlock iPad passcode without a computer, follow these stepwise instructions:
Step 1. Activate Siri on your iOS device by holding the Home button. Ask for the present time by giving a command like “Hey Siri, what time is it?” to proceed. Siri will let you know the current time by displaying a clock. Tap on it.

Step 2. Tap on the Add (plus) icon.

Step 3. From here, you can search for a city. Just type anything you want and tap again to get various options. Choose the “Select all” button to get more options.

Step 4. Select the feature of “Share.”

Step 5. Tap on the message icon.

Step 6. It will open another interface to draft a new message. Wait for a while and write something in the “To” field. Once you are done, tap on the return button on the keyboard.

Step 7. This will highlight your text in green. Now, tap on the add icon located nearby.

Step 8. A new interface would be launched to add a new contact. From here, tap on the “Create New Contact” button.

Step 9. Instead of adding information regarding a new contact, tap on the photo icon, and choose the option of “Add Photo.”

Step 10. This will open your device’s gallery. You can browse your photo library from here.

Step 11. After a while, press the Home button. If everything goes right, you will enter the Home screen of your iOS device after unlocking it.


By following this technique, you would also learn how to unlock the disabled Apple iPhone 8 Plus 4. Though, you need to ensure that the iOS device you are using would support this feature.
Part 2: How to unlock disabled Apple iPhone 8 Plus using Find My Apple iPhone 8 Plus?
The chances are that your iOS device might not work with the above-stated solution, or it’s latest iOS version. Therefore, you would be required to take the assistance of another method to unlock your device. With the help of Apple’s official Find My Apple iPhone 8 Plus service, you can easily restore your device remotely. It is also used to locate an iOS device, play a sound, and lock it remotely.
After implementing this solution, your iOS device will reset, and your data would be erased. Nevertheless, in the end, it will automatically reset its lock as well. Follow these steps:
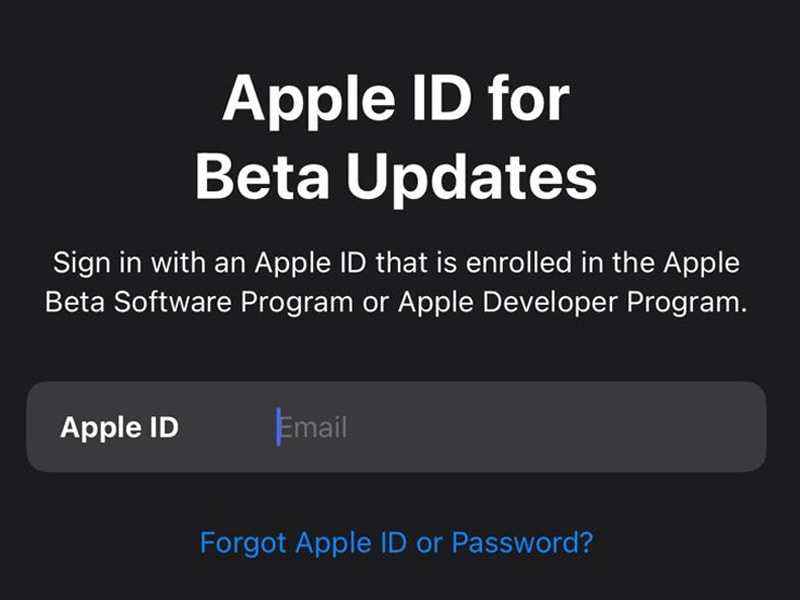
Step 1. Open iCloud’s website on any other handheld device of your choice. Not just your system, you can open the website on any other smart device as well. Use your Apple ID and password to log in to your iCloud account.
Step 2. Visit the Find My Apple iPhone 8 Plus service. Under the “All Devices” category, you can view all the iOS devices linked to your Apple ID. Select the Apple iPhone 8 Plus device you want to reset.

Step 3. Select the feature of the Erase device and confirm your choice. Wait for a while as your Apple iPhone 8 Plus or iPad would be restored remotely.

By following this method, you can learn how to unlock the iPad passcode without a computer remotely.
Part 3: Unlock disabled Apple iPhone 8 Plus/iPad using Dr.Fone - Screen Unlock?
Dr.Fone can help you to remove the screen from the disabled Apple iPhone 8 Plus or iPad. It can also unlock the Apple ID after you forgot the Apple ID email or password.
- Easy operations to unlock the Apple iPhone 8 Plus without the passcode.
- Removes the Apple iPhone 8 Plus lock screen without relying on iTunes.
- Works for all models of Apple iPhone 8 Plus, iPad, and iPod touch.
- Fully compatible with the latest iOS 14.

Step 1. Install Dr.Fone on your computer.
Step 2. Open ‘Screen Unlock’. Select ‘Unlock iOS Screen.’

Step 3. Follow the on-screen instruction.
Boot your Apple iPhone 8 Plus into DFU mode.

Select device information on Dr.Fone

Step 4. Start to Unlock. The phone will be unlocked after that.

Part 4: Tips to protect your Apple iPhone 8 Plus from being unlocked by thieves
As you can see, anyone can learn how to unlock the disabled Apple iPhone 8 Plus 4 without a computer and other iOS devices as well. Therefore, if you don’t want your Apple iPhone 8 Plus and iPad to be misused by thieves, you should take some added measures. Follow these suggestions to increase security on your iOS device.
1. Disable Siri from the lock screen
If someone can’t access Siri from the lock screen, then they won’t be able to follow the above-mentioned process to unlock an iOS device. Therefore, it is highly recommended to disable Siri from the lock screen. To do this, visit your device’s Settings > Touch ID & Passcode, and under the “Allow access when locked” section, disable the option of “Siri.”

2. Enable Find My Apple iPhone 8 Plus service
There are times when users forget to enable the Find My Apple iPhone 8 Plus feature on their iOS device. To access this feature, make sure that it is turned on. To do this, go to your device’s Settings > iCloud > Find My Apple iPhone 8 Plus and turn on the feature of “Find My Apple iPhone 8 Plus.” Additionally, you should turn on the “Send the last location” option as well.

3. Set a strong alphanumeric password
One of the best ways to secure your iOS device is by adding secure passwords. To do this, visit your device’s Settings > Touch ID & Passcode > Change Passcode and select the option of “Custom Alphanumeric Code.” Provide a strong alphanumeric passcode to boost the security of your device.

Conclusion
By implementing the above suggestions, you can easily make your iOS device more secure. Additionally, we have also listed two stepwise solutions that can unlock your iPad or Apple iPhone 8 Plus without taking the assistance of a computer. Now when you know how to unlock a disabled Apple iPhone 8 Plus without a computer, you can easily make the most out of your iOS device.
Complete Fixes To Solve Apple iPhone 8 Plus Randomly Asking for Apple ID Password
Apple ID is a crucial part of the Apple ecosystem that enables users to access a wide range of services and applications. It is a unique identifier that links all Apple devices, services, and applications together.
However, sometimes iPhone users may encounter an annoying issue where their iPhone randomly asks for an Apple ID password without any apparent reason. This problem can be frustrating and disruptive! It can interrupt your workflow and prevent you from using your phone normally.
Fortunately, we have comprehensive solutions to help you resolve this persistent issue once and for all. Let’s dive in and return your device to its happy, non-nagging self!
Part 1: Common Causes for Random Apple ID Verification Pop Up
The random Apple ID verification pop-up can be caused by a range of factors, from simple settings misconfigurations to more complex account-related issues. So it’s important to identify the root cause to find the appropriate solution that addresses the underlying issue.
Take a closer look at these common reasons why your Apple iPhone 8 Plus may be randomly asking for your Apple ID password:
- iOS Software Update****:
One of the most frequent causes of the Apple ID password prompts is when your Apple iPhone 8 Plus has undergone a software update. The update may require you to re-verify your Apple ID credentials to ensure security and privacy.
- iCloud Account Settings****:
If the settings are not in sync with your Apple ID credentials or if there are inconsistencies, it can trigger repeated password prompts.
- App Store/iTunes Purchase****:
If there was an issue when you purchased or downloaded something, your Apple iPhone 8 Plus might prompt you to verify your Apple ID to complete the purchase.
- iCloud Keychain****:
The iCloud Keychain is a feature that stores your passwords and other sensitive information across your Apple devices. If there are inconsistencies or conflicts with the iCloud Keychain data, it may prompt you to verify your Apple ID password.
- Network Connectivity****:
Sometimes, network connectivity issues can cause the Apple ID password prompts to appear repeatedly. If your Apple iPhone 8 Plus is struggling to establish a stable internet connection, it may trigger verification prompts.
These are some of the common causes that can trigger the random Apple ID verification pop-up on your Apple iPhone 8 Plus. Now, we’ll delve into the solutions to help you resolve this matter.
Part 2: Solutions To Stop iPhone Randomly Asking for Apple ID Password
After we’ve concluded the “Why does my iPhone keep asking for my apple ID” question, let’s explore solutions to help you end this annoyance. Here are eight methods that you can try to stop your Apple iPhone 8 Plus from repeatedly asking for your Apple ID password:
Method 1: Update iOS.
Ensure that your Apple iPhone 8 Plus is operating on the most up-to-date iOS version. Software updates usually incorporate bug fixes and security improvements that can address the problem effectively.
Method 2: Sign Out and Sign In to Apple ID.
Sign out and then sign back in your Apple ID. This method can refresh the credentials and resolve any authentication issues.
Method 3: Remove Apple ID with Wondershare Dr. Fone
If you forget your Apple ID and cannot access your device, Wondershare Dr. Fone’s Screen Unlock tool can help. This powerful tool lets you remove your Apple ID from your device, even if Find My Service is enabled.
Before we begin, it’s crucial to remember that this process will erase all data from the Apple iPhone 8 Plus device. Now, follow the steps below if your iPhone keeps asking for an Apple ID password:
- Step 1: Launch the Dr. Fone Screen Unlock
Open Wondershare Dr. Fone on your computer and navigate to the Toolbox > Screen Unlock to activate the feature.
- Step 2: Choose Remove Apple ID
In the next window, select the option to Remove Apple ID to initiate the process of removing your Apple ID.

- Step 3: Connect Your Device
Link up your iOS device to the computer using a USB cable. The software will display the connectivity status on the next screen. Click the Unlock Now button to proceed.

- Step 4: Confirm Screen Lock and Two-Factor Authentication
The software will ask if your device has a screen lock. Confirm whether you have a screen lock enabled on your device by clicking Yes. Then, it will also confirm if your device has Two-Factor Authentication enabled.
- Step 5: Put Device in Recovery Mode
The program will display on-screen guidelines to help you put your device in Recovery Mode. Follow the instructions that match your iOS model. If it doesn’t work, you can also try DFU Mode by clicking Try DFU Mode on the bottom-left of the screen. Then, follow the instructions.

- Step 6: Recognize the Apple iPhone 8 Plus device Model and Select System Version
Once your device is in Recovery Mode, you can see its details on the next screen. Then, select the System Version and Start to proceed. You can manually set the details if there are any differences in recognition.
- Step 7: Download iOS Firmware
The software will start downloading the corresponding iOS firmware. If the firmware download is slow, you can copy the link and download the iOS firmware.
- Step 8: Confirm the Prompt to Unlock
Once you download the firmware, it will be verified by the software. Click Unlock Now until a prompt window appears. It will ask you to enter a code to continue. Enter the code and click Unlock to start the process.

- Step 9: Monitor Apple ID Removal Progress
Keep your device connected and avoid any disconnections. Once the Apple ID is unlocked, the software will prompt the completion. Click Done to conclude the process. If the Apple ID is not unlocked, you can click Try Again.

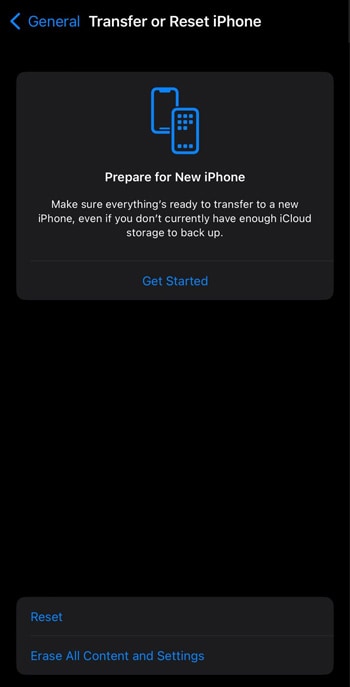
Method 4: Reset iCloud Account SettingsResetting your iCloud account settings can help clear any inconsistencies or conflicts that may be triggering the password prompts. Open Settings, and navigate to General > Transfer or Reset Phone > Reset.
Method 5: Check App Store/iTunes Purchase
Verify and complete any pending app purchases or downloads from the App Store or iTunes. If there was an issue with a previous transaction, resolving it can stop the password prompts.
Method 6: Disable iCloud Keychain
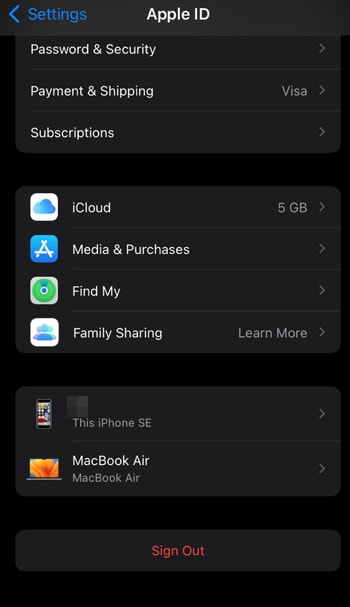
Turning off iCloud Keychain and then turning it back on can help refresh the data and resolve any syncing issues. Go to Settings > [Your Name] > iCloud > Keychain > Toggle off and on.

Method 7: Check Network Connectivity
Make sure that your Apple iPhone 8 Plus has a reliable internet connection. Weak or unstable networks can trigger password prompts. Try to switch between different Wi-Fi networks or use cellular data.
Method 8: Contact Apple Support
If none of the above methods work, contacting Apple Support can be a viable option. They can provide further assistance and guidance in resolving the issue.
These are some of the methods that can help you stop your Apple iPhone 8 Plus from randomly asking for your Apple ID password. Don’t forget to always back up your data before changing your Apple iPhone 8 Plus settings.
If the issue persists, it’s recommended to visit an authorized Apple service center.
Bonus Part: How To Get Your Apple ID Password Back if You Forget It
It’s not uncommon for people to forget their Apple ID password at times, especially with the ever-increasing number of online accounts we manage. But fret not! There are reliable password manager tools available, such as Dr.Fone Password Manager. It can help you handle this issue seamlessly and regain access to your Apple ID.
Let’s explore some of the Dr.Fone Password Manager tool:
- Password Recovery:
Allows you to recover your Apple ID password quickly and easily, even if you’ve forgotten it. With its intuitive interface and step-by-step guidance, you can reset your Apple ID password hassle-free.
- Data Security:
It prioritizes data security, ensuring that your Apple ID password and other credentials are securely stored and encrypted. It provides a safe and reliable way to manage passwords without compromising privacy.
- iCloud Backup and Restore:
It enables you to create a backup of your iCloud data, including your Apple ID password, and restore it whenever needed. This feature can be handy if you need to retrieve your password from a previous backup.
- Cross-Platform Compatibility:
It is compatible with various platforms, including iOS, Android, Windows, and Mac, making it a versatile password management solution that you can use across different devices.
If you forget your Apple ID password, Wondershare Dr.Fone can be a valuable tool to help you retrieve it and manage your passwords securely. Its features make it a comprehensive solution for handling password-related issues.
It’s essential to use secure and unique passwords for your accounts. Then, consider using a reliable password manager like Dr.Fone Password Manager to simplify your password management process.
How Many Attempts To Unlock Apple iPhone 8 Plus
Unlocking your Apple iPhone 8 Plus involves a delicate balance to avoid pitfalls. Knowing how many attempts to unlock an iPhone is vital due to Apple’s security measures. Exceeding the limit triggers consequences, such as temporary disablement or even data erasure.
These restrictions highlight the need to learn how many attempts for iPhone passcodes are allowed before facing potential data loss. When dealing with failed passcode attempts, exploring methods for successful access is essential. Let’s delve into the intricacies of iPhone passcode security and unveil strategies for a seamless unlocking process. Read on to learn more.

Part 1. How Many Times Until the Apple iPhone 8 Plus Is Permanently Disabled?
Unlocking an iPhone involves a series of attempts, each with distinct consequences. Here’s a breakdown of how many failed passcode attempts on an iPhone you can do before it locks you out:
First 5 Attempts
- No significant consequences.
- Users have the flexibility to enter their passcode without any penalties.
6th Attempt
- iPhone is disabled for 1 minute.
- An iPhone is Disabled message appears on the screen.

7th Attempt
- Disabled for 5 minutes.
- The same on-screen message persists, but the Apple iPhone 8 Plus enforces a longer wait time.
8th Attempt
- Disabled for 15 minutes.
- Users must wait before attempting again. The escalating time delay discourages brute-force attacks.
9th Attempt
- Disabled for 60 minutes.
- A considerable waiting period is imposed. It increases the frustration for unauthorized users attempting to gain access.

10th Attempt
- iPhone is disabled.

Two things can happen on the tenth failed attempt to unlock your Apple iPhone 8 Plus. If you have Erase Data enabled, your phone’s data gets wiped. If it’s disabled, the Apple iPhone 8 Plus is permanently locked, requiring a connection to iTunes for restoration. It’s crucial to back up your data on iCloud or locally to avoid permanent loss.
Part 2. What Are the Consequences After Consecutive Failed Attempts?
When you exceed ten unsuccessful passcode entries, the Apple iPhone 8 Plus device takes stringent actions to protect sensitive data. It can initiate a data wipe or lock the iPhone, needing a connection to iTunes for restoration. After a series of failed attempts, the Apple iPhone 8 Plus can activate a security measure often referred to as a “self-destruct” mode.
To turn this mode on or off, follow these steps:
How To Enable Erase Data Mode
Safeguard your personal information with these simple steps to remotely wipe your device in case of loss or theft.
- Step 1: Go to Settings > Face ID & Passcode or Touch ID & Passcode, depending on your device. Enter your current passcode.

- Step 2: Scroll down and find the Erase Data option. Toggle the button to activate the feature.
How To Disable Erase Data Mode
Here are the steps to disable Erase Data Mode on your Apple iPhone 8 Plus, ensuring controlled access to your device.
- Step 1: Follow the same steps to access the Erase Data toggle. Next, disable the toggle to turn off this feature.
- Step 2: Confirm your choice, ensuring the “self-destruct” mode is deactivated to prevent accidental data loss.
Part 3. Top 5 Methods To Unlock an iPhone After Too Many Attempts
When wondering how many tries to unlock an iPhone, consider the following methods to restore functionality. The section below explores the most effective ways to regain access to your device. Let’s start with the use of a dedicated screen unlock tool.
Method 1: Using a Dedicated Screen Unlock Tool
When facing a disabled iPhone, Wondershare Dr.Fone - Screen Unlock (iOS) stands out as a reliable solution. It’s a comprehensive platform that unlocks iOS devices without a passcode. Here are some of the tool’s key features to help you get started:

- Removes all types of lock screens. Fone Screen Unlock tackles various lock screen types, like pattern lock, etc. It offers a comprehensive solution for different scenarios.
- Unlock Apple ID without a password. The tool provides a secure method to unlock Apple ID without needing a password.
- No data loss. Users can regain access without losing data, a crucial aspect of dealing with a disabled iPhone.
- High success rate.Fone Screen Unlock boasts a high success rate, instilling confidence in users seeking a swift and effective solution.
How To Unlock iPhone With Dr.Fone
After many failed passcode attempts on your Apple iPhone 8 Plus,Dr.Fone can help you access it again in no time. Follow the steps:
- Step 1: Download and install Dr.Fone on your computer. Next, click Toolbox > Screen Unlock > iOS to start. In the next window, choose Unlock iOS Screen.

- Step 2: Follow the on-screen instructions. Dr.Fone will automatically detect your Apple iPhone 8 Plus model. If necessary, choose the System Version according to your preference. Next, click Start to start the iOS firmware download.
- Step 3: Wait for the iOS firmware to download successfully. Click on Unlock Now to initiate the unlocking process. Follow the on-screen instructions again and wait for Dr.Fone to unlock your device. If unsuccessful, click on the Try again option.

Method 2: Using iTunes To Unlock a Locked or Disabled iPhone
An alternative method to unlock your Apple iPhone 8 Plus when locked or disabled involves using iTunes. Note that if your iTunes is not synchronized with the iPhone, you risk losing your existing data. Here’s how:
- Step 1: Launch iTunes on your computer. Connect your locked iPhone using a cable and let iTunes identify the Apple iPhone 8 Plus device. Next, navigate to the Summary section and select the Restore iPhone option.

- Step 2: Allow iTunes to identify your device. Start the restoration of previous data by selecting Restore Backup. Your Apple iPhone 8 Plus will be unlocked with all the associated data if you have backed up your information on iTunes. Otherwise, you will need to set it up as a new iPhone.
Method 3: Using Recovery Mode To Unlock a Locked or Disabled iPhone
Activating Recovery mode is another useful method for accessing a locked phone. The approach erases all data on the phone, restoring it to factory settings. Any data not backed up will be lost using this method. Follow the steps:
- Step 1: Download and Launch iTunes on your computer. Connect your Apple iPhone 8 Plus with a USB cable.
- Step 2: For iPhone 8 models or newer, press and release the volume up button, followed by the volume down button. Next, press and hold the power button. If executed, the iTunes connect screen will appear. For earlier iPhone models, you can refer to here.

- Step 3: iTunes will prompt you to either restore or update your Apple iPhone 8 Plus. Choose the Restore iPhone option to reset your device to its factory settings. If the restoration process extends beyond 15 minutes and your Apple iPhone 8 Plus exits recovery mode, you’ll need to repeat the steps.
Method 4: Using iCloud To Unlock a Lock or Disabled iPhone
After many failed passcode attempts on your Apple iPhone 8 Plus,it got disabled, but iCloud offers a convenient solution. Your phone must have the Find My iPhone option enabled for the method to work. You should be aware of the Apple ID password associated with your iCloud account. Once these prerequisites are fulfilled, access the iCloud account from another device. Here’s how.
- Step 1: Go to iCloud.com using another device, such as a computer, and log in with your Apple ID and password.

- Step 2: Select All Devices, and pick the locked iPhone from the dropdown menu. Once you’ve chosen the Apple iPhone 8 Plus device, click the Erase iPhone icon in the lower-right corner. Although the action deletes the data on the phone, you can retrieve it from your iCloud backup once the Apple iPhone 8 Plus device is operational again.
Method 5: Contact Apple Support or Visit an Apple Store
If all methods fail or you don’t have access to Dr.Fone, consider contacting Apple Support. You can also try visiting an Apple Store. Apple experts will guide you through the appropriate steps based on your unique situation.
Conclusion
If you are wondering how many passcode attempts on iPhone will lock your device and not sure how to fix this issue, here is the way to go. Methods like iTunes, Recovery Mode, iCloud, or seeking Apple Support all offer potential solutions.
Consider using Dr.Fone Screen Unlock (iOS) for a secure and data-preserving unlock. It safeguards your data even if you forget your passcode. Remember that surpassing the allowed attempts could result in data loss or permanent device disablement. Safeguard your data wisely by exploring these methods.
Tips: Are you searching for a powerful Screen Unlock tool? No worries as Dr.Fone is here to help you. Download it and start a seamless unlock experience!
- Title: How to Unlock Disabled Apple iPhone 8 Plus/iPad Without Computer | Dr.fone
- Author: Amelia
- Created at : 2024-07-15 05:34:06
- Updated at : 2024-07-16 05:34:06
- Link: https://iphone-unlock.techidaily.com/how-to-unlock-disabled-apple-iphone-8-plusipad-without-computer-drfone-by-drfone-ios/
- License: This work is licensed under CC BY-NC-SA 4.0.