
In 2024, 3 Ways to Erase iPhone 12 Pro When Its Locked Within Seconds | Dr.fone
3 Ways to Erase Apple iPhone 12 Pro When It’s Locked Within Seconds
Over the last few years, Apple has made remarkable progress with its flagship iPhone series. There are plenty of ways for users to back up, erase, and restore their data. It doesn’t matter if you are moving from one device to another or would like to reset your phone. You should know how to erase iPhone when locked. Too many times, after getting locked out of their device, users find it hard to wipe locked iPhone. If you are also going through the same dilemma, then don’t worry. Read on and learn how to wipe a locked iPhone in this extensive guide.
Part 1: Erase locked iPhone with Dr.Fone - Screen Unlock (iOS)
One of the best ways to wipe locked iPhone is by using Dr.Fone - Screen Unlock (iOS) tool. It is an extremely secure and reliable application. It is already compatible with every leading version of iOS and runs on almost all major iOS devices. Available for both Windows and Mac, the tool can be used to remove activation lock and Apple ID. The tool also provides an easy-to-use interface that can help you reset the activation lock on your device.
Dr.Fone - Screen Unlock (iOS)
Erase the data of an iPhone even if it is locked
- Erase iPhone data together with the lock screen.
- Remove the 4-digit/6-digit passcode, Touch ID, and Face ID , and activation lock.
- A few clicks and the iOS lock screen are gone.
- Fully compatible with all iDevice models and iOS versions.
4,395,216 people have downloaded it
To learn how to erase iPhone when locked, follow these steps:
Step 1. Download and install Dr.Fone.
Start by downloading Dr.Fone - Screen Unlock (iOS) from its official website. Install it on your Windows or Mac and connect your Apple iPhone 12 Pro to the system whenever you wish to resolve an issue with it. After launching the application, click on the “Screen Unlock” option from the welcome screen.

Step 2. Click Start button.
Wait for a while as the application will automatically recognize your phone. Click on the “Start” button to commence the process.

Step 3. Put the phone into DFU mode.
Follow the on-screen instructions to put your phone into the DFU (Device Firmware Update) mode. It can be done by pressing the Home and Power button simultaneously for 10 seconds. Afterward, it would help if you released the Power button while pressing the Home button for another 5 seconds.

Step 4. Download firmware package.
After putting your device into the DFU mode, the application will automatically move to the next window. Here, you would be required to provide essential information related to your phone like device model, firmware update, and more. After filling in the correct information, click on the “Download” button.

Sit back and relax as the application will download the essential firmware update for your phone.

Step 5. Start to unlock.
Once it is done, the application will automatically start resolving the issue on your phone. Make sure that you don’t disconnect your phone while Dr.Fone - Screen Unlock (iOS) will resolve the issue on your device.

Step 7. Unlock completed.
After completing the operation successfully, the interface will provide the following message.

You can check if you can unlock your phone or not. If you still have an issue, then click on the “Try Again” button. Else, you can safely remove your phone and use it without any constraint. By following this method, you would learn how to wipe a locked iPhone with Dr.Fone - Screen Unlock (iOS).
One of the best things about this technique is that you would wipe locked iPhone without causing any damage. Since it is a secure and reliable method with a high success rate, it is sure to provide a hassle-free experience.
Part 2: Erase locked iPhone by restoring it with iTunes
If you are looking for an alternative way to learn how to erase iPhone when locked, you can also take the assistance of iTunes. It provides a free and simple method to restore your device. Since it would wipe your data, you might end up losing your essential files in the process. We recommend following this technique only when you have taken a backup of your data via iTunes beforehand. To learn how to wipe a locked iPhone with iTunes, follow these steps:
1. Firstly, put your Apple iPhone 12 Pro into recovery mode. To do this, launch an updated version of iTunes on your system and connect it to a lightning cable. Now, long-press the Home button on your device and connect it to the other end of the lightning cable. Release the Home button once the iTunes logo would appear.

2. As soon as your phone would be connected, iTunes will recognize an issue with it. From here, you can choose to restore it.

3. If you don’t get the above pop-up on your screen, launch iTunes and visit its “Summary” section. From here, choose “Restore backup” under the Backup section.

4. agree to the pop-up message by clicking on the “Restore” button.

Part 3: Erase locked iPhone by Find My iPhone
If you haven’t already taken a backup of your phone, then you might find it hard to recover it with iTunes. Another popular way to wipe locked iPhone is by using the Find My iPhone tool. This is mostly implemented in case of a stolen or lost device. One of the best features of Find My iPhone is that it can be used to reset your device remotely. With this, you can protect your personal data without much trouble. Implement these steps to learn how to erase iPhone when locked using Find My iPhone.
1. To start with, log in to your iCloud account and visit the “Find My iPhone” section.
2. Under the “All Devices” section, you can choose the Apple iPhone 12 Pro you wish to reset.

3. After selecting your device, you will be presented with various options. Select the “Erase iPhone” feature to reset your device.

Confirm your choice and wipe locked iPhone remotely using the Find My iPhone feature on iCloud.
After following this informative guide, you would learn how to wipe a locked iPhone without any trouble. Go ahead and pick your preferred option to wipe locked iPhone. We recommend using Dr.Fone - Screen Unlock (iOS) to resolve this issue securely. Though, if you wish to do it remotely, then you can also give Find My iPhone a try as well. If you are familiar with any other reliable method, please let us know how to erase iPhone when locked in the comments below.
How To Change Country on App Store for Apple iPhone 12 Pro With 7 Methods
Changing your App Store country can give you access to apps that are not available in your region. Whether getting region-specific apps, accessing exclusive content, or switching to a country with better app offerings, it’s a valuable capability.
The article below guides you through seven methods on how to change the country of your App Store.Following the guide ensures access to a world of apps and content tailored to your preferences. Keep reading the page below to achieve this.

Part 1. Pros and Cons of Changing Your App Store Country
Changing your App Store country on your Apple iPhone 12 Pro can offer various benefits, but it also comes with certain drawbacks. It’s necessary to consider the pros and cons before making this decision.
Pros
- **Access to Region-Specific Apps.**Different countries have unique apps tailored to their markets. By changing your App Store country, you can access apps that might not be available in your current region. For example, some popular Chinese and Japanese apps are unavailable in the US App Store. If you want to use these apps, you will need to change your App Store country.
- **Getting App Updates.**Sometimes, apps receive updates and features in certain regions before others. Changing your App Store country can give you early access to these updates, improving your app experience. For example, a gaming app might first release new levels or features in select countries.
- **Access Exclusive Content.**Some apps and content are exclusive to certain countries. By switching your App Store country, you can enjoy movies, music, or TV shows unavailable in your current region. For instance, certain Netflix shows are restricted to specific countries due to licensing agreements.
Cons
- **Loss of Access to Purchases.**If you’ve made purchases in your current App Store country, changing it can result in losing access to those purchases. The loss includes paid apps, in-app purchases, and subscriptions. For example, if you switch from the US to the UK store, you may lose access to US-specific subscriptions.
- **Offload Apps.**When you change your App Store country, your device may prompt you to offload apps that are not available in your new region. This can be inconvenient if you rely on specific apps for daily use. For instance, a banking app may be region-specific and unavailable in your new country.
- **Family Sharing Issues.**If you’re part of a Family Sharing group, changing your App Store country can affect the access and sharing of purchased apps and subscriptions. Family members may lose access to content tied to your previous country. For example, if you switch from the UK to the US store, your family members might no longer have access to UK-specific content.
Part 2. Different Methods to Change Your App Store Country
Changing your App Store country can be done through various methods. Below are different ways to achieve that, along with step-by-step instructions for each technique.
Method 1: Changing Apple ID Region via iPhone
It is the most common and straightforward way to change your App Store country. To do this, follow these steps:
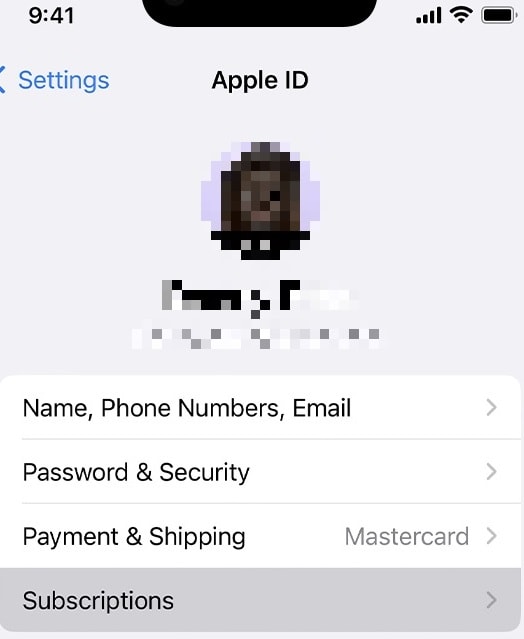
- Step 1: Open Settings on your Apple iPhone 12 Pro and tap your Apple ID at the top.
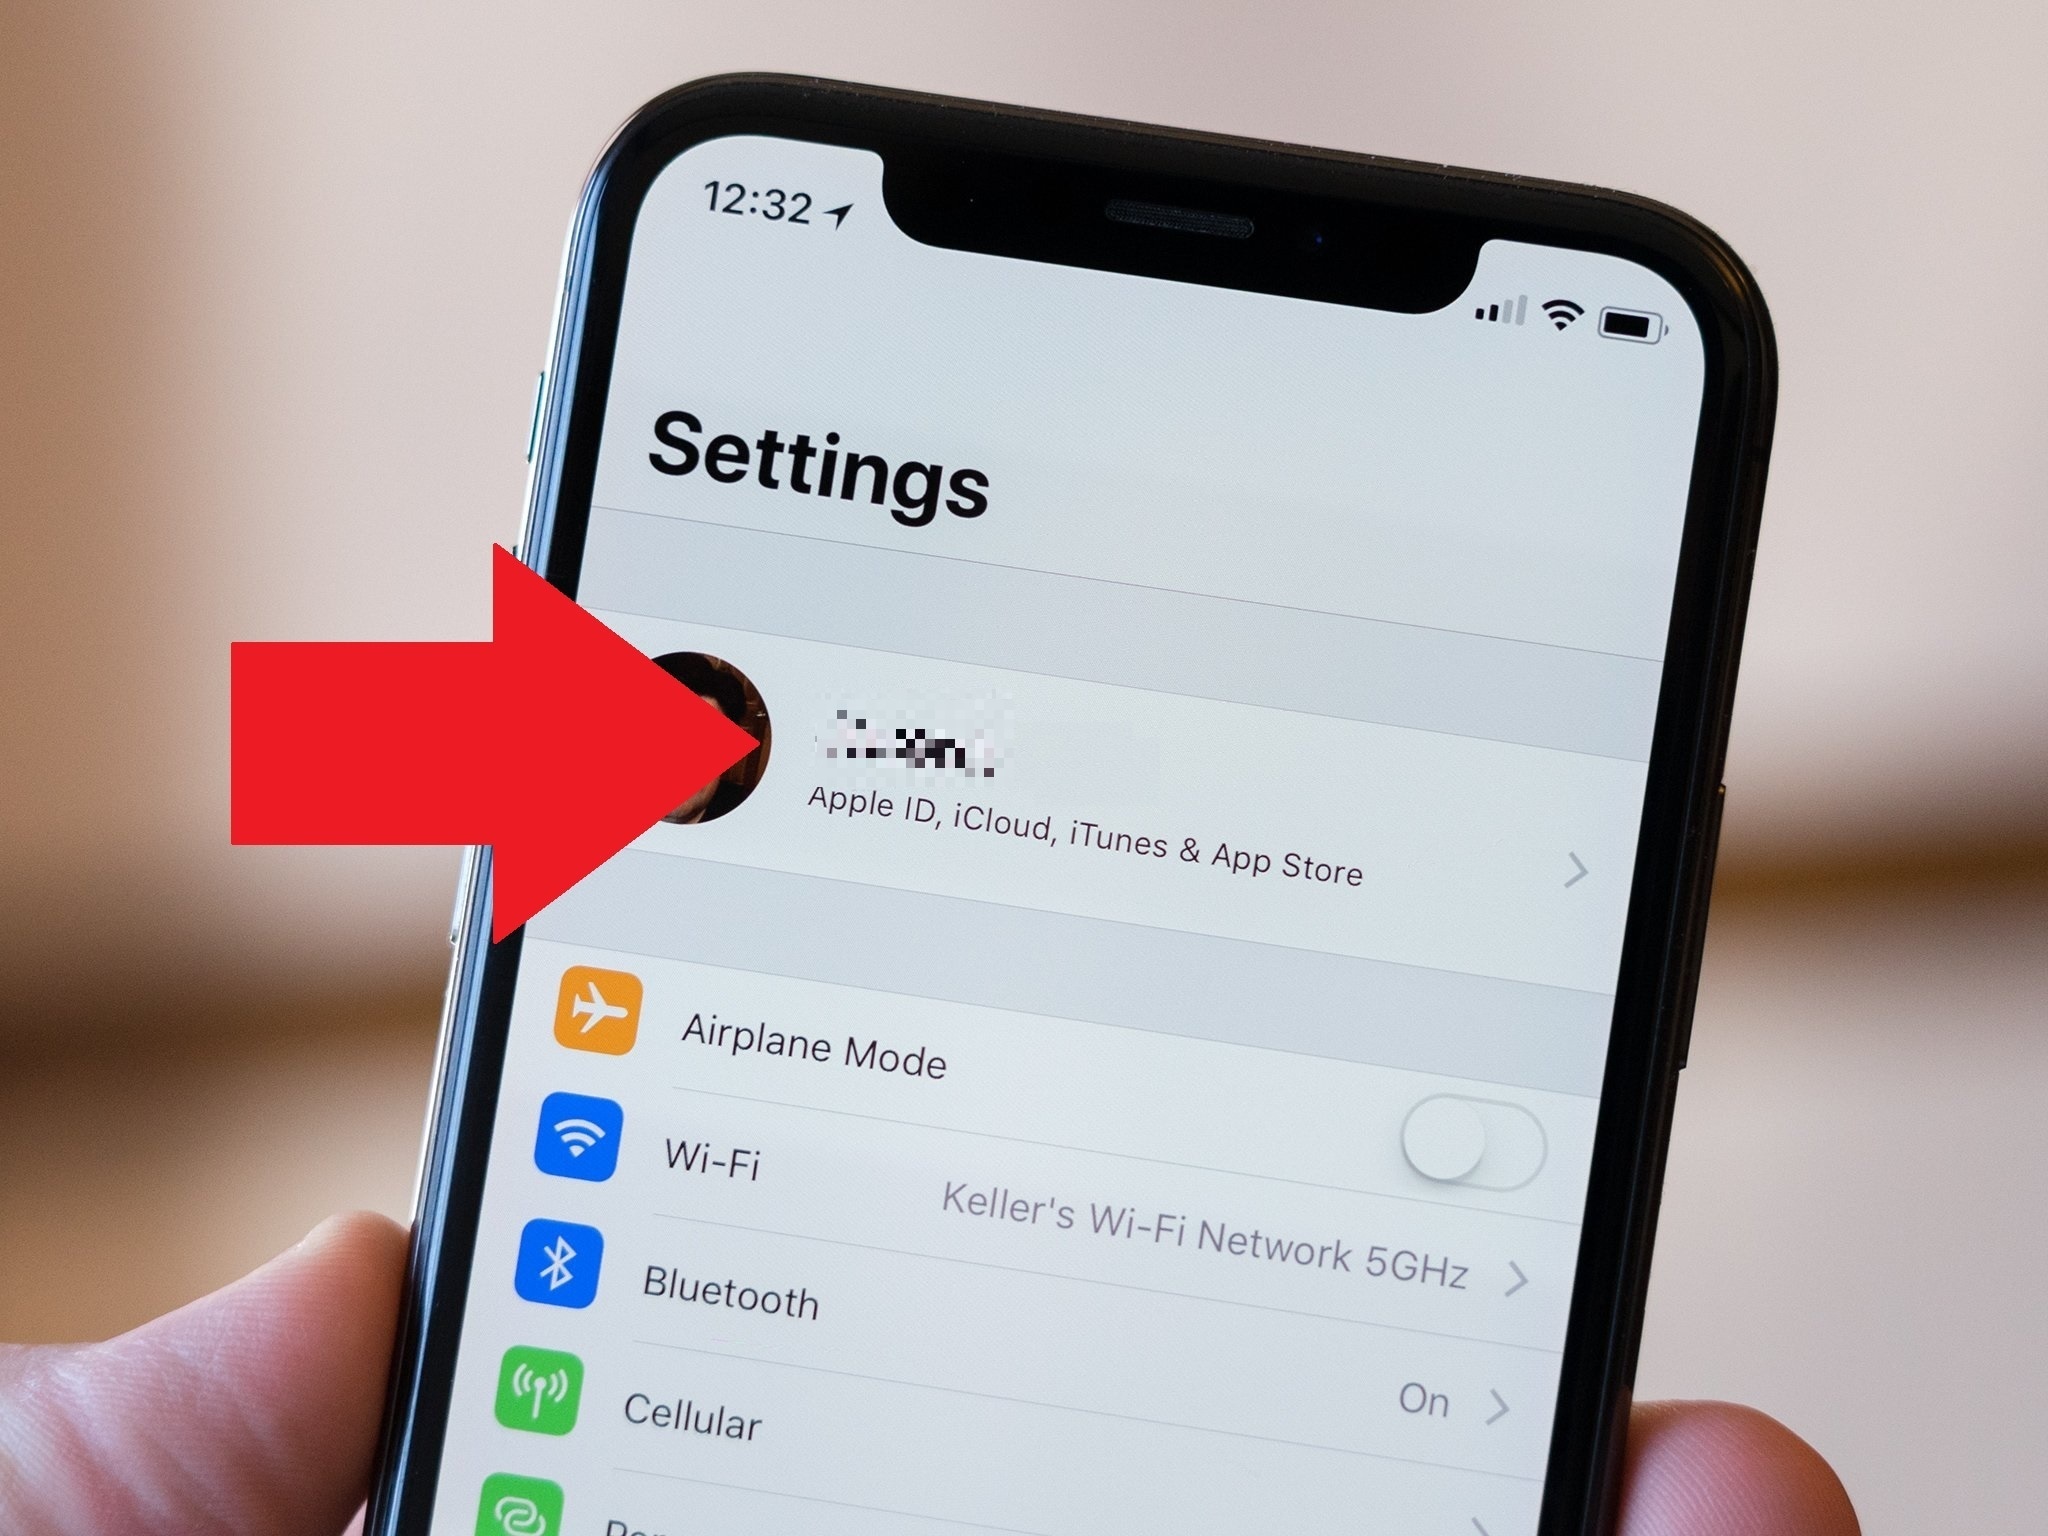
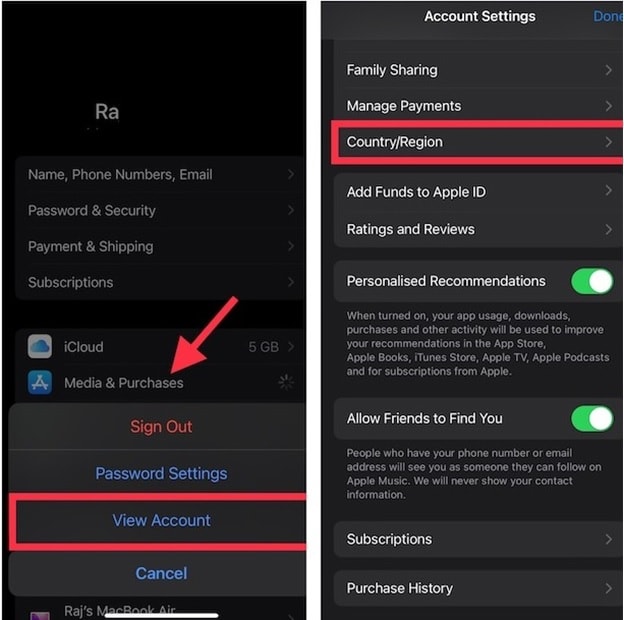
- Step 2: Tap on Media & Purchases > View Account. Sign in with your Apple ID. Next, Tap Country/Region > Change Country or Region and choose your desired country. Follow the on-screen prompts.
Method 2: Changing Apple ID Region via Mac/Windows
To change your Apple ID region via Mac/Windows, follow these steps:
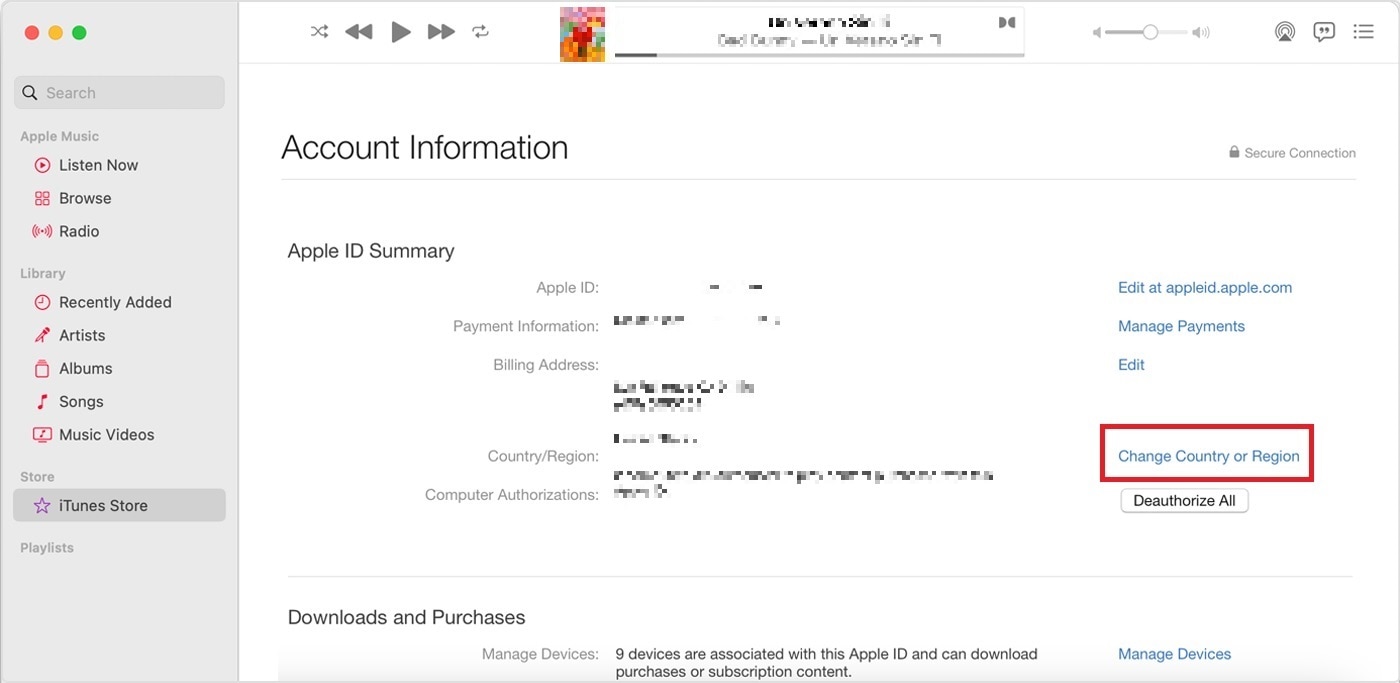
- Step 1: Open iTunes (on Windows) or Music (on Mac). Sign in with your Apple ID.
- Step 2: Go to Account > View My Account. Under Apple ID Summary, click Change Country or Region. Click your desired country and follow the instructions.
Method 3: Changing Apple ID Region via Web
The steps below are to change your Apple ID region via the web.
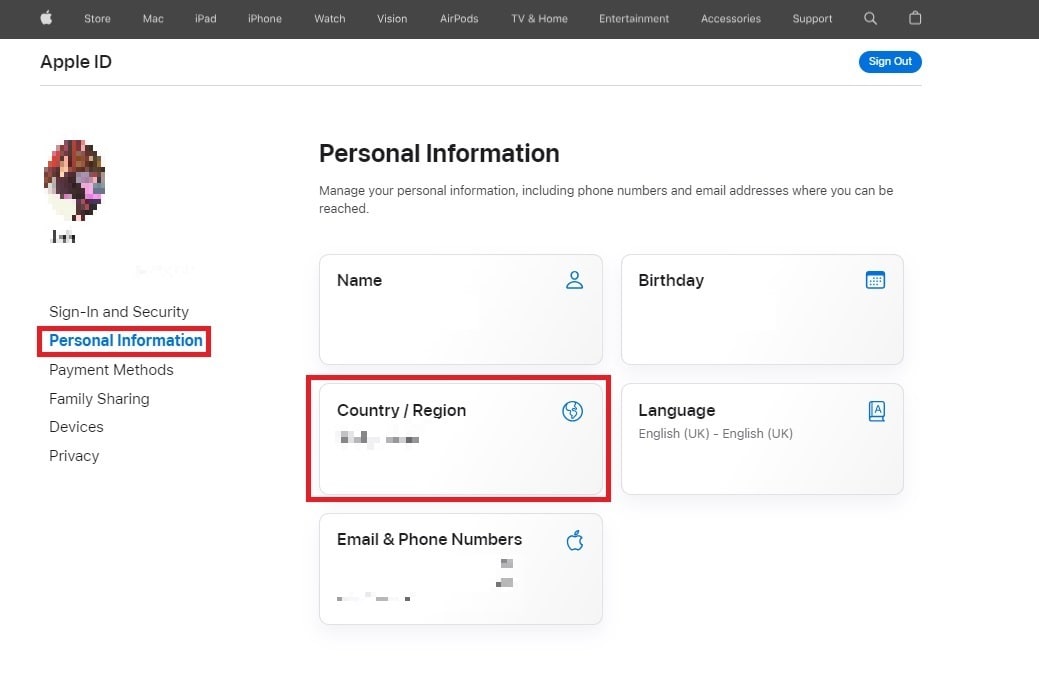
- Step 1: Open a web browser on your desktop or mobile device. Next, go to appleid.apple.com. Sign in with your Apple ID.
- Step 2: Under Personal Information, click the Country/Region button. Next, click the Change country or region and choose your preferred country.
Method 4: Leaving a Family-Sharing Group
If you’re part of a family sharing group, you need to leave the group before you can change your App Store country. To leave a family sharing group and change your app store country, follow the steps below.
- Step 1: Open the Settings app on your Apple iPhone 12 Pro and tap Family.
- Step 2: Tap your name and tap Stop Using Family Sharing. Once you have left the family sharing group, you can change your App Store country by following the aforementioned manners.

Method 5: Cancel All Subscriptions
If you have any subscriptions, you must cancel them before changing your App Store country. Here are the steps below.
- Step 1: Open Settings on your Apple iPhone 12 Pro. Next, tap your name at the top of the screen.
- Step 2: Tap Subscriptions > Cancel Subscription. Once you cancel all of your subscriptions, you can change your App Store country.
Method 6: Using a VPN
You can also use a VPN to change your App Store country. However, this method is not recommended, as it can be unreliable and may result in your account being banned. Here are the steps below.
- Step 1: Install a VPN app from the App Store.
- Step 2: Connect to a server in your desired country. Open the App Store and see content from the connected country.
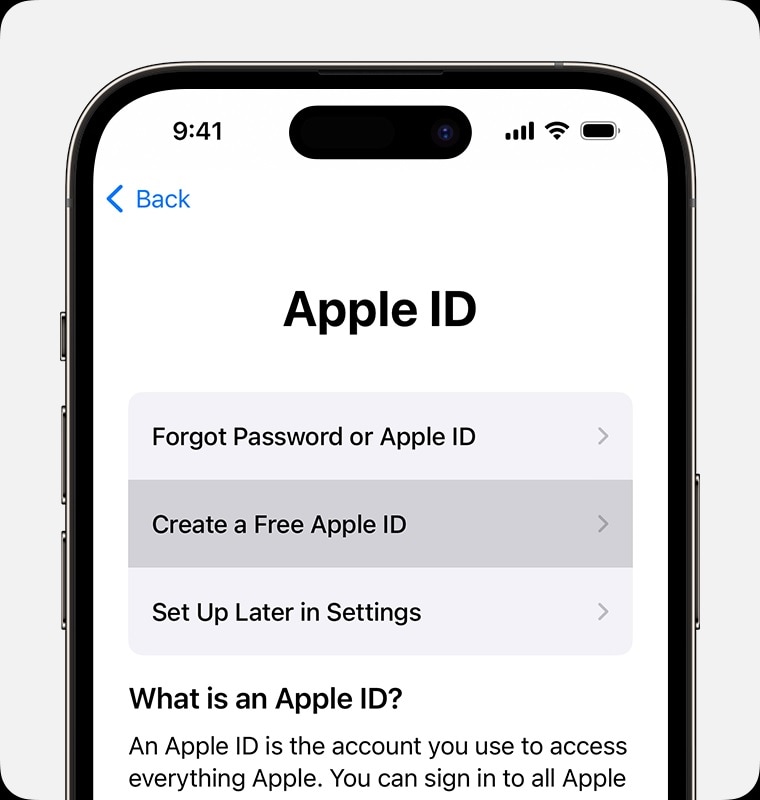
Method 7: Creating a New Apple ID
Finally, you can create a new Apple ID account with the country you want your App Store country to be. Here are the steps below.
- Step 1: Sign out of your current Apple ID in Settings.
- Step 2: Create a new Apple ID with your desired country as the region.
Sometimes, changing your App Store country can lead to issues. It can lock you out of your Apple ID, or you’re forgetting your password. During these events, it can restrict your App Store access. In such cases, a tool like Dr.Fone - Screen Unlock (iOS) can come to the rescue.
Part 3. Changing Countries Not Going Your Way? Use Wondershare Dr.Fone – Screen Unlock
Dr.Fone - Screen Unlock (iOS) helps you regain access to your Apple ID and fix any login-related problems. It ensures that you can continue enjoying your App Store without any hindrance. It’s a safe and reliable software tool that is used by millions of people to unlock their devices. It is also easy to use, even if you are not tech-savvy.
Key Features
Dr.Fone - Screen Unlock (iOS) is a powerful tool that can help you to:
- **Unlock iOS Device Without Passcode.**Regain access to your locked iPhone or iPad without needing the passcode.
- **Remove All Lock Screen Types.**Versatile unlock support for 4-digit/6-digit passcodes, Touch ID, and Face ID lock screens.
- **Unlock Apple ID Without Password.**Effortlessly unlock your Apple ID without requiring the password, simplifying access.
How To Unlock Your Apple iPhone 12 Pro in Seconds
Dr.Fone’s Screen Unlock tool offers a streamlined solution to get you back into your device within seconds. Here’s a simple guide on how to do it.
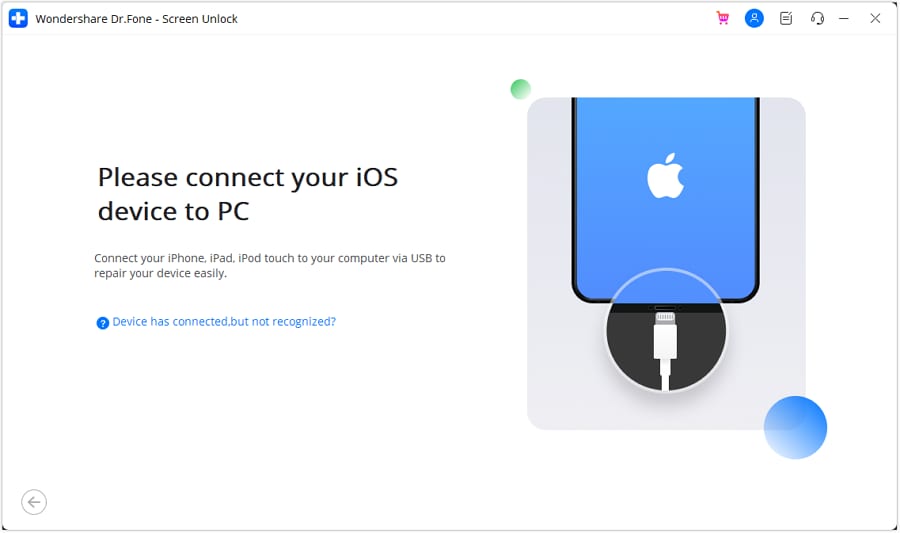
- Step 1: Download Dr.Fone - Screen Unlock (iOS) on your computer and install it. Next, launch the app.
- Step 2: Connect your locked Apple iPhone 12 Pro to your computer using a compatible USB cable. Afterward, click Start on the program. Follow the on-screen prompts on Dr.Fone. It will tell you to boot differently into DFU mode. Once your device enters DFU mode, Dr.Fone will present device details, including phone generation, iOS version, and more.
- Step 3: Dr.Fone will download the necessary firmware for your device. Follow the on-screen instructions to finish the unlocking process. Once done, Dr.Fone will remove the activation lock from your device.

Conclusion
Changing your App Store country can open doors to region-specific apps, exclusive content, and timely updates. However, it’s important to consider the potential drawbacks, such as losing previous purchases.
When changing the App Store country on your Apple iPhone 12 Pro, it’s important to consider Apple ID access issues. You never know when you will get locked out or suddenly forget your password. Wondershare Dr.Fone - Screen Unlock (iOS) offers a reliable solution during these instances. The tool ensures uninterrupted access to your App Store and Apple ID account, making it a valuable resource for managing your digital experience seamlessly.
How To Remove Flashlight From Apple iPhone 12 Pro Lock Screen
Ever wonder why the flashlight shows up on your Apple iPhone 12 Pro lock screen? Especially when it happens in your pocket or while you’re holding it. If you, like many, accidentally turn it on and drain your battery, no need to worry.
While you can’t remove it, figuring out how to remove flashlight from iPhone lock screens is a common question. This guide shares several ways to prevent accidental activations and save your device’s battery. Keep reading for easy solutions to take charge of your Apple iPhone 12 Pro’s lock screen and make it work better for you.

Part 1: How To Remove Flashlight From iPhone Lock Screens?
You can’t remove the shortcuts like the flashlight icon from an iPhone lock screen. These are built-in features, and Apple doesn’t currently offer an option to disable them. However, there are some workarounds to make the flashlights less accessible and avoid turning them on accidentally. You can turn off Tap to Wake, Raise to Wake, remove the flashlight icon from the control center, and turn off the Back Tap shortcut.
Find out the steps below.
Quick Fix No. 1: Turn Off Tap To Wake
Tap to Wake lets you light up your Apple iPhone 12 Pro screen with a simple tap. It’s handy, but there’s a catch – tapping near the bottom right corner might accidentally turn on the flashlight icon. The Tap to Wake feature can be troublesome, especially in the dark, when you don’t want any unexpected brightness.
Turning off the Tap to Wake feature is not directly related to the issue of iPhone users wanting to remove the flashlight from lock screens. However, adjusting settings like Tap to Wake can be part of customizing the overall user experience on an iPhone. When turned off, the screen won’t light up with a tap, reducing the likelihood of accidentally triggering the flashlight.
Here is how to turn off the Tap to Wake feature:
- Step 1: Go to Settings or General > Accessibility on your Apple iPhone 12 Pro device.
- Step 2: Toggle off Tap to Wake.

Quick Fix No. 2: Turn Off Raise To Wake
With “Raise to Wake” enabled, simply picking up your phone can activate the lock screen. Consequently, the flashlight icon becomes more susceptible to accidental touches. To address this, turning off this feature stops the screen from waking when you lift your Apple iPhone 12 Pro. By doing so, it becomes less likely that you’ll accidentally turn on the flashlight when you pick up your iOS device.
Here is how to remove flashlights from iPhone lock screens when not needed:
- Step 1: Head to Settings > Display & Brightness on your iOS device.
- Step 2: Toggle off the Raise to Wake option.

Quick Fix No. 3: Remove the Flashlight From the Control Center
The Control Center on iPhones is a quick-access panel. You can access it by swiping down from the top right corner of your screen. There, you can control various settings, like the flashlight. If you remove it, the flashlight becomes less accessible from the lock screen. Follow these steps to remove the flashlight from the control center:
- Step 1: Open the Settings app and navigate to Control Center.
- Step 2: Tap on Customize Controls, then find the Flashlight icon.
- Step 3: Tap the red minus (-) sign next to the Flashlight icon.
- Step 4: Tap Remove to confirm deleting the Flashlight icon from the Control Center.

Quick Fix No. 4: Turn Off Back Tap Shortcut
Back Tap on the Apple iPhone 12 Pro lets you set actions for double or triple taps on the back. One of these actions is turning on the flashlight. If you often tap your phone’s back, you might accidentally activate the flashlight. Turning off the Back Tap for the flashlight prevents these accidental activations.
Although the flashlight icon remains on the lock screen, you won’t accidentally turn it on by hitting the back of your phone. Here’s how to disable the Back Tap for the flashlight shortcut:
- Step 1: Go to Settings > Accessibility > Touch > Back Tap.
- Step 2: Select the Double Tap or Triple Tap option you’re using for the flashlight shortcut.
- Step 3: Choose None instead of the currently assigned action, which might be Flashlight.

Part 2: How To Turn Off the Flashlight on iPhone?
Now, let’s address turning off the flashlight on your Apple iPhone 12 Pro. Even if you’ve applied Part 1’s solutions, knowing how to switch off the flashlight is crucial. In this section, you’ll learn how to turn the light off on iPhone devices.
Method No. 1: Turn Off the Flashlight in the Control Center
You can’t remove the flashlight icon from the lock screen, but you can still turn it off easily. Just swipe down from the upper-right corner or swipe up from the bottom (for iPhones with a Home button). Then, follow these steps to discover how to turn off the flashlight on your Apple iPhone 12 Pro: Here’s how to do it.
- Step 1: Find the flashlight icon in the Control Center. It’s usually located in the bottom left corner.
- Step 2: Tap on the flashlight icon once to turn it off. The icon will turn gray, indicating the flashlight is deactivated.

This method is fast and convenient, especially if you’ve kept the flashlight icon in the Control Center. Plus, it works regardless of how the flashlight was activated, even if it was an accidental tap on the lock screen.
Method No. 2: Use Siri To Turn Off Flashlight
To go hands-free and avoid accidental taps, you can use Siri to turn off the flashlight. For those who favor a hands-free approach, it offers an alternative method, particularly if you haven’t customized the Control Center. Here’s how to turn off the flashlight with Siri on your Apple iPhone 12 Pro:
- Step 1: Say “Hey Siri” or press and hold the power button (or Home button on older iPhones) to activate Siri.
- Step 2: Give the commands saying, “Turn off the flashlight.”
- Step 3: Siri will confirm your request and turn off the flashlight. You’ll hear a voice cue and see the flashlight icon on your screen dim.

Remember, even with Siri, ensure your Apple iPhone 12 Pro’s microphone isn’t covered or blocked for successful voice recognition.
Bonus Part: Easily Unlock Your Apple iPhone 12 Pro Without a Password
Removing the flashlight shortcut avoids accidentally activating the Apple iPhone 12 Pro flashlight. But what if you forget your lock screen passcode and need to access your Apple iPhone 12 Pro? That’s where Wondershare Dr.Fone Screen Unlock (iOS) comes in, offering a powerful toolkit for regaining access to your locked iOS device.
This software effortlessly bypasses any lock screen, so you can access your data in a few steps. Dr.Fone works seamlessly with the latest iOS versions and devices, providing a dependable safety net for iPhone users.
Key Features:
- If you’ve forgotten your phone’s password or bought a second-hand device, here’s how Dr.Fone can help you:
- Bypasses various lock screen types like pattern, 4 or 6-digit passcode, Touch ID, and Face ID without the original passcode.
- Removes iCloud Activation Lock on a used or lost iPhone/iPad, allowing it to be set up with a new Apple ID.
- Offers a simple, intuitive interface with clear instructions.
Forgotten passcodes and iCloud Activation Lock can leave you feeling shut out. To address this issue, here’s a step-by-step guide using Dr.Fone Screen Unlock (iOS):
- Step 1: Download and install Dr. Fone’s desktop app on your computer. Make sure you get the latest version for optimal compatibility. Launch the app and select the Screen Unlock option from the Toolbox homepage.
- Step 2: Select iOS as the Apple iPhone 12 Pro device type. Then, within the Screen Unlock window, select Unlock iOS Screen to begin the process.

- Step 3: Click Start to remove the iOS screen lock.

- Step 4: Get your Apple iPhone 12 Pro and a USB cable. Connect the phone to your computer and wait for Dr.Fone to recognize it. Next, put your Apple iPhone 12 Pro into Recovery Mode using specific button combinations for your model.

- Step 5: Check your Device Model, select the System Version you need from the dropdown list, then click Start.
- Step 6: Dr.Fone will download and install the latest iOS firmware on your device. Then, click Unlock Now once the firmware is ready. Follow the on-screen instructions to continue unlocking your device.

- Step 7: Once the process is complete, Dr.Fone will notify you. Your Apple iPhone 12 Pro should be unlocked and ready for you to set it up again with your preferred settings and Apple ID.

Conclusion
Resolving the issue of how to remove flashlight from iPhone lock screens is attainable with these workarounds. Turning off Tap to Wake and Raise to Wake reduces accidental activations. Customizing the Control Center and Back Tap allows precise accessibility adjustments.
Additionally, learn how to turn off the flashlight using straightforward methods: either through the Control Center or by instructing Siri to do so. These solutions ensure a personalized lock screen experience, minimizing unwanted light disruptions.
And if ever locked out with the flashlight on, consider Dr.Fone Screen Unlock. This powerful tool bypasses various screen locks, including passcodes, Face IDs, and Touch IDs. Dr.Fone remains a valuable safety net for unexpected moments while fixing your iOS device. Customize your Apple iPhone 12 Pro lock screen settings with these tips for a seamless experience.
Tips: Are you searching for a powerful Screen Unlock tool? No worries as Dr.Fone is here to help you. Download it and start a seamless unlock experience!
Also read:
- [Updated] In 2024, Discovering Android's and iOS's Best-Rated Wedding Clock Apps
- [Updated] In 2024, Visionary Vistas The Ultimate List of Motivating IG Images
- 8 Safe and Effective Methods to Unlock Your iPhone 8 Plus Without a Passcode | Dr.fone
- AMD Radeon HD 7870 Driver Download – Keep Your Graphics Card Running Smoothly on Windows 11
- Clearing Roadblocks for Seamless AMD Software Setup
- Easy Steps on How To Create a New Apple ID Account On Apple iPhone 13 mini | Dr.fone
- Essential Fixes: Handling a Server Error 500 Successfully
- Free Trial: Try HD Video Converter Factory Pro This Week – Limited Time Offer Ended
- How BERT Transforms Natural Language Processing, Outshining GPT's Capabilities
- How To Bypass Activation Lock On Apple Watch Or iPhone 8?
- How To Change Country on App Store for iPhone 15 Pro Max With 7 Methods | Dr.fone
- How to Easily Install or Update D-Link Drivers in Windows - SOLUTION FOUND
- How To Remove Flashlight From iPhone 8 Lock Screen | Dr.fone
- How to Unlock Apple iPhone 15, Apples New iPhone | Dr.fone
- How To Unlock iPhone 15 Plus Without Swiping Up? 6 Ways | Dr.fone
- In 2024, A Comprehensive Guide to Apple iPhone SE (2022) Blacklist Removal Tips and Tools | Dr.fone
- In 2024, How to Unlock Apple iPhone 11 with a Mask On | Dr.fone
- In 2024, How To Unlock Stolen iPhone 11 In Different Conditionsin | Dr.fone
- Mastering Gadgets and Systems at Tom's Digital Workshop
- Title: In 2024, 3 Ways to Erase iPhone 12 Pro When Its Locked Within Seconds | Dr.fone
- Author: Amelia
- Created at : 2024-12-19 22:45:25
- Updated at : 2024-12-26 18:38:33
- Link: https://iphone-unlock.techidaily.com/in-2024-3-ways-to-erase-iphone-12-pro-when-its-locked-within-seconds-drfone-by-drfone-ios/
- License: This work is licensed under CC BY-NC-SA 4.0.