
In 2024, 5 Most Effective Methods to Unlock iPhone XS in Lost Mode | Dr.fone
5 Most Effective Methods to Unlock Apple iPhone XS in Lost Mode
Numerous security features make all Mac devices like iPhones, iPads, and Macs stand apart from the opposition in terms of user data safety. Lost Mode is one feature that locks your lost iPhone or other Apple devices so nobody can get to them.
If your device is gone, you can use the Find My application on your other Apple device connected to a similar account to unlock the lost iPhone.
If your Apple iPhone XS is in Lost Mode and you don’t have the foggiest idea of how to restore it, relax. This guide will cover every one of the techniques that you can use for iPhone Lost Mode unlock.
Part 1: What Will Happen When iPhone Is in Lost Mode?
The Apple iPhone XS Lock feature permits remotely locking a lost Apple iPhone XS to prevent people from using its data. If you set a password for a device before enabling the Lost Mode, you will need this password to unlock the Apple iPhone XS once it has returned to its proprietor.
The Lost Mode menu will ask you to set one if it has no password. Password is obligatory to stop Lost Mode once a device is returned to the owner, as Contact ID or Face ID won’t work for this reason.
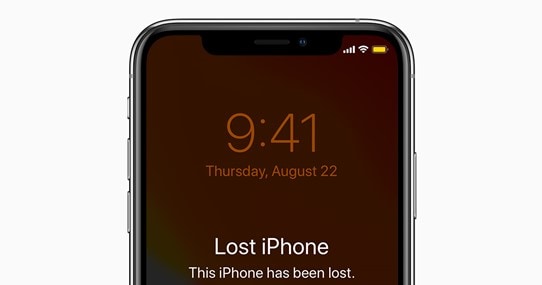
Send a Custom Text Message: When you sort out your lost iPhone and put it in Lost Mode, another supportive feature accessible to you is a custom message shown on the Lock Screen. You can enter any message to let an individual who found it realize this iPhone is lost. This way, you can demonstrate a phone number for the other person. That will expand opportunities to get your device back.
Erase Data Remotely: Lost Mode allows you to delete the Apple iPhone XS if you believe it’s been some time since it’s gone and you don’t think you can get it back. Doing so will ensure nobody will use your user data.
Track Your Device on Map: An owner can follow their lost iPhone on the map through the Lost Mode menu. The menu additionally gives email warnings to show the last location of your Apple iPhone XS.
Play Songs: Playing a sound might assist you with finding your lost iPhone if it’s still close by. The Apple iPhone XS will play a sound at top volume, no matter what volume level was set on the Apple iPhone XS device when you lost it.
1. Remove lost mode by entering the correct passcode
The most straightforward method for unlocking the Apple iPhone XS in Lost Mode is entering the password on the actual device. If your device was protected with a password before placing it in Lost Mode, enter it again.
If your device had no password while placing it in Lost Mode and you’ve entered it into iCloud while placing your Apple iPhone XS into Lost Mode, utilize this password. That will help you unlock lost iPhone, and you can start operating your Apple iPhone XS again.
2. Remove it from Find My in iCloud
One more method for unlocking the Lost Mode on your Apple iPhone XS is to utilize the Find My iPhone application on the official iCloud site. Follow the steps underneath to do so:
- Go to <www.icloud.com> and utilize your account details to sign in.
- Click the “Find My iPhone” button and select all iDevices.
- Pick the Apple iPhone XS device you need to unlock in Lost Mode and tap the “Lost Mode” button.
- Click the “Stop Lost Mode” button to remove the lock from the phone.
- Confirm this activity by clicking the “Stop Lost Mode” button again.
3. Use iCloud DNS Bypass
Domain Name Service is an unsafe technique that utilizes a domain name to an IP address. iCloud stores every iPhone’s information, and when an iPhone is set up, it sends a request through DNS to ensure whether the Apple iPhone XS device has an activation lock enabled.
The DNS bypass will send a fake “device isn’t locked” message to iCloud through a server. It allows you to go through the setting of your Apple iPhone XS and access some applications. However, you must remember that this technique works on iOS 11 or older versions. Follow these steps to utilize the iCloud DNS bypassing strategy to unlock lost iPhone:
- Insert SIM in your Apple iPhone XS, turn it on, and select a preferred language and your location.
- A WiFi screen will spring up. Tap on the “I” icon. If you are now connected with your WiFi, tap “Forget this Network.”
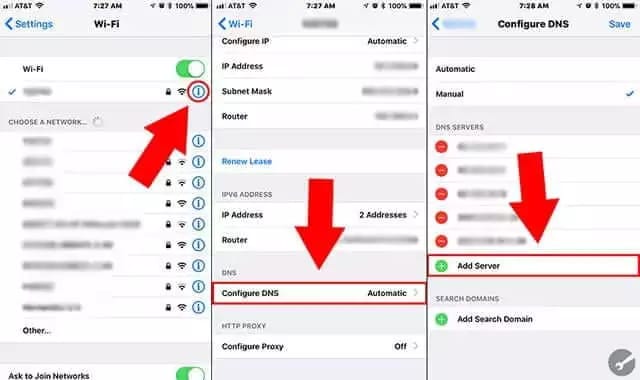
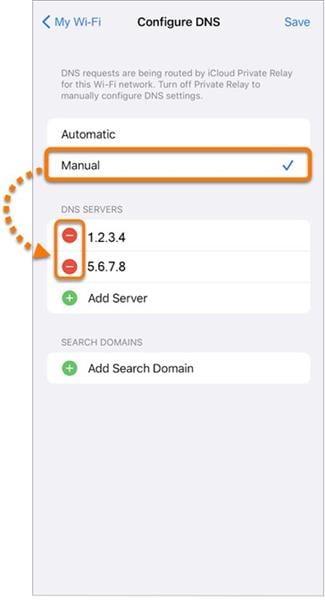
- Tap on “Configure DNS,” and enter a DNS server as per your region from the list underneath:
USA: 104.154.51.7
Asia: 104.155.28.90
Europe: 104.155.28.90
South America: 35.199.88.219
Australia and Oceania: 35.189.47.23
- Clean old DNS server off of ISP modem, select and connect to a WiFi network. Click the Back button when a popup says that the Apple iPhone XS device is attempting to connect to the Apple servers.
- You will now be on the DNS bypass screen. Pick the applications from the list to keep using your device. However, only a handful of applications are available through this.
4. Use Emergency Call
This technique is the most widely recognized one. You can bypass your iCloud activation by settling on a fake Emergency call. Nonetheless, it is accounted for that this strategy probably won’t work for everyone.
If your Apple iPhone XS is on lost mode and attempting to unlock it, you can try using this method. Follow these steps for making an Emergency call on your iPhone in Lost Mode unlock:
- Click the “Emergency Call” option on your locked device.
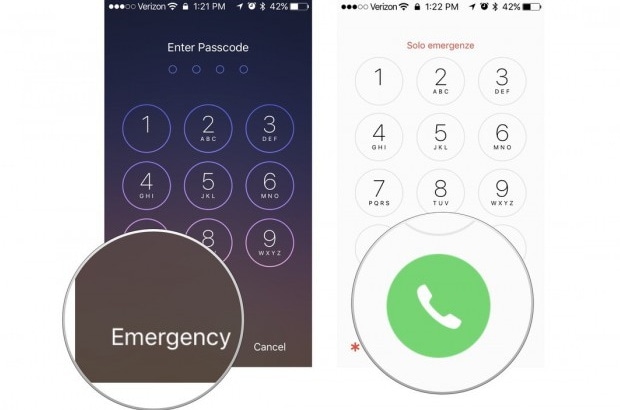
- Dial “*#96274825*0000*1#,” then, at that point, press and hold the dial button for 10 to 15 minutes.
- If it’s not working, try changing the last digit from 1-9. If this doesn’t work, have a go at setting 0 after 9. Remember to hold the dial button.
- Press Home, and it will return you to the beginning screen. Select the language and country, and the activation screen will never appear again. Now create a new password after iPhone Lost Mode unlock.
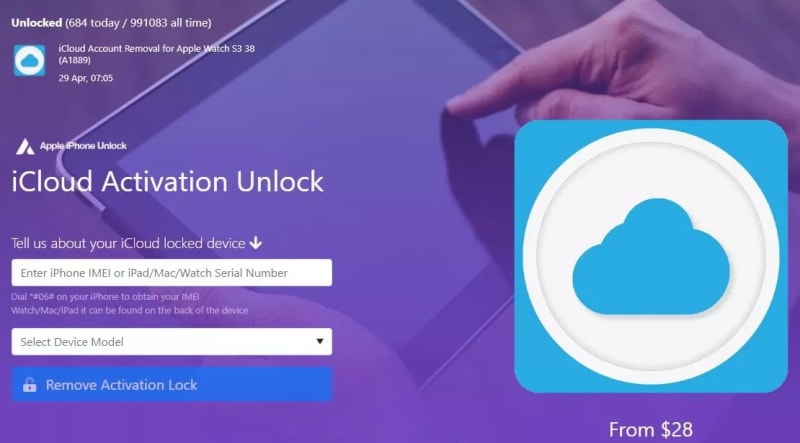
5. Apple iPhone Unlock
Apple iPhone Unlock is a site that can assist you with iPhone in Lost Mode unlock. You must give them your Apple iPhone XS’s IMEI and model number to get their services.
The benefit of Apple iPhone Unlock is that they keep themselves updated with the latest technology. They are educated regarding their tool’s advancement by giving updates every time.
Critical Features of Apple iPhone Unlock:
- As per their site, Apple iPhone Unlock can work with every one of the Apple iPhone XS devices going from iPhone 4 to iPhone 14 Pro Max.
- Don’t bother downloading anything to your PC or phone like others. Another iPhone lock screen expects you to download their tool or software to work.
Bonus Tips: How to Unlock Our iPhone Screen?
Dr.Fone-Screen Unlock
An expert unlocking tool comes in handy when no other method works. In this case, we strongly suggest you use the Dr.Fone-Screen Unlock tool by Wondershare. Dr.Fone is a reliable tool and has been in the market for a long time. Professional unlock service providers use it because of its ease of use and clean interface.
So, without looking any further, download this tool for a remarkable unlocking experience. The methods below will guide you into unlocking your Apple iPhone XS within no time:
Step 1. Connect your Apple iPhone XS/iPad
Open the Dr.Fone software and tap the “Unlock iOS Screen.”

Step 2. Boot iPhone in Recovery/DFU mode
Before bypassing the Apple iPhone XS lock screen, we want to boot it in Recovery or DFU mode by adhering to the on-screen guidelines. The Recovery mode is suggested for the iOS lock screen. However, if you can’t activate the Recovery mode, you can figure out how to activate the DFU mode from their official site.

Step 3. Affirm Device Information
After getting the phone in DFU mode, Dr.Fone will show the Apple iPhone XS device information, for example, the Apple iPhone XS model and other data. You can choose the right information from the dropdown menu if the information isn’t right. Then, at that point, download the firmware for your Apple iPhone XS.

Step 4. Unlock the Apple iPhone XS Screen Lock
After downloading the required firmware effectively, click Unlock Now to remove the lock. However, note that this unlocking system will wipe the user data on your Apple iPhone XS. Truly, there is no answer for iPhone Lost Mode unlock without losing your data.

The Bottom Line
You might forget the password used before placing your Apple iPhone XS in Lost Mode. It is also likely to purchase a locked device, and then you can’t contact the owner to unlock it and don’t know your Apple ID details. Some might think this is a dead situation, and you can’t use the iPhone.
Luckily, we’re here to provide a series of dependable and secure solutions that will help your iPhone in Lost Mode unlock.
How To Unlock A Found Apple iPhone XS?
What to do if you find an iPhone? If you are here, you might have found an iPhone, and now you want to know how to unlock someone’s iPhone. Well, you should first try to find the owner, but if you can’t find the owner, it’s probably because you need help finding information about them.
That is why you want to unlock that iPhone. So, in this article, we will teach you how to unlock someone’s iPhone with different methods. These methods will be constructive for you to quickly unlock the Apple iPhone XS so you can return it to the rightful owner.
So, let’s get started.
3 Efficient Ways to Unlock a Found iPhone
Unlocking an iPhone seems challenging, especially when it’s not yours, but it’s not impossible. You have various ways to unlock a found iPhone, but most are a waste of time. So, to save time and energy, we have compiled 3 efficient ways to unlock a found iPhone.

These methods will be easy to follow because of the detailed step-by-step guide.
1.Unlock it from Recovery mode
Many people need to realize that you can unlock your Apple iPhone XS in Recovery Mode. This built-in feature of the Apple iPhone XS allows you to turn your device to its factory settings.

But there are two ways to unlock a found iPhone from recovery mode. The old iPhones, like iPhone 5 to iPhone 7 and 7 Plus, can be unlocked from recovery mode differently, and the newer iPhone models have different methods.
So, let’s discuss both of them in detail.
Unlock iPhone 7 Plus and Older in Recovery Mode
If you want to unlock an iPhone 7 or older model in Recovery Mode, follow these instructions.
- First, connect your Apple iPhone XS to the computer with a lightning cable and launch iTunes.
- Now, turn off your Apple iPhone XS and then press and hold the Home button and Sleep/Wake button simultaneously. Keep holding both buttons until you see the recovery mode screen.
- Once you see the recovery mode screen, release both buttons. Now, you will see a message in iTunes saying, “There is a problem with the Apple iPhone XS that requires it to be updated or restored.”
- Click on the Update button, and iTunes will try reinstalling iOS erasing your data. Once the process is completed, your Apple iPhone XS will be unlocked.
Now, set up your Apple iPhone XS, and you are good to go.
Unlock iPhone 8 and Update Models in Recovery Mode
The process of unlocking an iPhone 8 or newer model differs from the older models. So, follow these instructions if you want to unlock an iPhone 8 or later in Recovery Mode.

- First, connect your Apple iPhone XS to the computer with a lightning cable and launch iTunes.
- Now, turn off your Apple iPhone XS and press and quickly release the Volume Up button. After that, press and release the Volume Down button immediately, and hold the Side button until you are in the recovery mode screen.
- Once you see the recovery mode screen, release the Side button. Now, you will see a message in iTunes that says, “There is a problem with the Apple iPhone XS that requires it to be updated or restored.” Or another message that says restore this iPhone. You can click on any option.
- Click on the Update or Restore button, and iTunes will try reinstalling iOS while also erasing your data. Once the process is completed, your Apple iPhone XS will be unlocked.
Now, set up your Apple iPhone XS, and you are good to go.
2. Unlock it via the DNS server
If the above method doesn’t work or iTunes is not detecting that iPhone, you can follow this method.
- This method is easy to follow and doesn’t require any technical skills.
- All you need is the DNS server IP address.
- Connect your Apple iPhone XS to the Wi-Fi network and go to Settings -> Wi-Fi. Now, tap the “i” button next to the Wi-Fi network you need to connect to.
- Scroll down and tap on the Configure DNS option. Now, select the Manual option and enter the DNS server IP address.
- For US servers, you can use 74.82.42.42 or 208.67.222.222
- For UK servers, you can use 8.8.8.8 or 8.8.4.4
- For Canadian servers, you can use 199.85.126.10 or 208.67.222.222
- For Australian servers, you can use 1.1.1.1 or 208.67.222.222
- After that, tap the Save button and connect to the Wi-Fi network. Now, open the Safari browser, redirecting you to the activation screen.
- Follow the instructions on the screen, and your Apple iPhone XS will be unlocked.
3. Dr.Fone-Screen Unlock
If none of the above methods can be used for you, there is an ultimate method that will surely help you if you want to unlock a found iPhone.
Here are the simple steps that can help you.
- First, connect your Apple iPhone XS to the computer with a lightning cable and launch Dr.Fone on your computer.
- Now, click on the Screen Unlock option from the main interface.
- After that, click on the iOS Screen Unlock to begin the process.

- Now, put your Apple iPhone XS in DFU mode or Recovery mode according to your Apple iPhone XS model.
- If you have no idea about it, don’t worry. The software will provide on-screen instructions to help you put your Apple iPhone XS in DFU mode or Recovery mode.
- Once your Apple iPhone XS is in DFU mode or Recovery mode, the software will ask you to start downloading the necessary firmware for your device. So, choose an appropriate firmware according to the Apple iPhone XS model.
- After downloading the firmware, click the Unlock Now button to begin the unlocking process.

- Once the process is completed, your Apple iPhone XS will be unlocked, and you can set it up again.
So that’s how you can easily unlock a found iPhone. This method has been tested, and it will surely work for you. So, if you have an iPhone that is locked or disabled, you can use this method to unlock it without any problem.
What Can I Do to Contact Its Owner?
Once the found iPhone is successfully unlocked, you can contact its owner in many ways.
Following are some of them that work.
Contact the owner with the phone number in lost mode
Many iPhone owners habitually put their phone numbers in lost mode. So, you can check if any phone number is available in the lost mode. If a phone number is available, you can contact the owner and return the Apple iPhone XS to them.

The rightful owner of the Apple iPhone XS activates lost mode. You can see the lost mode on the notification panel, where a message will show that the phone is lost. The owner can also remotely lock the phone using this mode.
Check medical ID in an emergency call
There is a feature in the Apple iPhone XS known as medical ID. This feature can help you contact the owner of the found iPhone if they are unavailable.

To do this, go to the emergency call screen and tap on the Medical ID option. Here, you can find out the name and phone number of the owner. So, you can use this information to contact the owner and return the iPhone.
Take photos to communicate with the owner via iCloud
This is a great way to contact the owner of a lost iPhone. You can use this method if you cannot find the owner’s phone number in the lost mode or medical ID.

To do this, go to Settings -> iCloud -> Photos and turn on the iCloud Photo Library. Now, take some pictures with the found iPhone, and they will be automatically uploaded to iCloud.
Most people who have lost their iPhones often check their iCloud, and once they find out that someone is taking pictures and uploading them to their iCloud, they will try to communicate with you.
And that’s how you can also communicate with them and ask for contact details so that you can return their phone and be a good citizen.
The Bottom Line
So, that’s how you can unlock a found iPhone and contact its owner. I hope this article will help you find the lost iPhone owner and return it to them.
All the methods mentioned above have a high success ratio, but the last ultimate method is better than all because it will unlock the Apple iPhone XS within minutes.
Dr.Fone-Screen Unlock is one of the most effective ways can help you to unlock a found iPhone. This method has been tested, and it will surely work for you. So, if you have an iPhone that is locked or disabled, you can use this method to unlock it without any problem.
Guide on How To Change Your Apple ID Email Address On Apple iPhone XS
Your Apple ID email is the key to your digital world with Apple devices. It’s the address Apple recognizes you by, allowing you to access your apps, music, and more. But sometimes, life brings changes, and your Apple ID email may need an update.
This guide will take you through the simple process of changing your Apple ID email address, ensuring it’s easy to understand every step. Explore why you might want to make this change, shedding light on common scenarios where this adjustment can enhance your Apple experience. So dive in and explore!

Part I: Why Change Your Apple ID Email?
Your Apple ID email helps you access your apps, music, and more. But sometimes, you might need to change it for simple reasons. Let’s look at why you might want to change your Apple ID email in easy-to-understand terms.
- Your email address is part of your identity. Changing it to something that better suits you can make your Apple experience more personal.
- If you think someone else knows your old email password, changing it can keep your Apple account safer. A fresh email means a new layer of security.
- Maybe you used an old email you don’t want to use anymore. Changing it lets you keep your personal life separate from your Apple stuff.
- **Email Problems.**If your old email is full of spam or not working well, switching to a new one is a good idea. You’ll get a cleaner and more reliable inbox.
- **Sharing Devices.**If you share Apple devices with someone and want to keep your stuff separate, changing your Apple ID email can help you do that easily.
- Using a more professional email address for your Apple ID can make a better impression when using Apple services for work or business.
These are the simple reasons why you might want to change your Apple ID email. It’s all about making your Apple experience better, safer, and more suited to your needs.
Part II: Step-by-Step Guide: How to Change Apple ID Email
Before you jump into changing your Apple ID email address, there’s an essential step to take. Just like you’d secure your valuables before embarking on a journey, backing up your device before going through the email change process is vital. This step ensures that none of your precious data is lost during the transition.
A. How To Change Your Apple Email Address on Various Devices
Now, let’s explore three different methods of how to change your Apple ID email address, tailored to various user preferences.
Method 1: For Mac Users
If you’re a Mac enthusiast, changing your Apple ID email is straightforward:
- Step 1: Click the Apple logo at the top left corner of your screen.
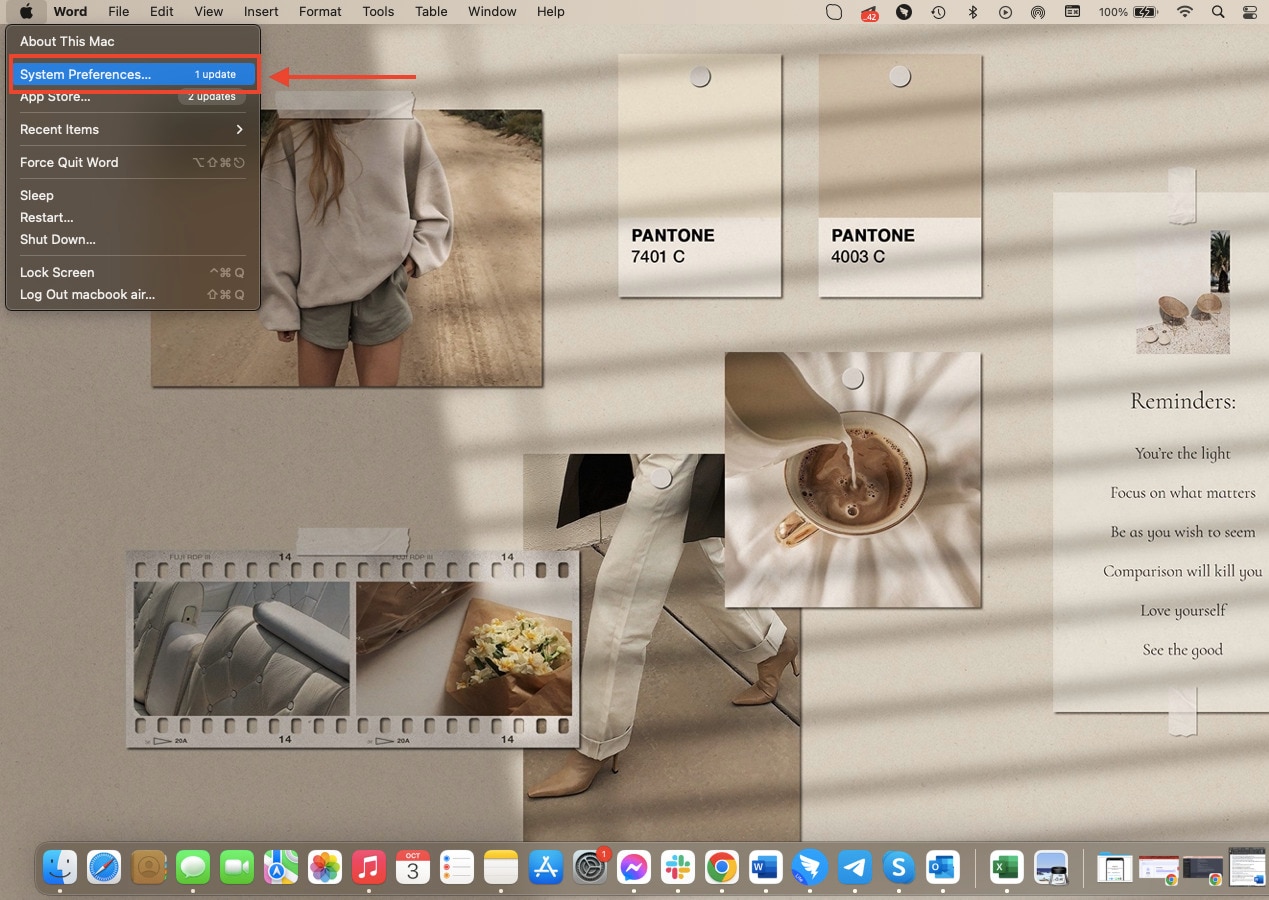
- Step 2: Click System Preferences, and then select Apple ID.
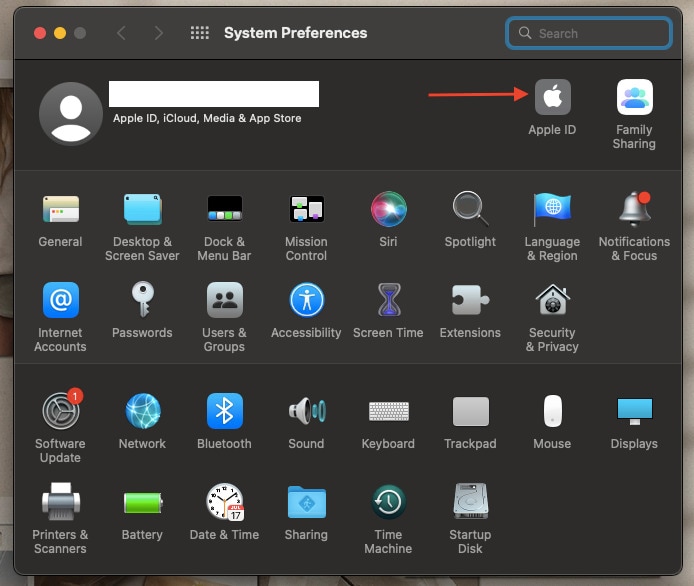
- Step 3: Navigate to the Name, Phone, Email section, then click Edit next to your email address.
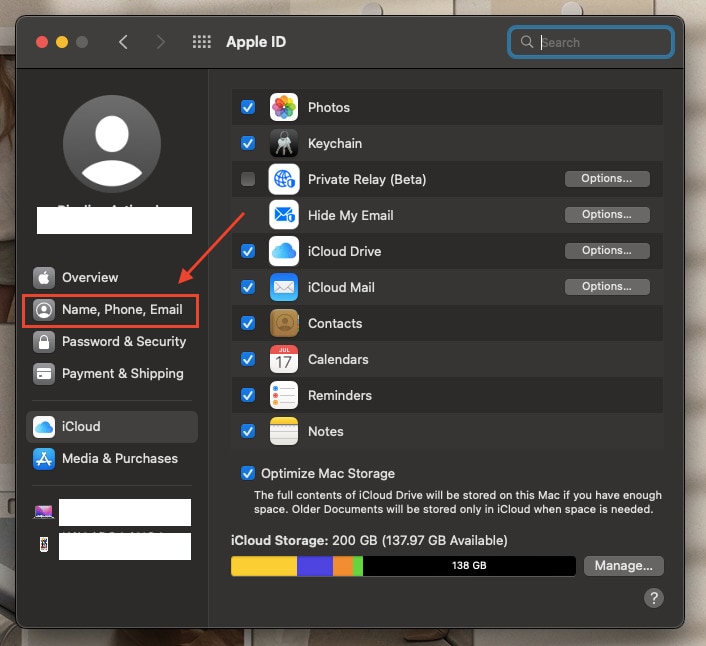
- Step 4: Input your new email address, and Apple will send a verification code to it.
- Step 5: Check your new email for the verification code, enter it, and voilà! Your Apple ID email is updated on your Mac.
Method 2: For Mobile Device Users
For those who prefer the convenience of mobile devices:
- Step 1: Open the Settings app on your Apple iPhone XS or iPad, then tap your Apple ID at the top of the screen.
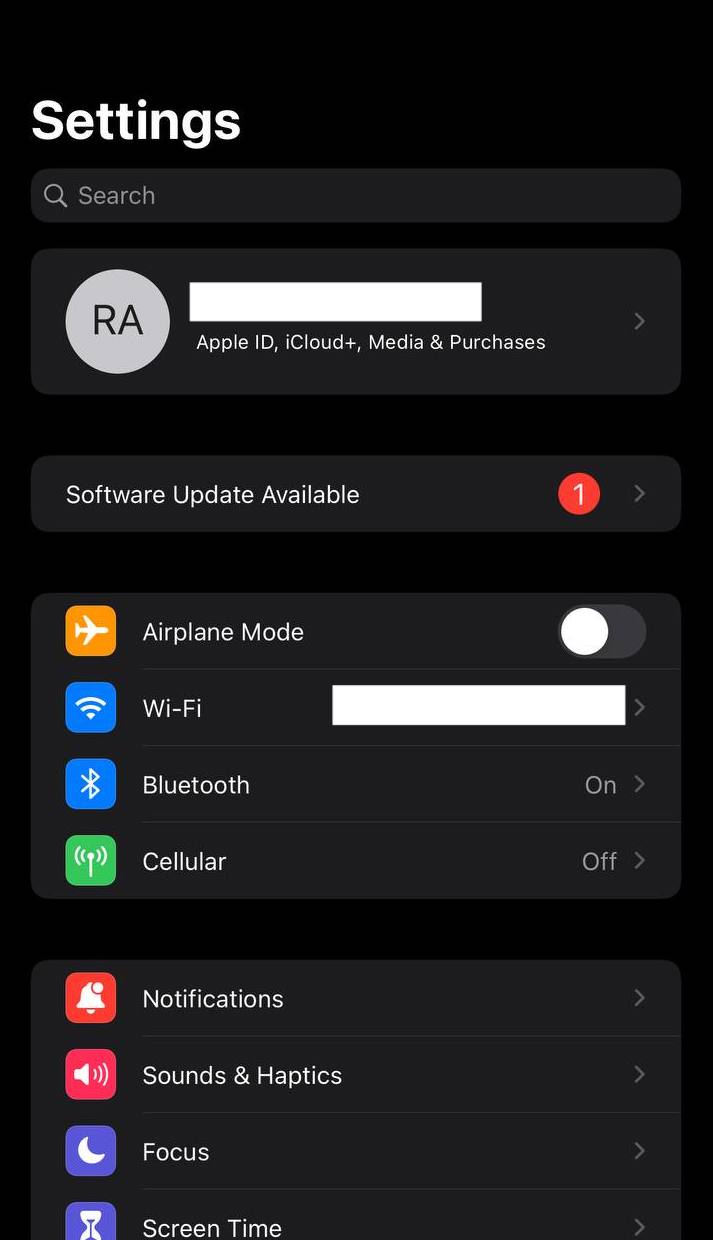
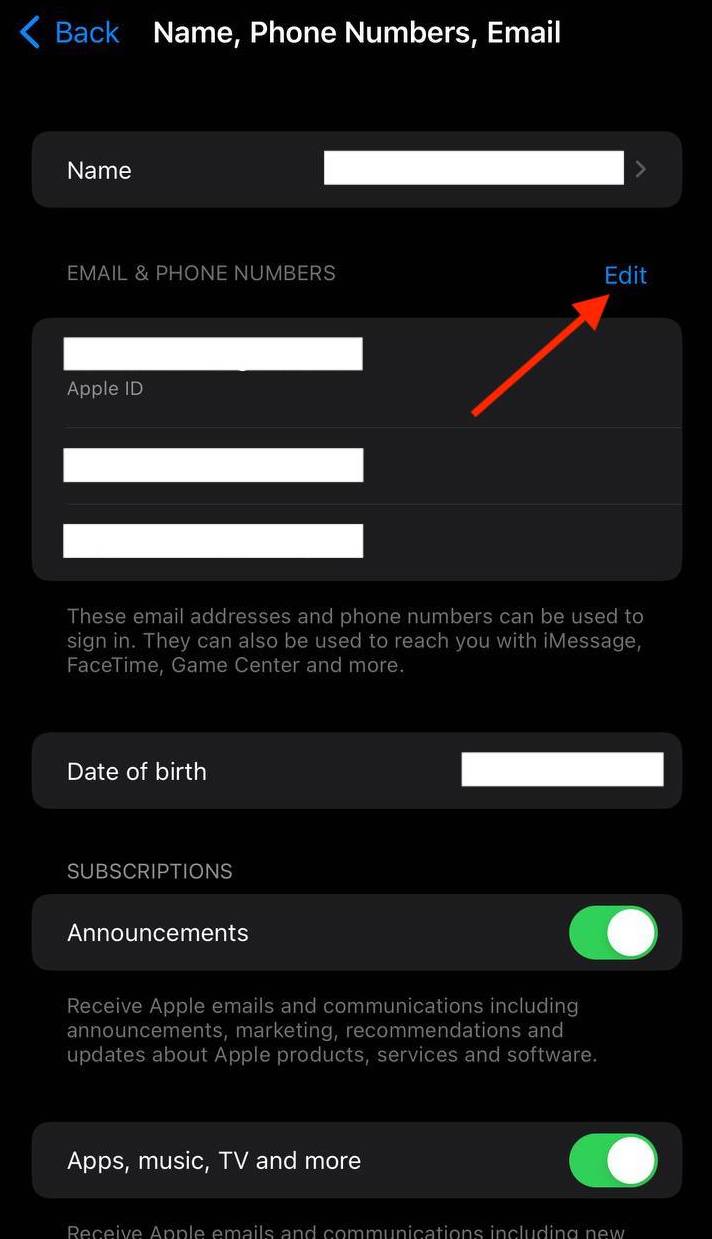
- Step 2: Tap Name, Phone Numbers, Email.
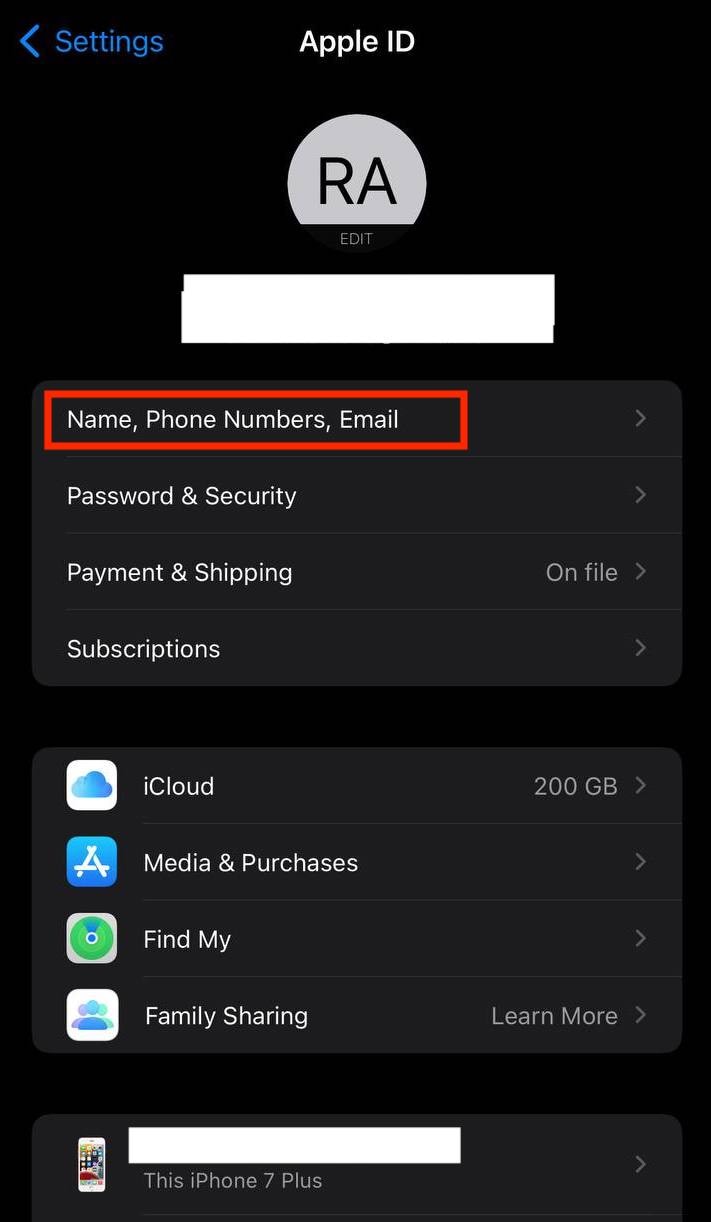
- Step 3: Tap Edit next to your email address, enter your new one, then tap Next.
- Step 4: Apple will send a verification code to the new email. Enter it, and your Apple ID email on your mobile device is updated.
Method 3: For Browser Users
If you prefer the simplicity of a web browser:
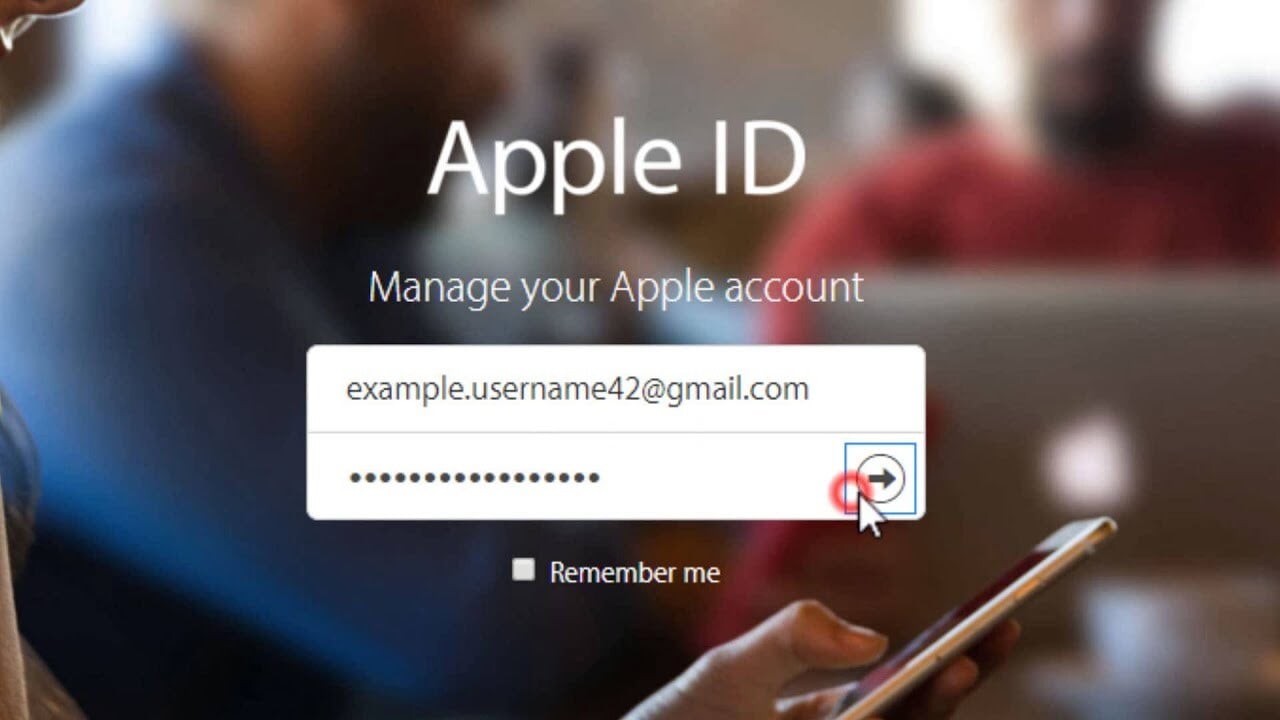
- Step 1: Open the web browser your prefer and go to the Apple ID account management page.
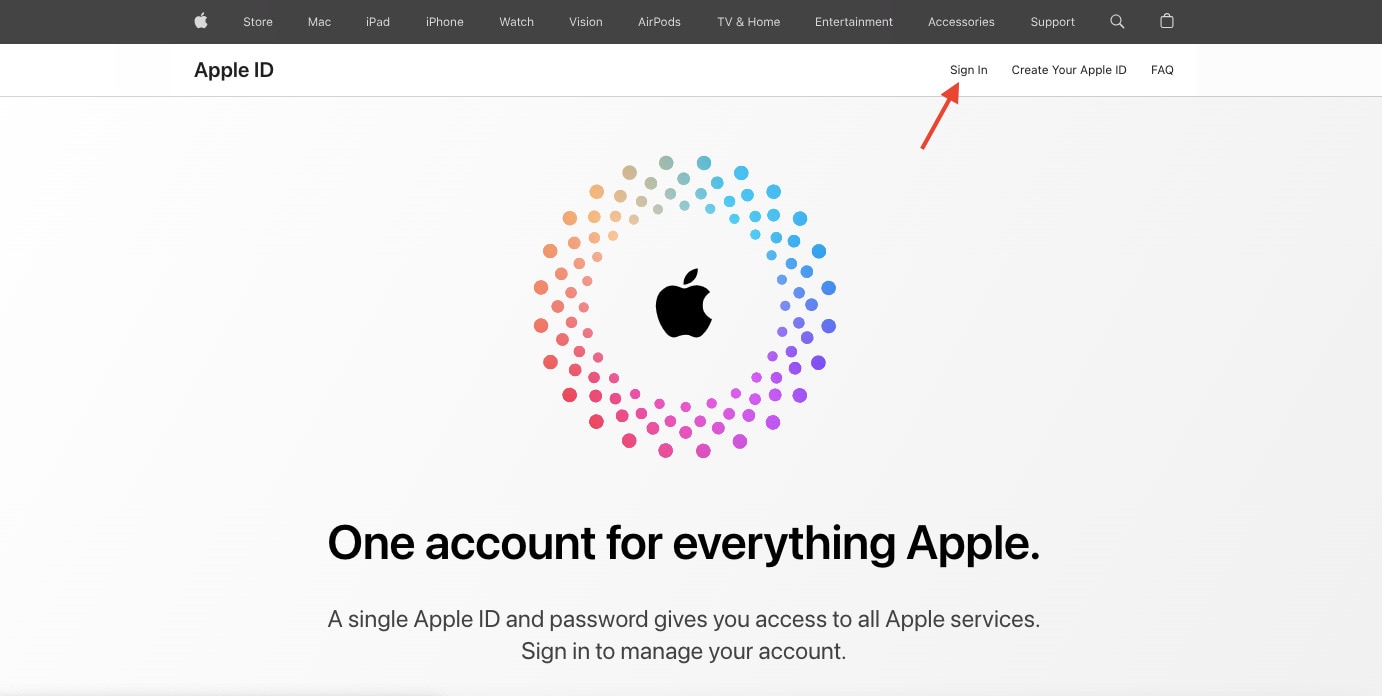
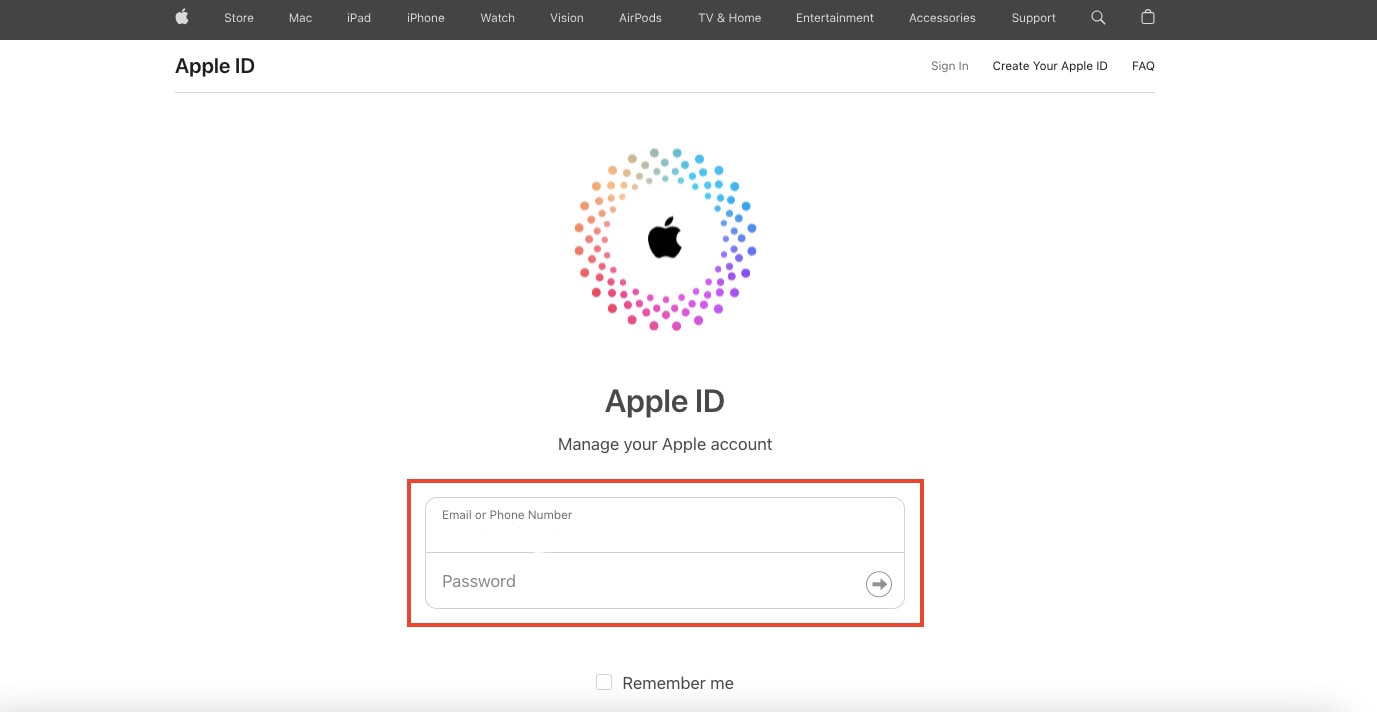
- Step 2: Click Sign In and tap your Email or Phone Number and Password.
- Step 3: Click Edit next to your email address in the Account section.
- Step 4: Input your new email address and click Continue.
- Step 5: A verification code will be sent to your new email. Enter it to confirm your email change.
B. Updating Your Apple ID
Now that you’ve successfully changed your Apple ID email, it’s crucial to ensure that all your Apple devices are on the same page:
- Step 1: Tap the Settings application on your Apple iPhone XS or iPad.
- Step 2: Go to Update Apple ID Settings below your Apple ID settings.
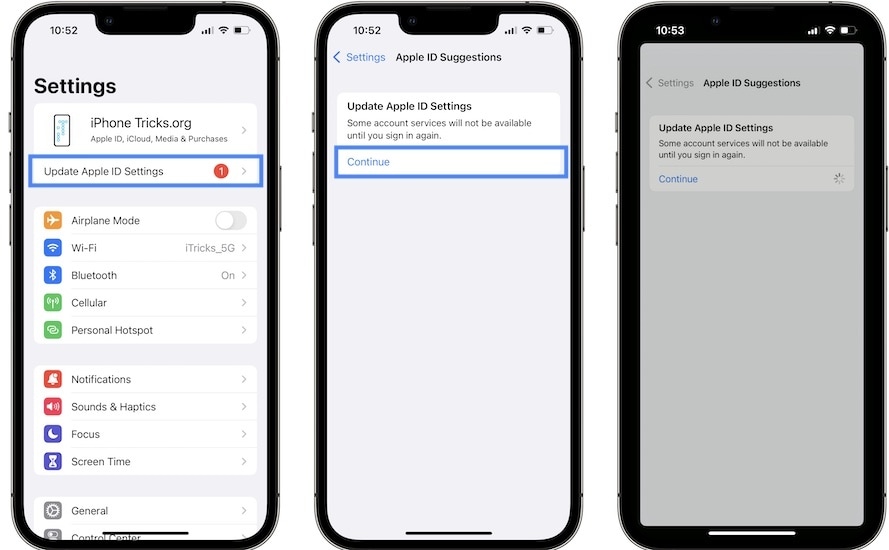
- Step 3: Tap Continue, then wait for a few moments. Your Apple ID will then get updated.
By following these steps, you’ll ensure that all your Apple devices are synced with your updated email address, providing a seamless and consistent Apple experience across all your gadgets. Now, with your new Apple ID email, you’re ready to explore the Apple ecosystem with renewed convenience and security.
Part III: Unlock iOS Screen With Wondershare Dr.Fone - Screen Unlock (iOS)
What if you find yourself in a situation where you want to change your Apple ID email address on your iOS device, but you’re locked out? Don’t worry; Dr.Fone - Screen Unlock (iOS) can rescue you. This handy tool is designed to help you unlock your iOS device, allowing you to change your Apple ID email address smoothly.
Key Features of Dr.Fone - Screen Unlock (iOS)
Check out the key features that Dr.Fone has to offer:
- **User-Friendly Interface.**Fone - Screen Unlock (iOS) is designed to be easy to use, making it accessible for users of all levels of technical expertise.
- It fits a wide range of iOS devices, including iPhones and iPads, ensuring that you can unlock your device no matter which one you have.
- **Multiple Unlock Modes.**Fone offers different unlock modes to cater to various scenarios. Whether you’ve forgotten your passcode, have a disabled device, or are dealing with a locked Apple ID, Dr.Fone has a solution.
- **No Data Loss.**One of the most significant advantages of Dr.Fone is that it unlocks your device without causing any data loss. Your photos, apps, and important information remain intact.
Step-by-Step Guide on Using Dr.Fone - Screen Unlock (iOS)
Outlined below is the step-by-step guide on how to use Dr.Fone – Screen Unlock for iOS devices:
- Step 1: When you’ve finished downloading and installing Wondershare Dr.Fone on your computer, go to Toolbox, then Screen Unlock, and choose iOS to open the tool in a new window.
- Step 2: Begin to pick the Unlock iOS Screen button in the new window to begin unlocking the screen of your iOS device. On the following screen, click the Start button to begin unlocking the iOS device.
Note: Ensure your device’s battery levels are enough before proceeding.

- Step 3: Following that, place your iDevice in Recovery Mode. Follow the on-screen instructions to set your iDevice into mode based on your phone model.
Note: If Recovery Mode does not work, try hitting the Try DFU Mode button at the bottom to access the instructions for putting the iDevice in DFU mode.
- Step 4: After successfully entering your device into Recovery Mode, the platform automatically recognizes the Device Model and shows it in the appropriate section. Modify the model and select the System Version to meet your needs if necessary. After that, select Start to begin unlocking your device’s screen.
- Step 5: The next screen shows the progress of your iOS firmware download. If at any point you decide you’d rather call it quits, hit the Stop button. If the iOS firmware takes a long time to download on your platform, you can copy the download link by clicking the Copy option.

- Step 6: After a successful download, the iOS firmware is checked and shown on the next screen. Select the Unlock Now option again to proceed with the unlocking procedure. A confirmation popup displays, requesting you to confirm the action. Enter the unlock code and press the Unlock button to continue.

- Step 7: You’ll see the unlocking status of your iOS device on the following screen. Don’t forget that keeping the gadget plugged in is necessary to avoid bricking it.
- Step 8: Click the Done button once the iDevice has been unlocked. If you’re still stuck with a locked iPhone, iPad, or iPod, select Try Again to retry the process.
By using Dr.Fone - Screen Unlock (iOS), you can regain access to your iOS device and continue with the process of changing your Apple ID email address hassle-free. It’s a reliable and user-friendly solution that ensures you can enjoy the benefits of the new email address without losing any of your precious data.
You May Also Like:
How to Show Email Password on iPhone and Find It Back
A Detailed Guide to Fix All iPad Email Problems [2023]
How to Fix Email Disappeared from iPhone?
Conclusion
This guide easily explored the process of changing your Apple ID email address. It started by understanding why this change might be necessary and provided straightforward methods for Mac, mobile, and browser users to accomplish it seamlessly.
But what if you’re locked out of your iOS device? Don’t fret; Dr.Fone - Screen Unlock (iOS) is a user-friendly tool that can help you regain access to your device. It ensures a smooth transition to your new email. Unlock new possibilities with Dr.Fone, a reliable companion in managing your iOS device. Explore its features and simplify your Apple journey today!
Also read:
- [Updated] The Ultimate Comparison VSDC Screen Recorder vs Other Leading Solutions for 2024
- 8 Safe and Effective Methods to Unlock Your iPhone 11 Pro Max Without a Passcode | Dr.fone
- Discovering ChatGPT Escape Routes: Advisable?
- Displacement Pumps Move a Fixed Volume of Fluid with Each Cycle, Providing a Consistent Flow Rate
- Fix Geforce ShadowPlay Install Failed Issue
- How to Fix Error 495 While Download/Updating Android Apps On Honor 100 | Dr.fone
- How To Unlock Apple iPhone 8 Without Passcode? 4 Easy Methods | Dr.fone
- In 2024, 3 Easy Ways to Factory Reset a Locked iPhone 6s Without iTunes | Dr.fone
- In 2024, 4 Ways to Unlock Apple iPhone XS to Use USB Accessories Without Passcode | Dr.fone
- In 2024, Can You Unlock iPhone 13 mini After Forgetting the Passcode? | Dr.fone
- In 2024, Forgot Locked Apple iPhone 11 Password? Learn the Best Methods To Unlock | Dr.fone
- In 2024, How to Unlock iPhone 14 Pro Max Passcode Screen? | Dr.fone
- In 2024, How to Use Zoom for Win10 PC
- In 2024, Nocturnal Tales on the Silver Screen
- Instagram Reels Strategy for Instant Success for 2024
- Remove Device Supervision From your Apple iPhone 8 Plus | Dr.fone
- Render Photos Add Inward Radiant Spread in Photoshop
- Trasforma File MPEG in Formato MJPEG Gratuitamente: Il Convertitore Video Migliore - Movavi
- Unlock Your Disabled Apple iPhone SE Without iTunes in 5 Ways | Dr.fone
- Title: In 2024, 5 Most Effective Methods to Unlock iPhone XS in Lost Mode | Dr.fone
- Author: Amelia
- Created at : 2025-02-24 20:31:07
- Updated at : 2025-03-04 05:04:32
- Link: https://iphone-unlock.techidaily.com/in-2024-5-most-effective-methods-to-unlock-iphone-xs-in-lost-mode-drfone-by-drfone-ios/
- License: This work is licensed under CC BY-NC-SA 4.0.