
In 2024, Complete Fixes To Solve Apple iPhone 12 mini Randomly Asking for Apple ID Password | Dr.fone
Complete Fixes To Solve Apple iPhone 12 mini Randomly Asking for Apple ID Password
Apple ID is a crucial part of the Apple ecosystem that enables users to access a wide range of services and applications. It is a unique identifier that links all Apple devices, services, and applications together.
However, sometimes iPhone users may encounter an annoying issue where their iPhone randomly asks for an Apple ID password without any apparent reason. This problem can be frustrating and disruptive! It can interrupt your workflow and prevent you from using your phone normally.
Fortunately, we have comprehensive solutions to help you resolve this persistent issue once and for all. Let’s dive in and return your device to its happy, non-nagging self!
Part 1: Common Causes for Random Apple ID Verification Pop Up
The random Apple ID verification pop-up can be caused by a range of factors, from simple settings misconfigurations to more complex account-related issues. So it’s important to identify the root cause to find the appropriate solution that addresses the underlying issue.
Take a closer look at these common reasons why your Apple iPhone 12 mini may be randomly asking for your Apple ID password:
- iOS Software Update****:
One of the most frequent causes of the Apple ID password prompts is when your Apple iPhone 12 mini has undergone a software update. The update may require you to re-verify your Apple ID credentials to ensure security and privacy.
- iCloud Account Settings****:
If the settings are not in sync with your Apple ID credentials or if there are inconsistencies, it can trigger repeated password prompts.
- App Store/iTunes Purchase****:
If there was an issue when you purchased or downloaded something, your Apple iPhone 12 mini might prompt you to verify your Apple ID to complete the purchase.
- iCloud Keychain****:
The iCloud Keychain is a feature that stores your passwords and other sensitive information across your Apple devices. If there are inconsistencies or conflicts with the iCloud Keychain data, it may prompt you to verify your Apple ID password.
- Network Connectivity****:
Sometimes, network connectivity issues can cause the Apple ID password prompts to appear repeatedly. If your Apple iPhone 12 mini is struggling to establish a stable internet connection, it may trigger verification prompts.
These are some of the common causes that can trigger the random Apple ID verification pop-up on your Apple iPhone 12 mini. Now, we’ll delve into the solutions to help you resolve this matter.
Part 2: Solutions To Stop iPhone Randomly Asking for Apple ID Password
After we’ve concluded the “Why does my iPhone keep asking for my apple ID” question, let’s explore solutions to help you end this annoyance. Here are eight methods that you can try to stop your Apple iPhone 12 mini from repeatedly asking for your Apple ID password:
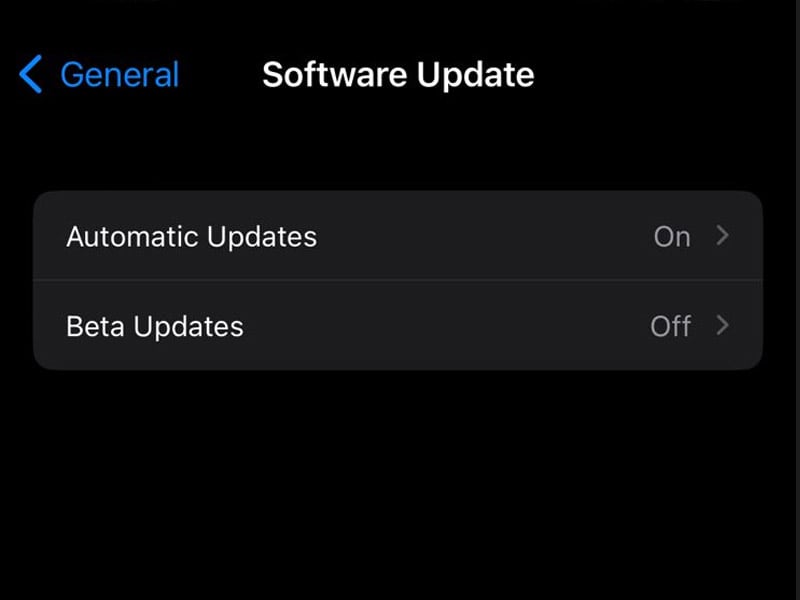
Method 1: Update iOS.
Ensure that your Apple iPhone 12 mini is operating on the most up-to-date iOS version. Software updates usually incorporate bug fixes and security improvements that can address the problem effectively.
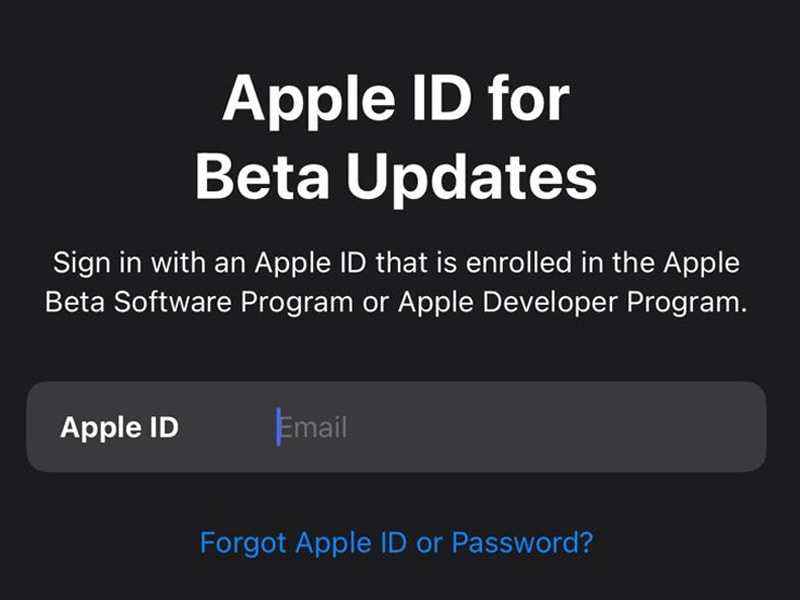
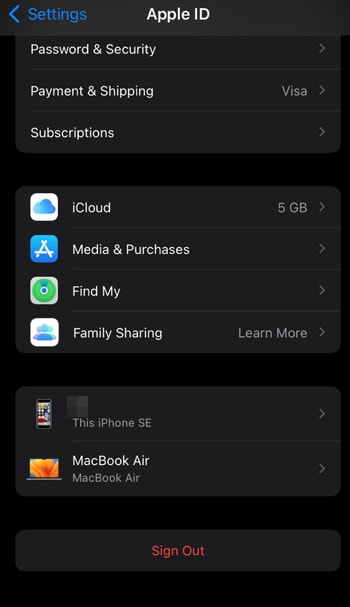
Method 2: Sign Out and Sign In to Apple ID.
Sign out and then sign back in your Apple ID. This method can refresh the credentials and resolve any authentication issues.
Method 3: Remove Apple ID with Wondershare Dr. Fone
If you forget your Apple ID and cannot access your device, Wondershare Dr. Fone’s Screen Unlock tool can help. This powerful tool lets you remove your Apple ID from your device, even if Find My Service is enabled.
Before we begin, it’s crucial to remember that this process will erase all data from the Apple iPhone 12 mini device. Now, follow the steps below if your iPhone keeps asking for an Apple ID password:
- Step 1: Launch the Dr. Fone Screen Unlock
Open Wondershare Dr. Fone on your computer and navigate to the Toolbox > Screen Unlock to activate the feature.
- Step 2: Choose Remove Apple ID
In the next window, select the option to Remove Apple ID to initiate the process of removing your Apple ID.

- Step 3: Connect Your Device
Link up your iOS device to the computer using a USB cable. The software will display the connectivity status on the next screen. Click the Unlock Now button to proceed.

- Step 4: Confirm Screen Lock and Two-Factor Authentication
The software will ask if your device has a screen lock. Confirm whether you have a screen lock enabled on your device by clicking Yes. Then, it will also confirm if your device has Two-Factor Authentication enabled.
- Step 5: Put Device in Recovery Mode
The program will display on-screen guidelines to help you put your device in Recovery Mode. Follow the instructions that match your iOS model. If it doesn’t work, you can also try DFU Mode by clicking Try DFU Mode on the bottom-left of the screen. Then, follow the instructions.

- Step 6: Recognize the Apple iPhone 12 mini device Model and Select System Version
Once your device is in Recovery Mode, you can see its details on the next screen. Then, select the System Version and Start to proceed. You can manually set the details if there are any differences in recognition.

- Step 7: Download iOS Firmware
The software will start downloading the corresponding iOS firmware. If the firmware download is slow, you can copy the link and download the iOS firmware.
- Step 8: Confirm the Prompt to Unlock
Once you download the firmware, it will be verified by the software. Click Unlock Now until a prompt window appears. It will ask you to enter a code to continue. Enter the code and click Unlock to start the process.

- Step 9: Monitor Apple ID Removal Progress
Keep your device connected and avoid any disconnections. Once the Apple ID is unlocked, the software will prompt the completion. Click Done to conclude the process. If the Apple ID is not unlocked, you can click Try Again.

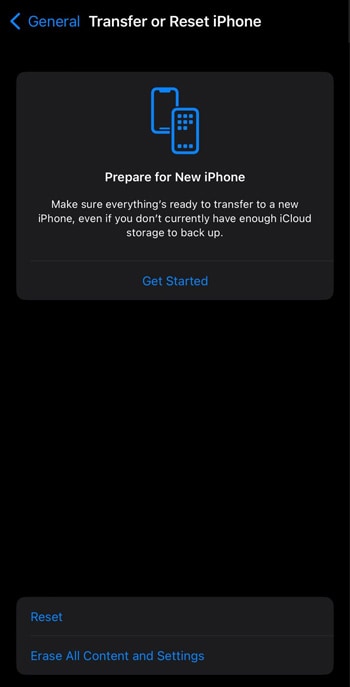
Method 4: Reset iCloud Account SettingsResetting your iCloud account settings can help clear any inconsistencies or conflicts that may be triggering the password prompts. Open Settings, and navigate to General > Transfer or Reset Phone > Reset.
Method 5: Check App Store/iTunes Purchase
Verify and complete any pending app purchases or downloads from the App Store or iTunes. If there was an issue with a previous transaction, resolving it can stop the password prompts.
Method 6: Disable iCloud Keychain
Turning off iCloud Keychain and then turning it back on can help refresh the data and resolve any syncing issues. Go to Settings > [Your Name] > iCloud > Keychain > Toggle off and on.

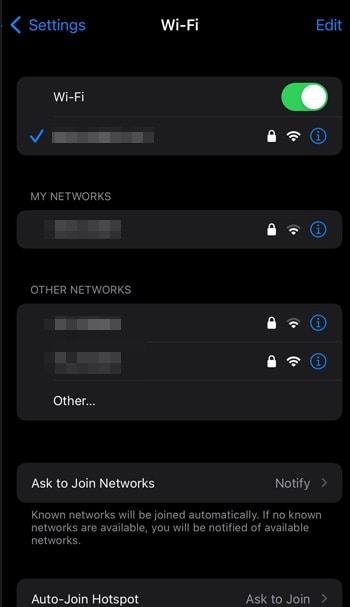
Method 7: Check Network Connectivity
Make sure that your Apple iPhone 12 mini has a reliable internet connection. Weak or unstable networks can trigger password prompts. Try to switch between different Wi-Fi networks or use cellular data.
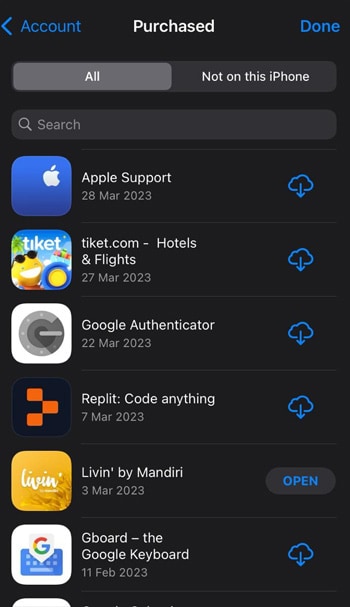
Method 8: Contact Apple Support
If none of the above methods work, contacting Apple Support can be a viable option. They can provide further assistance and guidance in resolving the issue.
These are some of the methods that can help you stop your Apple iPhone 12 mini from randomly asking for your Apple ID password. Don’t forget to always back up your data before changing your Apple iPhone 12 mini settings.
If the issue persists, it’s recommended to visit an authorized Apple service center.
Bonus Part: How To Get Your Apple ID Password Back if You Forget It
It’s not uncommon for people to forget their Apple ID password at times, especially with the ever-increasing number of online accounts we manage. But fret not! There are reliable password manager tools available, such as Dr.Fone Password Manager. It can help you handle this issue seamlessly and regain access to your Apple ID.
Let’s explore some of the Dr.Fone Password Manager tool:
- Password Recovery:
Allows you to recover your Apple ID password quickly and easily, even if you’ve forgotten it. With its intuitive interface and step-by-step guidance, you can reset your Apple ID password hassle-free.
- Data Security:
It prioritizes data security, ensuring that your Apple ID password and other credentials are securely stored and encrypted. It provides a safe and reliable way to manage passwords without compromising privacy.
- iCloud Backup and Restore:
It enables you to create a backup of your iCloud data, including your Apple ID password, and restore it whenever needed. This feature can be handy if you need to retrieve your password from a previous backup.
- Cross-Platform Compatibility:
It is compatible with various platforms, including iOS, Android, Windows, and Mac, making it a versatile password management solution that you can use across different devices.
If you forget your Apple ID password, Wondershare Dr.Fone can be a valuable tool to help you retrieve it and manage your passwords securely. Its features make it a comprehensive solution for handling password-related issues.
It’s essential to use secure and unique passwords for your accounts. Then, consider using a reliable password manager like Dr.Fone Password Manager to simplify your password management process.
How To Fix Auto Lock Greyed Out on Apple iPhone 12 mini
Auto-lock on iOS devices serves multiple purposes - it conserves battery life, secures your data, and more. But have you encountered the Auto-Lock greyed-out dilemma, fixed at 30 seconds? When this setting becomes inaccessible, it limits your control over screen timeout.
Read on if you’ve encountered a similar problem on your iOS device. In this guide, we’ll explore the possible reasons and offer steps to fix Auto-Lock greyed out on iPhone and iPad devices. If force restarts or settings resets haven’t worked for you, we’ve got alternative solutions. Let’s get started.

Part 1: Why Is Auto-Lock Greyed Out on iOS Device?
There are a few reasons why the Auto-Lock might be greyed out on your Apple iPhone 12 mini or iPad device, preventing you from adjusting the duration. Here are the most common culprits:
Low Power Mode
When you activate Low Power Mode on your iOS device, you might notice the screen automatically locking after 30 seconds of inactivity. This quick sleep setting, implemented to minimize power usage, explains why the Auto-Lock option appears greyed out and inaccessible.
Screen Time Restrictions
Screen Time restrictions can impact Auto-Lock. For instance, if your downtime schedule blocks all apps, the screen locks itself, even if the Auto-Lock timer hasn’t run out.

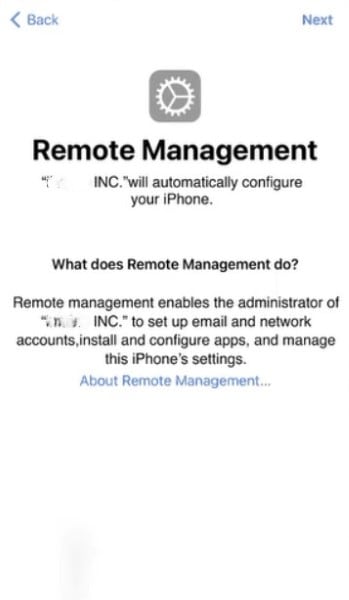
MDM Profile Restrictions
If the Auto-Lock is greyed out on your iPad or iPhone and you use it for work or school, a Mobile Device Management (MDM) profile might be the reason. This profile restricts settings, including Auto-Lock. To fix this, contact your IT administrator and ask if they can adjust the MDM profile settings.
Alright, you know the possible reasons why the Auto-Lock option is not working on your iOS device. Still, you might be wondering how to fix the Auto-Lock greyed-out issue. Below are several ways to get your iPad or iPhone Auto-Lock working normally again.
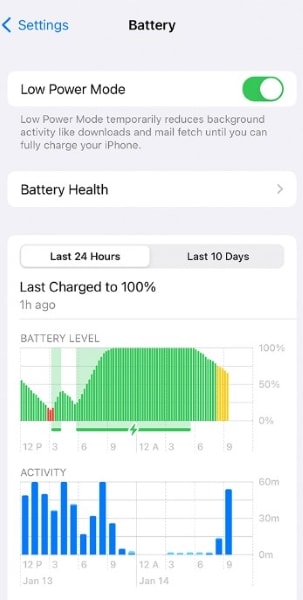
Fix No.1: Disable Low Power Mode
Your iPhone Auto-Lock greyed out because Low Power Mode limits background activities, including the Auto-Lock option. In this mode, you cannot change the Auto-Lock settings. Turn off Low Power Mode to fix this issue and choose your preferred timeout. Here’s how:
- Step 1: Go to your Apple iPhone 12 mini or iPad’s Settings app.
- Step 2: Scroll down and tap Battery. It will show you your device’s battery usage and available settings.
- Step 3: Turn off the Low Power Mode. Now, the greyed-out Auto-Lock option in Settings should be available again.

Low Battery Mode can stretch your battery life further. But if you need your screen to stay on longer, like while reading an article or watching a video, you can turn it off. It lets you adjust the screen timeout in Settings so it stays awake for as long as you like.
Fix No.2: Check Screen Time Restrictions
You’ve ruled out the Low Power Mode, but the Auto-Lock greyed out on iPad or iPhone remains. If Low Power Mode isn’t causing the problem, your screen time settings might be the issue. Some app restrictions can limit your screen use to specific times, causing it to lock automatically. Resolve this by removing limits, such as downtime and app restrictions, or turning it off.
- Step 1: Open the Settings app on your iOS device.
- Step 2: Go to Screen Time, then scroll down.
- Step 3: Tap Turn Off Screen Time.

Fix No.3: Remove MDM Configuration Profile
A configuration profile is a file that contains settings and restrictions that can be applied to an iOS device. Organizations, schools, or IT administrators often use it to manage devices remotely and enforce specific configurations. Once installed, the settings within a profile override the Apple iPhone 12 mini device’s default settings. It can include restrictions related to security, network access, app usage, and more.
Since an MDM configuration profile causes limitations, like the greyed-out Auto-Lock on iPad, removing it can be the solution. Doing so frees your iOS device from external settings imposed by the profile. Then, it could allow you to adjust the Auto-Lock time setting as you normally would.
Step 1: See the configuration profiles you installed on your iOS device.
Go to Settings> General > VPN & Device Management on your Apple iPhone 12 mini.
Go to Settings> General > Profiles & Device Management on your iPad.
Step 2: Select the configuration profile you need to delete.
Step 3: Tap Remove Profile, enter your device passcode, then tap Remove.

Fix No.4: Remove Network Settings Installed by MDM
Businesses often use Mobile Device Management (MDM) to remotely manage their employees’ iPhones and iPads. MDM lets IT admins push software updates, restrict apps, and remotely wipe a lost device. This keeps corporate data safe and devices under control, whether the company or the employee owns them.
If you’re having trouble with a greyed-out Auto-Lock timeout setting, disassociating your device from MDM might be an option. But remember, this is a big step. Make sure you follow your company’s authorized procedures to avoid unintended consequences.
If your IT team gives the green light, you might also be able to remove the network settings installed by MDM. Just proceed with caution, as messing with these settings could lead to instability or data loss. Here’s how:
- Step 1: Open the Settings app on your iOS device.
- Step 2: Navigate to General > Profile or VPN & Device Management (or a similar section).
- Step 3: Select the management and tap Remove Management.

If the option is unavailable, only the person who used Apple Configurator 2 or handles your company’s mobile device management platform can remove it.
Fix No.5: Use Dr.Fone To Bypass MDM Lock Without Data Loss
Unfortunately, manually removing profiles can be tricky, especially if they’re associated with MDM, Apple School Manager, or supervised configurations. These often require the removal of passwords, admin privileges, or complete data wipes. But there’s good news. Wondershare Dr.Fone - Screen Unlock (iOS) provides a simpler and safer solution.
Here’s why you should try it:
- **Speedy and Efficient:**No more endless troubleshooting. Dr.Fone bypasses the MDM lock in minutes, saving you precious time.
- **Data Stays Safe:**Unlike factory resets, Dr.Fone keeps all your precious photos, messages, and apps right where they belong.
- **No Jailbreaking:**Say goodbye to complex hacks and warranty voiding. Dr.Fone works without jailbreaking your Apple iPhone 12 mini, keeping it healthy and secure.
- **Universal Compatibility:**Whether you own the latest iPhone with iOS 17 or an older version, Dr.Fone has your back. It supports all iOS devices and versions starting from iOS 7.0.
Have you ever bought a used iPad or Apple iPhone 12 mini to find the Auto-Lock option greyed out and isn’t working? Mobile Device Management (MDM) profiles, often deployed by companies or schools, can restrict functionality. If you lack the credentials to bypass or remove it, Dr.Fone can help remove all MDM restrictions on your iOS device. Here’s how:
- Step 1: Download and open Dr.Fone on your computer. Next, connect your Apple iPhone 12 mini or iPad to the computer using a USB cable and navigate to Toolbox > Screen Unlock > iOS.

Tips: Are you searching for a powerful Screen Unlock tool? No worries as Dr.Fone is here to help you. Download it and start a seamless unlock experience!
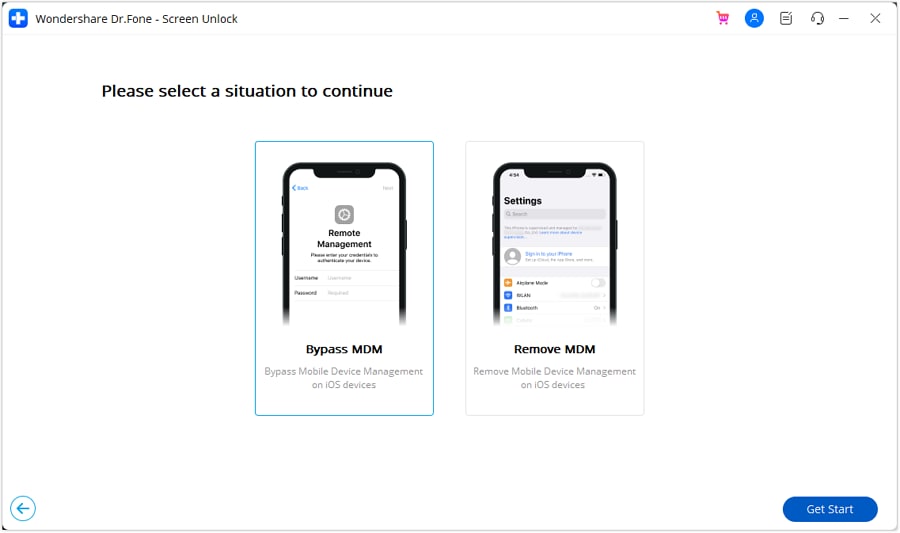
- Step 2: Within the Screen Unlock tool window, select Unlock MDM iPhone.

- Step 3: Select Bypass MDM, then click Get Start to proceed.
- Step 4: Please review the message carefully before initiating the MDM bypass process. Once you’ve read it, click Start to Bypass to proceed.

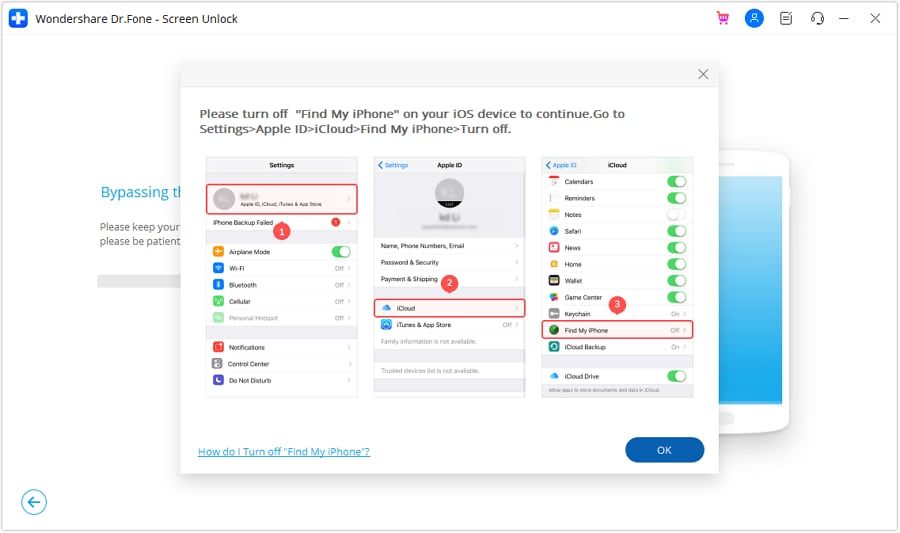
- Step 5: If prompted, go to your device’s Settings > Apple ID > iCloud and turn off the Find My feature. Next, click OK to initiate the MDM bypass.
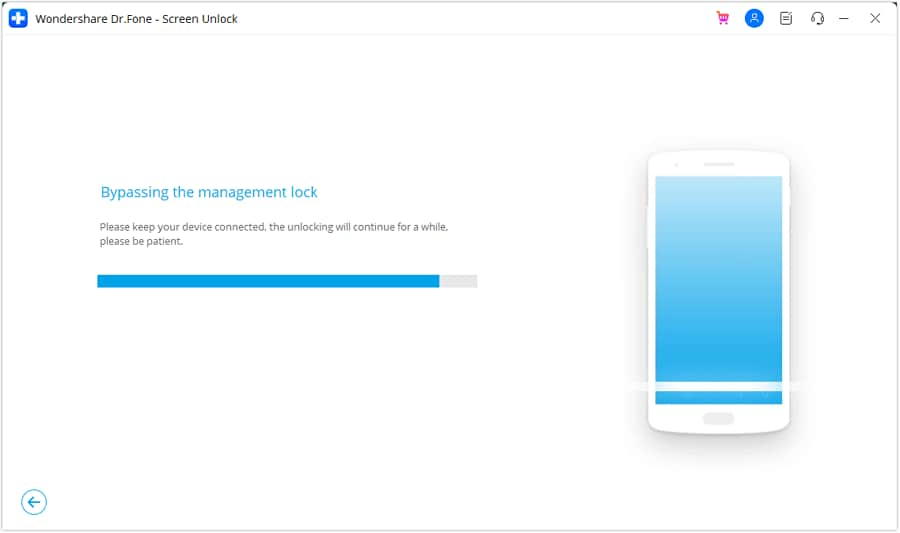
- Step 6: The software will display the progress of the bypass. Wait for it to complete.
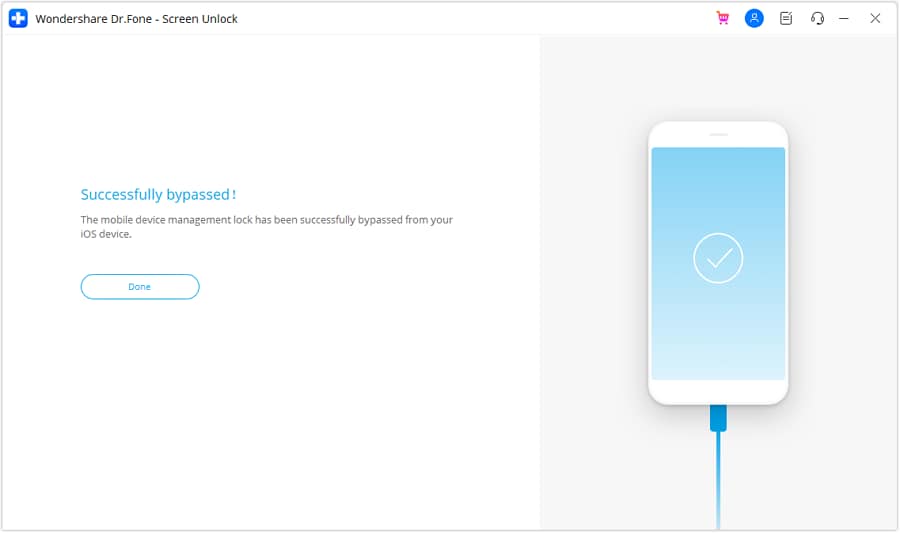
- Step 7: You’ll see a confirmation message once the bypass is successful. Click Done to exit. Your device should now be free from MDM restrictions.
Fix No.6: Check and Adjust Auto-Lock Settings
Once you’ve tried all the fixes above, you might need to set up the Auto-Lock timeout again.
- Setup Auto-Lock on iPad
Here are the steps on how to change Auto-Lock on iPad devices:
- Step 1: Within the Settings app, scroll down the list on the left-hand side and tap Display & Brightness.
- Step 2: On the right-hand side of the Display & Brightness screen, tap the Auto-Lock option.

- Step 3: A list of time options will appear, ranging from 2 minutes to 15 minutes, as well as Never. Select the time you want your iPad to wait before automatically locking the screen after inactivity. If you want the screen to stay on indefinitely, choose Never.

Step 4: Once you’ve selected your preferred auto-lock duration, you can exit the Settings app. The change will be applied automatically.
- Setup Auto-Lock on iPhone
Here’s how to change Auto-Lock on iPhone devices:
- Step 1: Open the Settings app.
- Step 2: Tap on Display & Brightness, scroll down, and tap Auto-Lock.
- Step 3: Choose the desired time interval for your Apple iPhone 12 mini to automatically lock. The available options typically range from 30 seconds to 5 minutes. You may also have the option to select Never if you prefer to have the screen stay on indefinitely until you manually lock it.

Conclusion
There you have it. This guide has equipped you with the knowledge and solutions to fix the Auto-Lock greyed out on your Apple iPhone 12 mini or iPad devices. From identifying the reasons like Low Power Mode and MDM configurations to implementing actionable fixes, you can now change your screen timeout. So, turn off those restrictions, remove MDM profiles, and head back to Settings.
For an easy solution, use Dr.Fone Screen Unlock to bypass MDM restrictions, giving you control over your device. Whether it’s a work phone or a personal device under MDM, Dr.Fone can offer an efficient solution. With a few clicks, you’ll have the Auto-Lock back on track, ensuring your iOS device works again just how you want it.
Tips: Are you searching for a powerful Screen Unlock tool? No worries as Dr.Fone is here to help you. Download it and start a seamless unlock experience!
Guide on How To Change Your Apple ID Email Address On Apple iPhone 12 mini
Your Apple ID email is the key to your digital world with Apple devices. It’s the address Apple recognizes you by, allowing you to access your apps, music, and more. But sometimes, life brings changes, and your Apple ID email may need an update.
This guide will take you through the simple process of changing your Apple ID email address, ensuring it’s easy to understand every step. Explore why you might want to make this change, shedding light on common scenarios where this adjustment can enhance your Apple experience. So dive in and explore!

Part I: Why Change Your Apple ID Email?
Your Apple ID email helps you access your apps, music, and more. But sometimes, you might need to change it for simple reasons. Let’s look at why you might want to change your Apple ID email in easy-to-understand terms.
- Your email address is part of your identity. Changing it to something that better suits you can make your Apple experience more personal.
- If you think someone else knows your old email password, changing it can keep your Apple account safer. A fresh email means a new layer of security.
- Maybe you used an old email you don’t want to use anymore. Changing it lets you keep your personal life separate from your Apple stuff.
- **Email Problems.**If your old email is full of spam or not working well, switching to a new one is a good idea. You’ll get a cleaner and more reliable inbox.
- **Sharing Devices.**If you share Apple devices with someone and want to keep your stuff separate, changing your Apple ID email can help you do that easily.
- Using a more professional email address for your Apple ID can make a better impression when using Apple services for work or business.
These are the simple reasons why you might want to change your Apple ID email. It’s all about making your Apple experience better, safer, and more suited to your needs.
Part II: Step-by-Step Guide: How to Change Apple ID Email
Before you jump into changing your Apple ID email address, there’s an essential step to take. Just like you’d secure your valuables before embarking on a journey, backing up your device before going through the email change process is vital. This step ensures that none of your precious data is lost during the transition.
A. How To Change Your Apple Email Address on Various Devices
Now, let’s explore three different methods of how to change your Apple ID email address, tailored to various user preferences.
Method 1: For Mac Users
If you’re a Mac enthusiast, changing your Apple ID email is straightforward:
- Step 1: Click the Apple logo at the top left corner of your screen.
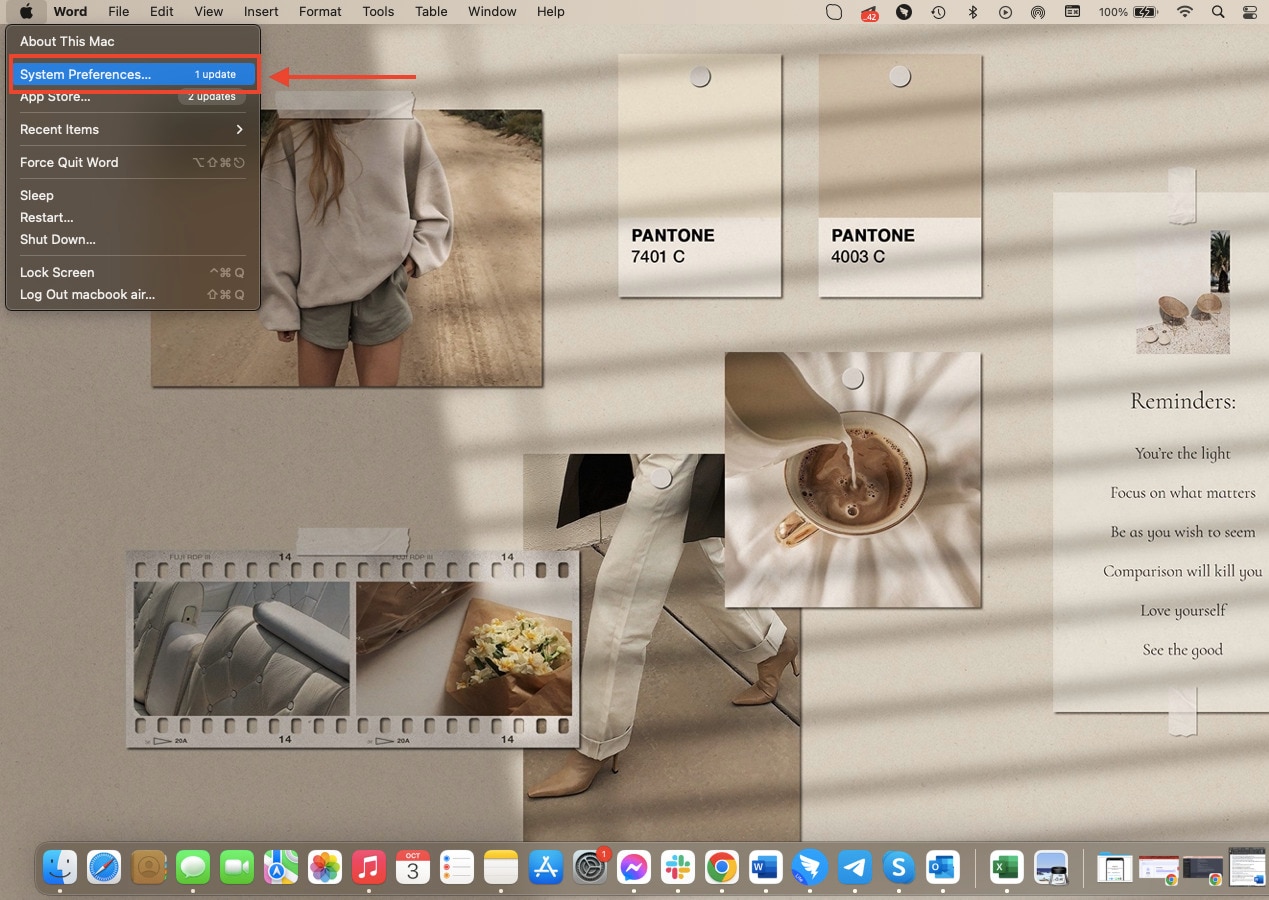
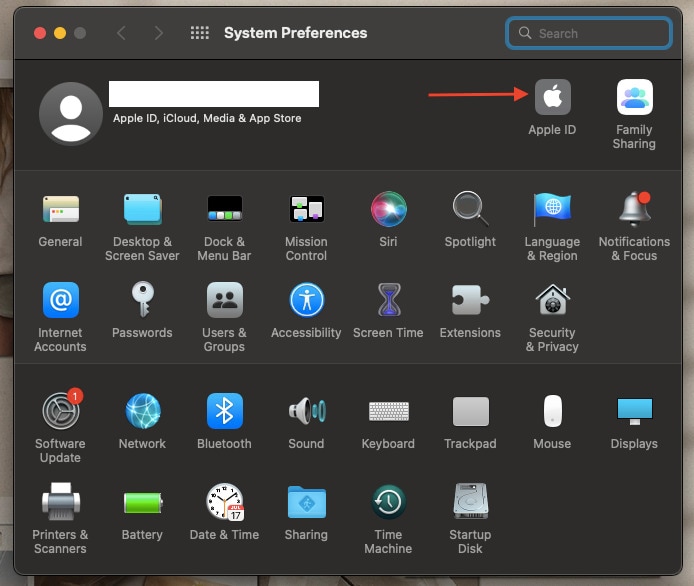
- Step 2: Click System Preferences, and then select Apple ID.
- Step 3: Navigate to the Name, Phone, Email section, then click Edit next to your email address.
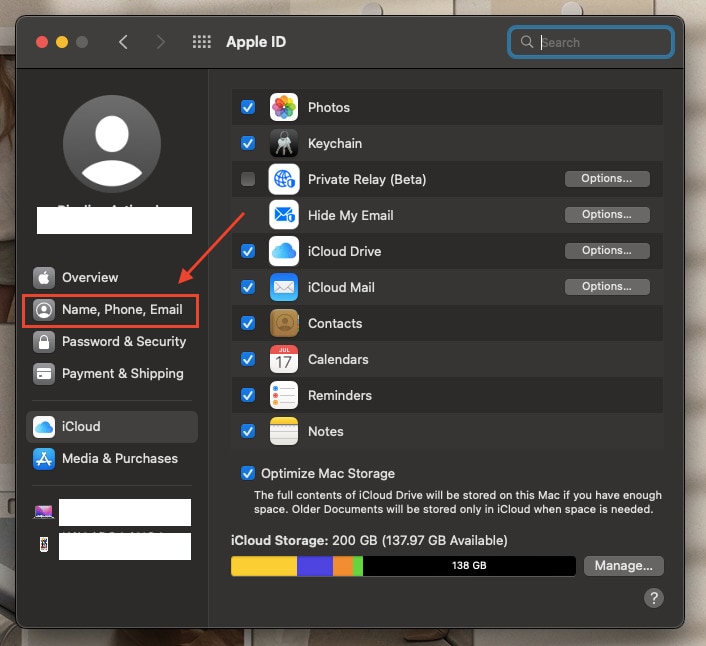
- Step 4: Input your new email address, and Apple will send a verification code to it.
- Step 5: Check your new email for the verification code, enter it, and voilà! Your Apple ID email is updated on your Mac.
Method 2: For Mobile Device Users
For those who prefer the convenience of mobile devices:
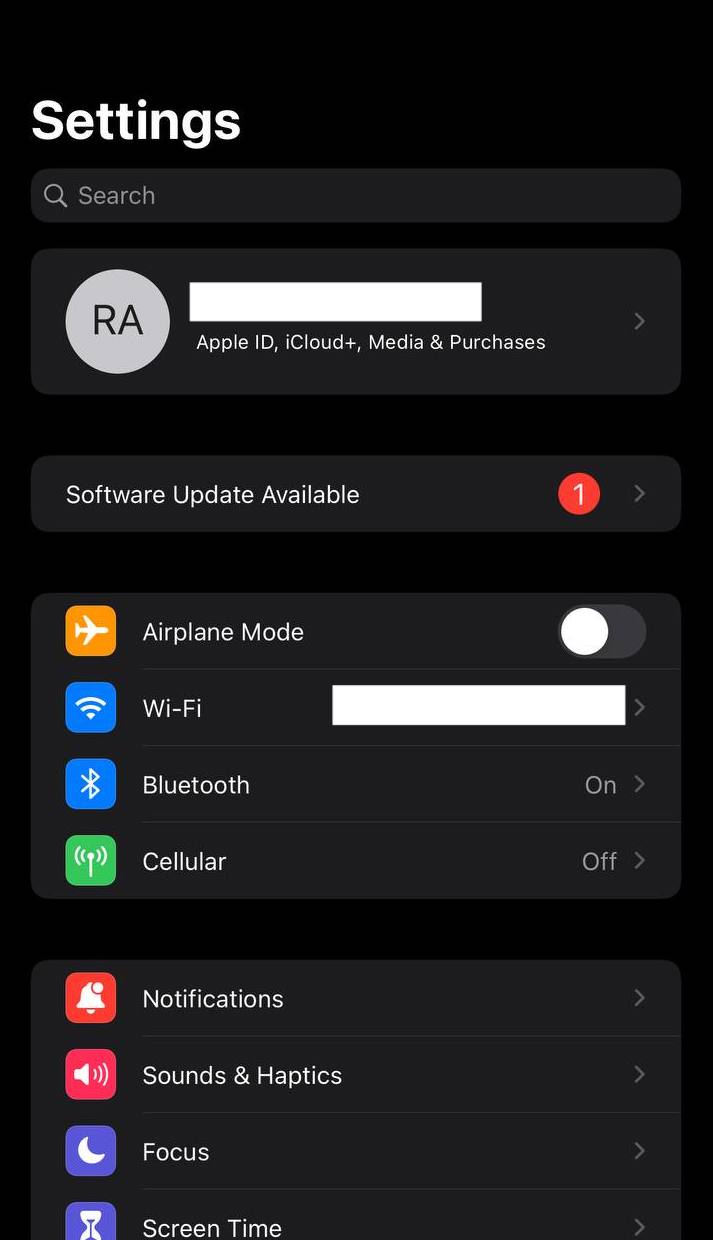
- Step 1: Open the Settings app on your Apple iPhone 12 mini or iPad, then tap your Apple ID at the top of the screen.
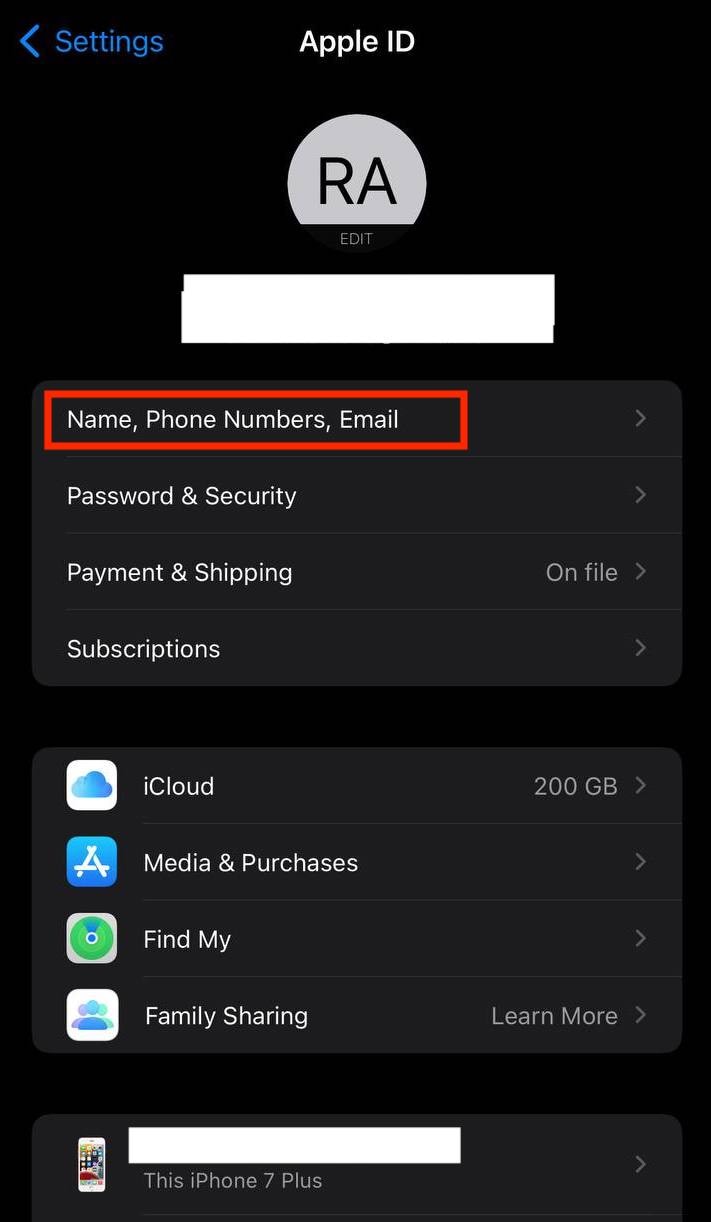
- Step 2: Tap Name, Phone Numbers, Email.
- Step 3: Tap Edit next to your email address, enter your new one, then tap Next.
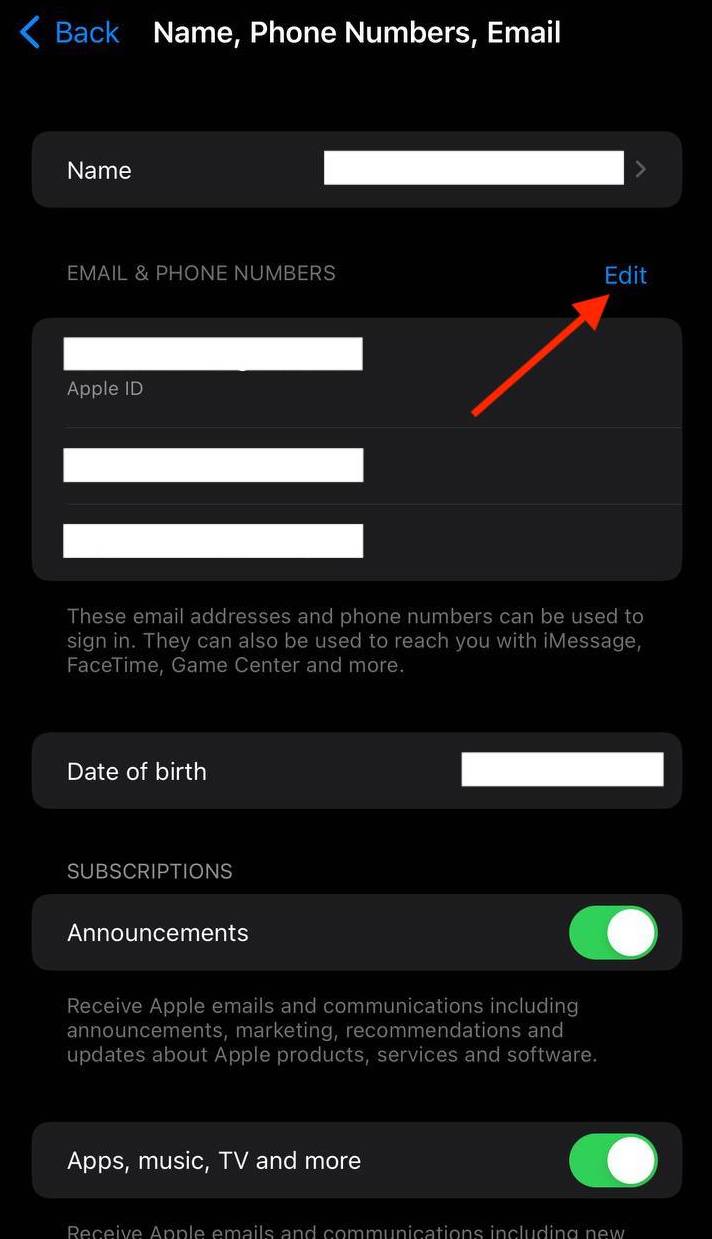
- Step 4: Apple will send a verification code to the new email. Enter it, and your Apple ID email on your mobile device is updated.
Method 3: For Browser Users
If you prefer the simplicity of a web browser:
- Step 1: Open the web browser your prefer and go to the Apple ID account management page.
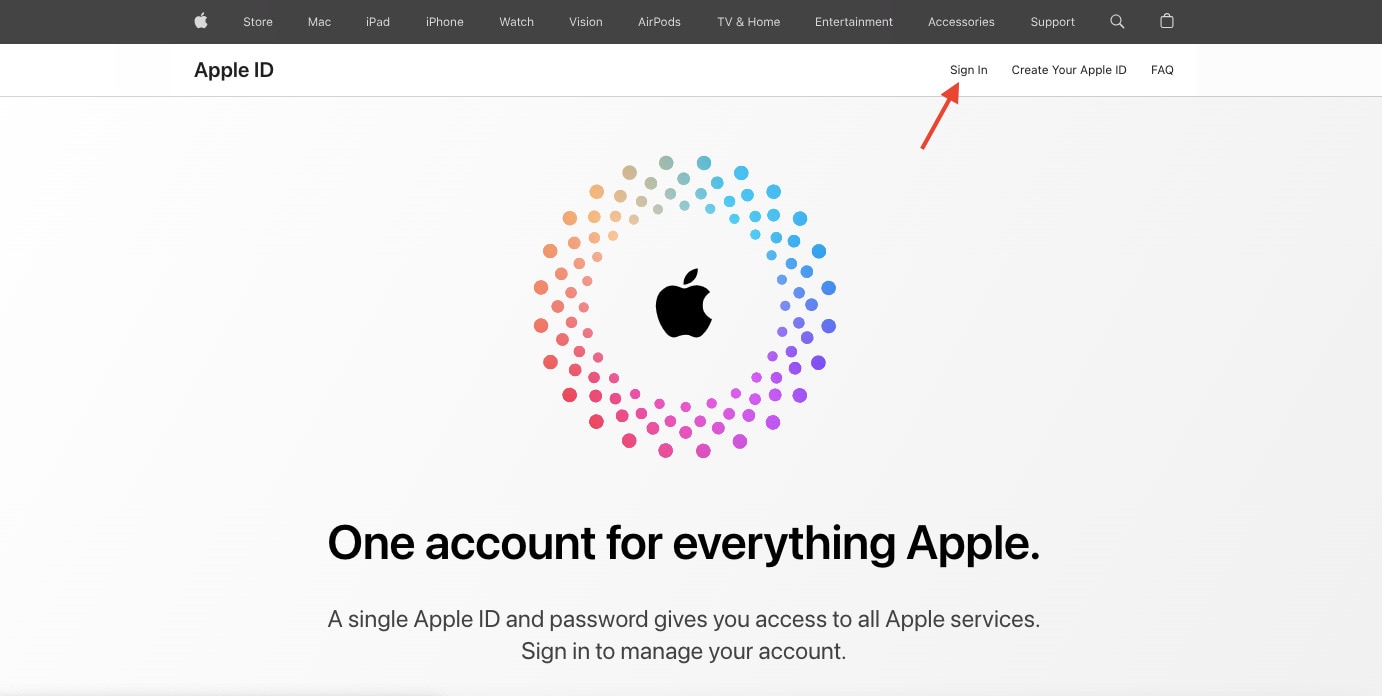
- Step 2: Click Sign In and tap your Email or Phone Number and Password.
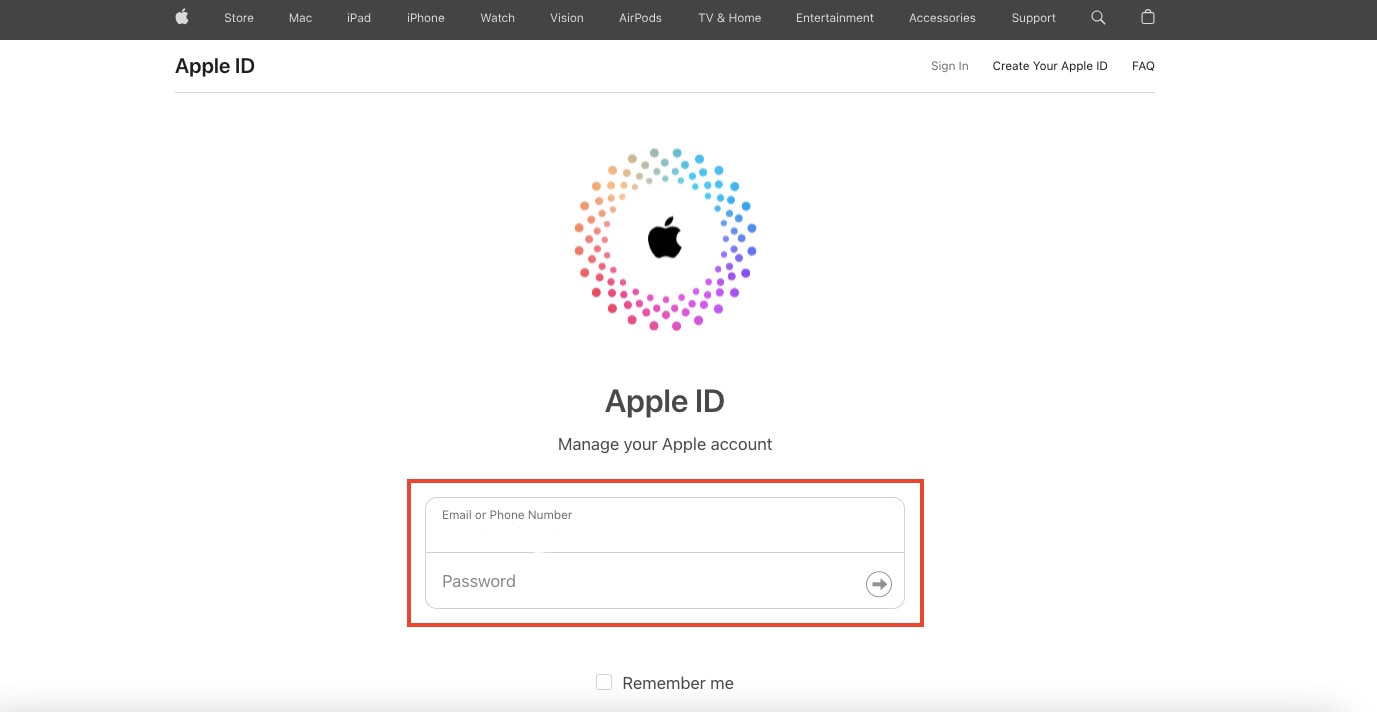
- Step 3: Click Edit next to your email address in the Account section.
- Step 4: Input your new email address and click Continue.
- Step 5: A verification code will be sent to your new email. Enter it to confirm your email change.
B. Updating Your Apple ID
Now that you’ve successfully changed your Apple ID email, it’s crucial to ensure that all your Apple devices are on the same page:
- Step 1: Tap the Settings application on your Apple iPhone 12 mini or iPad.
- Step 2: Go to Update Apple ID Settings below your Apple ID settings.
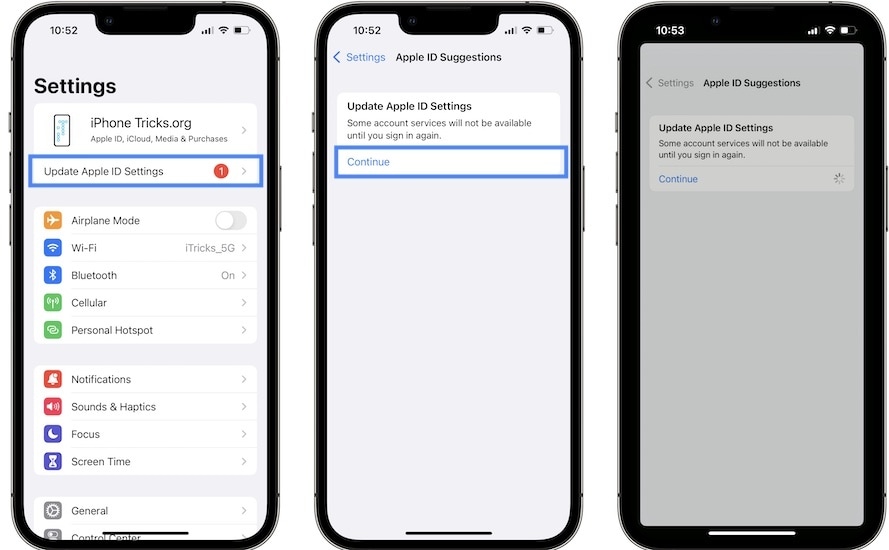
- Step 3: Tap Continue, then wait for a few moments. Your Apple ID will then get updated.
By following these steps, you’ll ensure that all your Apple devices are synced with your updated email address, providing a seamless and consistent Apple experience across all your gadgets. Now, with your new Apple ID email, you’re ready to explore the Apple ecosystem with renewed convenience and security.
Part III: Unlock iOS Screen With Wondershare Dr.Fone - Screen Unlock (iOS)
What if you find yourself in a situation where you want to change your Apple ID email address on your iOS device, but you’re locked out? Don’t worry; Dr.Fone - Screen Unlock (iOS) can rescue you. This handy tool is designed to help you unlock your iOS device, allowing you to change your Apple ID email address smoothly.
Key Features of Dr.Fone - Screen Unlock (iOS)
Check out the key features that Dr.Fone has to offer:
- **User-Friendly Interface.**Fone - Screen Unlock (iOS) is designed to be easy to use, making it accessible for users of all levels of technical expertise.
- It fits a wide range of iOS devices, including iPhones and iPads, ensuring that you can unlock your device no matter which one you have.
- **Multiple Unlock Modes.**Fone offers different unlock modes to cater to various scenarios. Whether you’ve forgotten your passcode, have a disabled device, or are dealing with a locked Apple ID, Dr.Fone has a solution.
- **No Data Loss.**One of the most significant advantages of Dr.Fone is that it unlocks your device without causing any data loss. Your photos, apps, and important information remain intact.
Step-by-Step Guide on Using Dr.Fone - Screen Unlock (iOS)
Outlined below is the step-by-step guide on how to use Dr.Fone – Screen Unlock for iOS devices:
- Step 1: When you’ve finished downloading and installing Wondershare Dr.Fone on your computer, go to Toolbox, then Screen Unlock, and choose iOS to open the tool in a new window.
- Step 2: Begin to pick the Unlock iOS Screen button in the new window to begin unlocking the screen of your iOS device. On the following screen, click the Start button to begin unlocking the iOS device.
Note: Ensure your device’s battery levels are enough before proceeding.

- Step 3: Following that, place your iDevice in Recovery Mode. Follow the on-screen instructions to set your iDevice into mode based on your phone model.
Note: If Recovery Mode does not work, try hitting the Try DFU Mode button at the bottom to access the instructions for putting the iDevice in DFU mode.

- Step 4: After successfully entering your device into Recovery Mode, the platform automatically recognizes the Device Model and shows it in the appropriate section. Modify the model and select the System Version to meet your needs if necessary. After that, select Start to begin unlocking your device’s screen.
- Step 5: The next screen shows the progress of your iOS firmware download. If at any point you decide you’d rather call it quits, hit the Stop button. If the iOS firmware takes a long time to download on your platform, you can copy the download link by clicking the Copy option.

- Step 6: After a successful download, the iOS firmware is checked and shown on the next screen. Select the Unlock Now option again to proceed with the unlocking procedure. A confirmation popup displays, requesting you to confirm the action. Enter the unlock code and press the Unlock button to continue.

- Step 7: You’ll see the unlocking status of your iOS device on the following screen. Don’t forget that keeping the gadget plugged in is necessary to avoid bricking it.
- Step 8: Click the Done button once the iDevice has been unlocked. If you’re still stuck with a locked iPhone, iPad, or iPod, select Try Again to retry the process.

By using Dr.Fone - Screen Unlock (iOS), you can regain access to your iOS device and continue with the process of changing your Apple ID email address hassle-free. It’s a reliable and user-friendly solution that ensures you can enjoy the benefits of the new email address without losing any of your precious data.
You May Also Like:
How to Show Email Password on iPhone and Find It Back
A Detailed Guide to Fix All iPad Email Problems [2023]
How to Fix Email Disappeared from iPhone?
Conclusion
This guide easily explored the process of changing your Apple ID email address. It started by understanding why this change might be necessary and provided straightforward methods for Mac, mobile, and browser users to accomplish it seamlessly.
But what if you’re locked out of your iOS device? Don’t fret; Dr.Fone - Screen Unlock (iOS) is a user-friendly tool that can help you regain access to your device. It ensures a smooth transition to your new email. Unlock new possibilities with Dr.Fone, a reliable companion in managing your iOS device. Explore its features and simplify your Apple journey today!
Also read:
- [New] In 2024, Harmonious Messages on WhatsApp Status
- [Updated] Getting Unstuck Troubleshooting Absent FB Vids
- [Updated] Turn Viewers Into Vendors Yielding Wealth with YouTube Analytics for 2024
- 2024 Approved The Art of Polishing and Personalizing Drone Videos
- 3 Ways to Erase Apple iPhone 13 Pro When Its Locked Within Seconds | Dr.fone
- 4 Quick Ways to Transfer Contacts from Apple iPhone 12 mini to iPhone With/Without iTunes | Dr.fone
- 8 Safe and Effective Methods to Unlock Your iPhone 12 Pro Without a Passcode | Dr.fone
- Essential Methods to Securely Accept Card Payments in Your Startup, According to Industry Experts
- Expert Tips for Fixing Apple AirPods Microphone Glitches in Windows 11
- How to Fix Apple iPhone SE (2022) Passcode not Working? | Dr.fone
- In 2024, 5 Most Effective Methods to Unlock iPhone 13 in Lost Mode | Dr.fone
- In 2024, Easy Steps on How To Create a New Apple ID Account On Apple iPhone 15 Pro | Dr.fone
- In 2024, How Many Attempts To Unlock Apple iPhone 13 mini | Dr.fone
- In 2024, How to Reset a Locked Infinix Smart 7 Phone
- In 2024, Things You Should Know When Unlocking Total Wireless Of iPhone XR | Dr.fone
- Preserving Perfection: A Guide to Transcode-Free DVD Ripping
- Things You Should Know When Unlocking Total Wireless Of iPhone 14 Plus | Dr.fone
- Title: In 2024, Complete Fixes To Solve Apple iPhone 12 mini Randomly Asking for Apple ID Password | Dr.fone
- Author: Amelia
- Created at : 2024-12-31 17:03:00
- Updated at : 2025-01-06 02:59:15
- Link: https://iphone-unlock.techidaily.com/in-2024-complete-fixes-to-solve-apple-iphone-12-mini-randomly-asking-for-apple-id-password-drfone-by-drfone-ios/
- License: This work is licensed under CC BY-NC-SA 4.0.