
In 2024, How To Change Country on App Store for Apple iPhone 8 With 7 Methods | Dr.fone
How To Change Country on App Store for Apple iPhone 8 With 7 Methods
Changing your App Store country can give you access to apps that are not available in your region. Whether getting region-specific apps, accessing exclusive content, or switching to a country with better app offerings, it’s a valuable capability.
The article below guides you through seven methods on how to change the country of your App Store.Following the guide ensures access to a world of apps and content tailored to your preferences. Keep reading the page below to achieve this.

Part 1. Pros and Cons of Changing Your App Store Country
Changing your App Store country on your Apple iPhone 8 can offer various benefits, but it also comes with certain drawbacks. It’s necessary to consider the pros and cons before making this decision.
Pros
- **Access to Region-Specific Apps.**Different countries have unique apps tailored to their markets. By changing your App Store country, you can access apps that might not be available in your current region. For example, some popular Chinese and Japanese apps are unavailable in the US App Store. If you want to use these apps, you will need to change your App Store country.
- **Getting App Updates.**Sometimes, apps receive updates and features in certain regions before others. Changing your App Store country can give you early access to these updates, improving your app experience. For example, a gaming app might first release new levels or features in select countries.
- **Access Exclusive Content.**Some apps and content are exclusive to certain countries. By switching your App Store country, you can enjoy movies, music, or TV shows unavailable in your current region. For instance, certain Netflix shows are restricted to specific countries due to licensing agreements.
Cons
- **Loss of Access to Purchases.**If you’ve made purchases in your current App Store country, changing it can result in losing access to those purchases. The loss includes paid apps, in-app purchases, and subscriptions. For example, if you switch from the US to the UK store, you may lose access to US-specific subscriptions.
- **Offload Apps.**When you change your App Store country, your device may prompt you to offload apps that are not available in your new region. This can be inconvenient if you rely on specific apps for daily use. For instance, a banking app may be region-specific and unavailable in your new country.
- **Family Sharing Issues.**If you’re part of a Family Sharing group, changing your App Store country can affect the access and sharing of purchased apps and subscriptions. Family members may lose access to content tied to your previous country. For example, if you switch from the UK to the US store, your family members might no longer have access to UK-specific content.
Part 2. Different Methods to Change Your App Store Country
Changing your App Store country can be done through various methods. Below are different ways to achieve that, along with step-by-step instructions for each technique.
Method 1: Changing Apple ID Region via iPhone
It is the most common and straightforward way to change your App Store country. To do this, follow these steps:
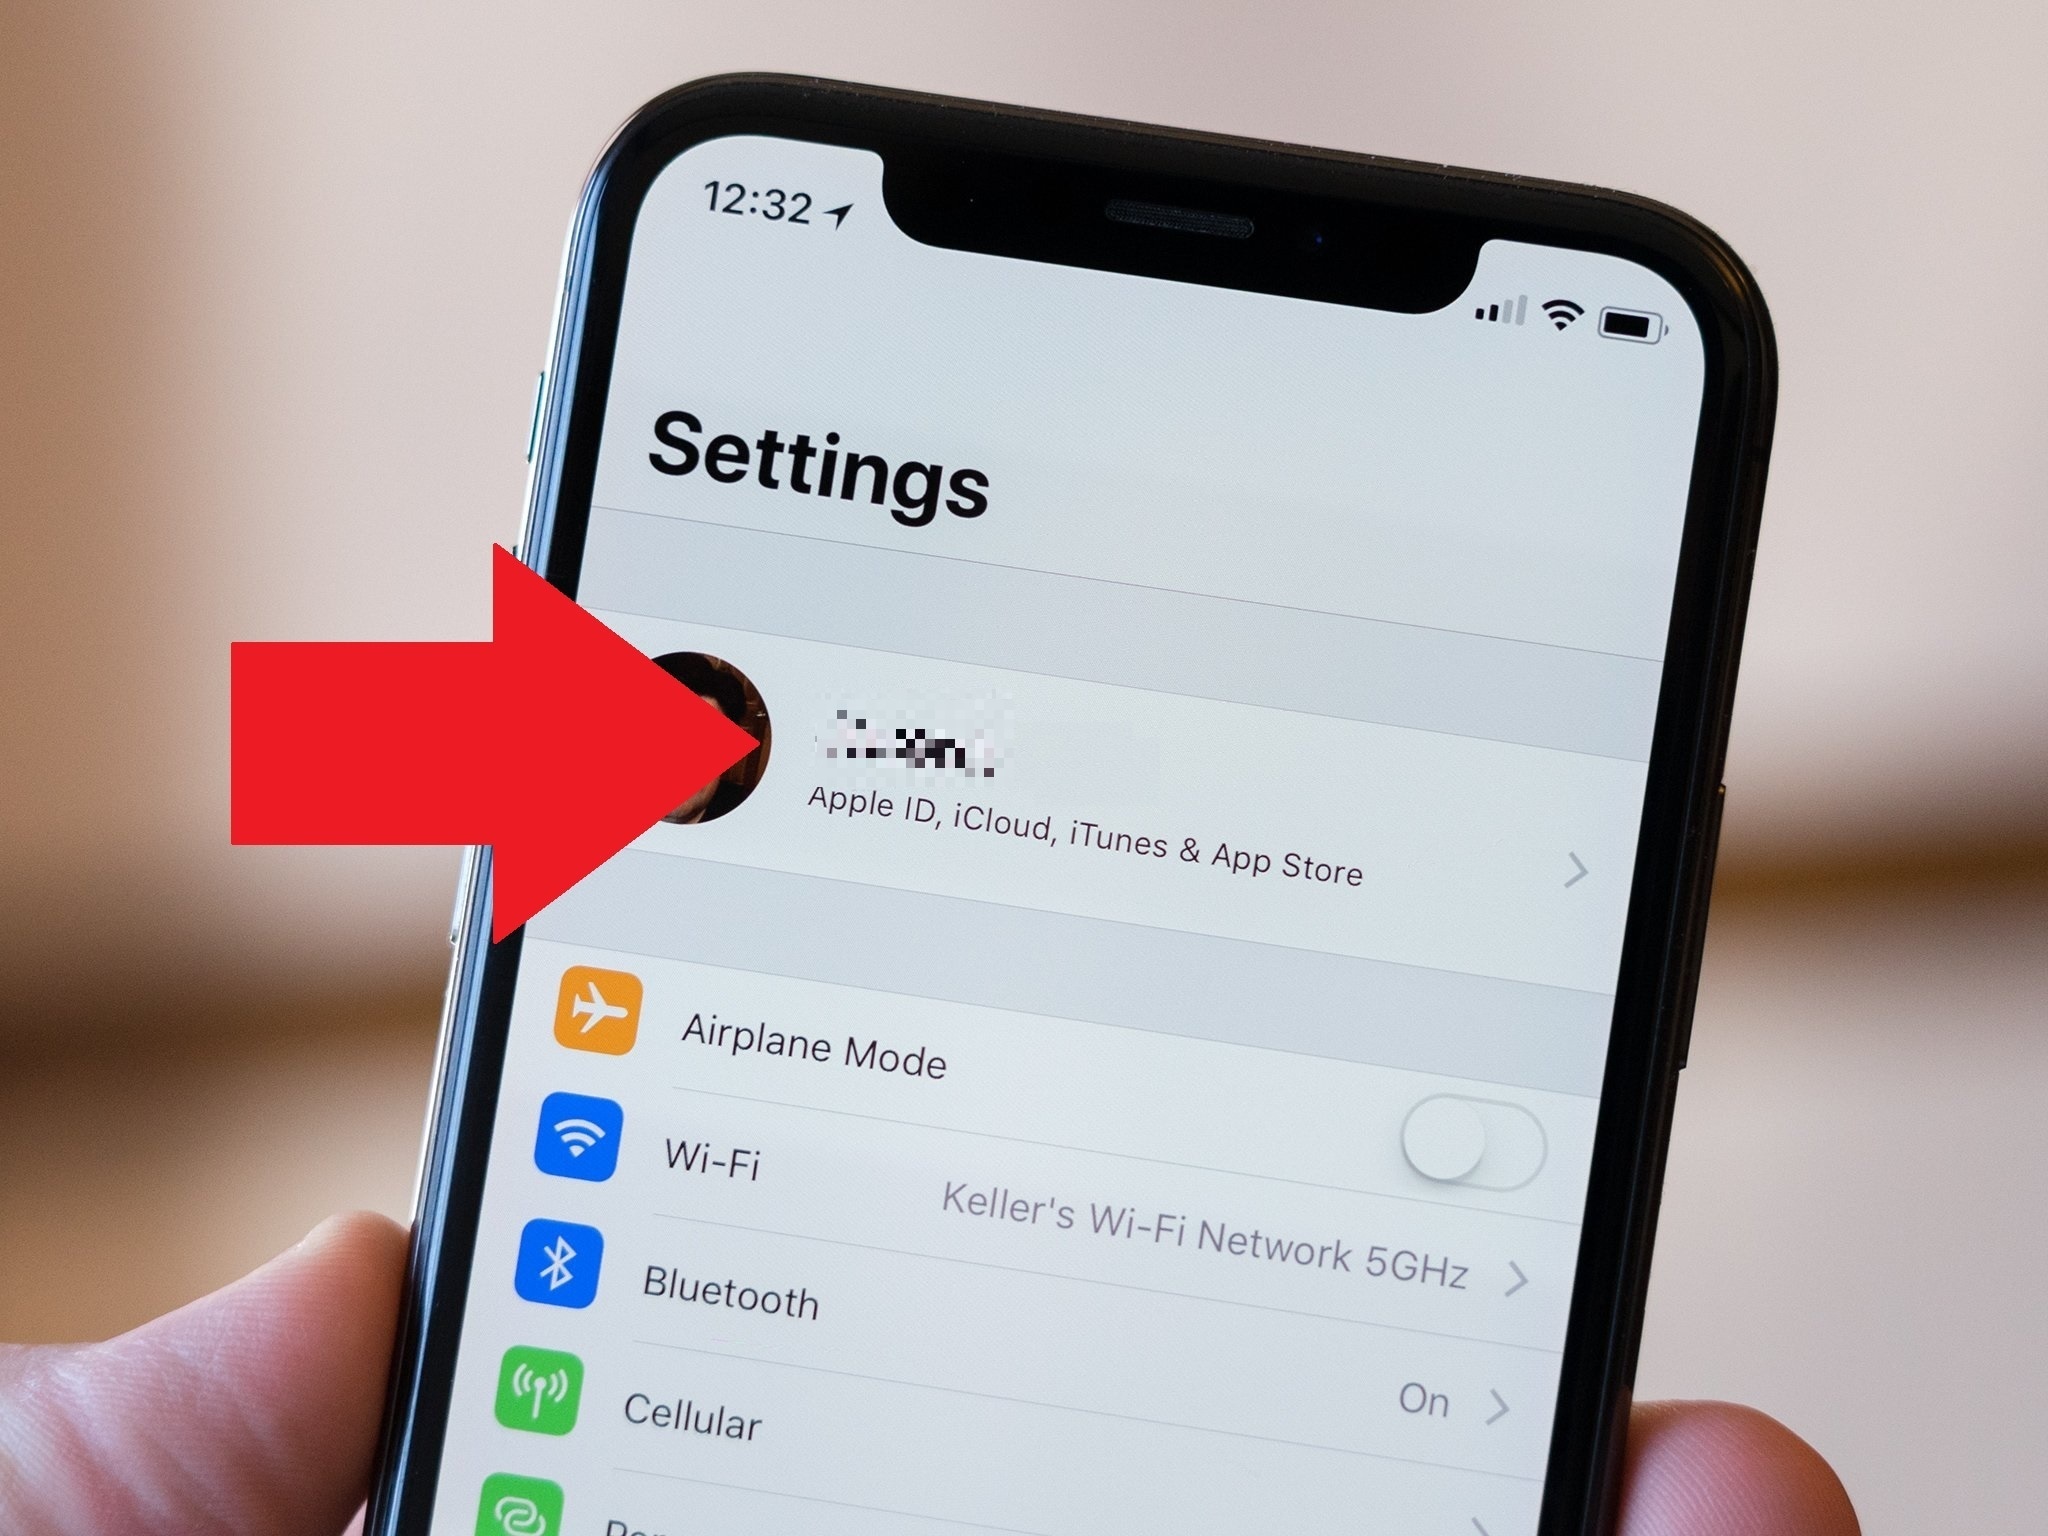
- Step 1: Open Settings on your Apple iPhone 8 and tap your Apple ID at the top.
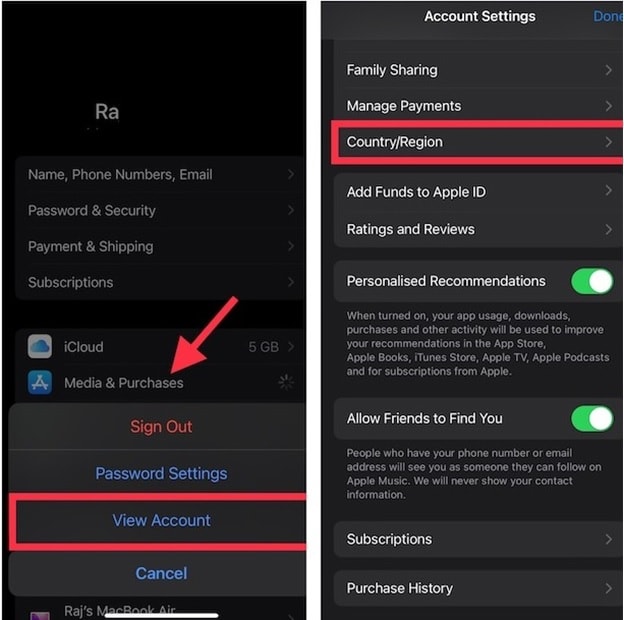
- Step 2: Tap on Media & Purchases > View Account. Sign in with your Apple ID. Next, Tap Country/Region > Change Country or Region and choose your desired country. Follow the on-screen prompts.
Method 2: Changing Apple ID Region via Mac/Windows
To change your Apple ID region via Mac/Windows, follow these steps:
- Step 1: Open iTunes (on Windows) or Music (on Mac). Sign in with your Apple ID.
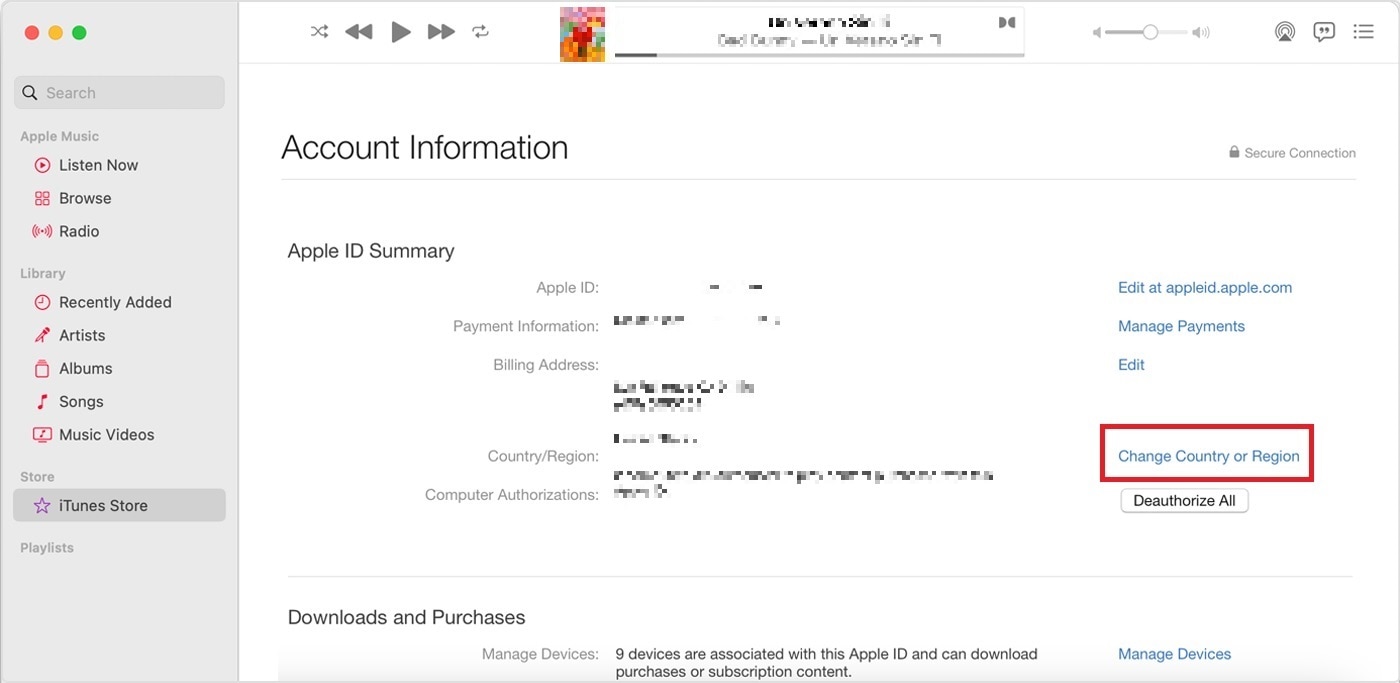
- Step 2: Go to Account > View My Account. Under Apple ID Summary, click Change Country or Region. Click your desired country and follow the instructions.
Method 3: Changing Apple ID Region via Web
The steps below are to change your Apple ID region via the web.
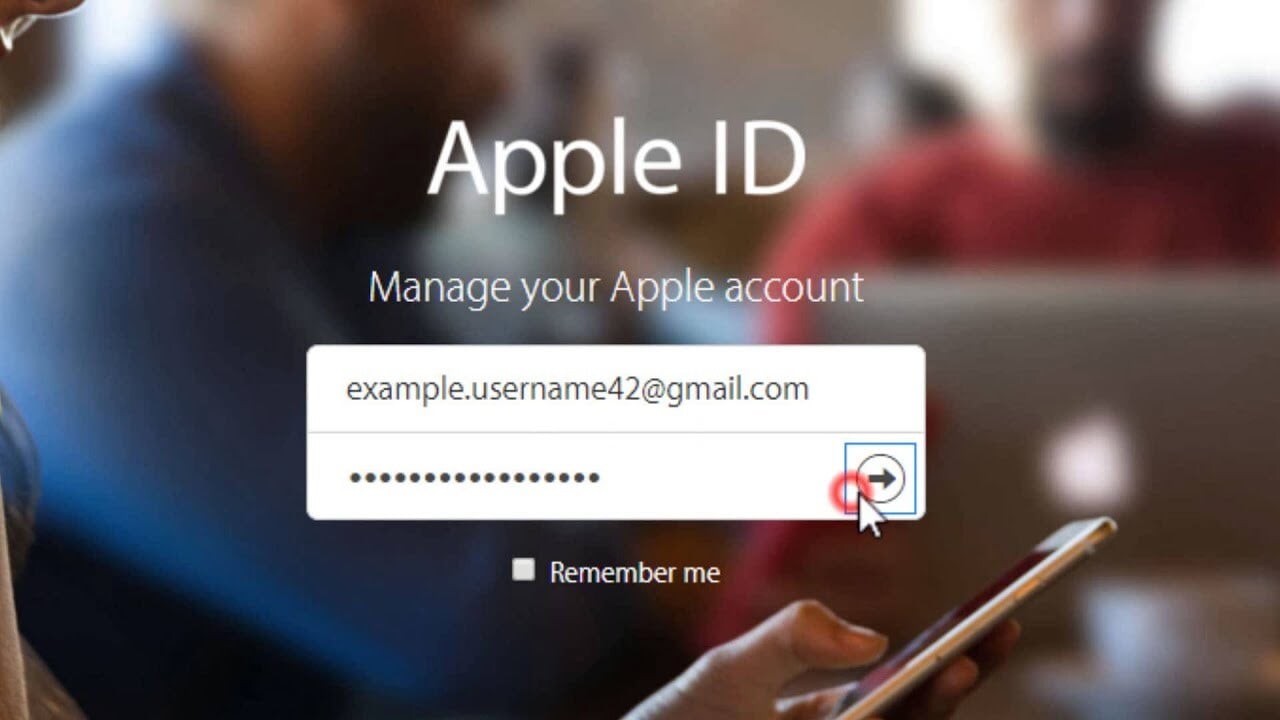
- Step 1: Open a web browser on your desktop or mobile device. Next, go to appleid.apple.com. Sign in with your Apple ID.
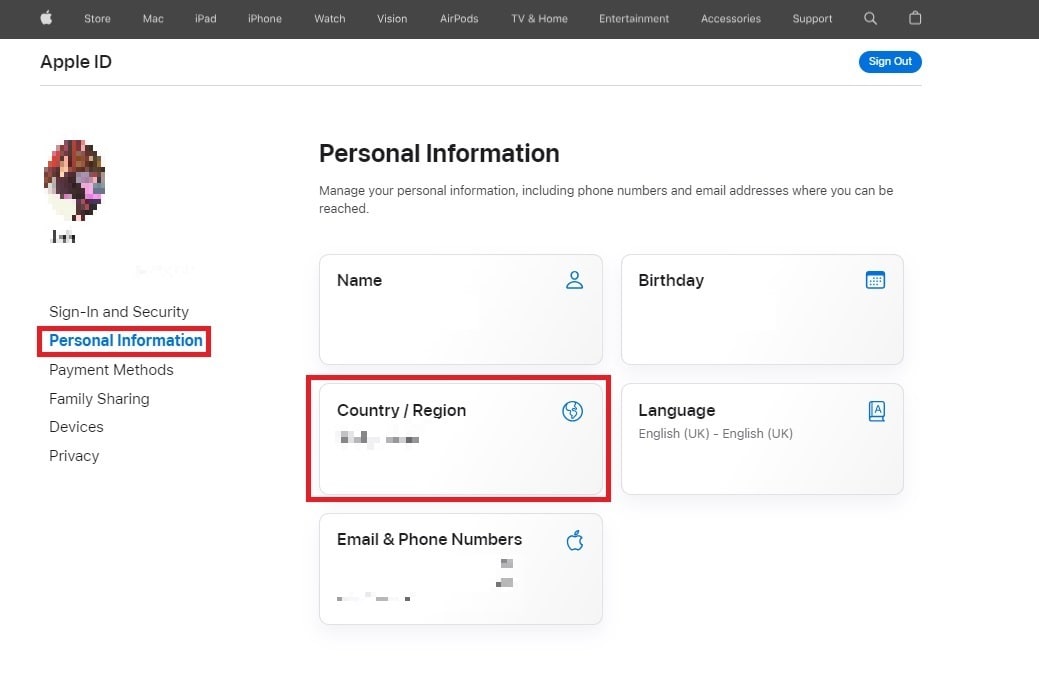
- Step 2: Under Personal Information, click the Country/Region button. Next, click the Change country or region and choose your preferred country.
Method 4: Leaving a Family-Sharing Group
If you’re part of a family sharing group, you need to leave the group before you can change your App Store country. To leave a family sharing group and change your app store country, follow the steps below.
- Step 1: Open the Settings app on your Apple iPhone 8 and tap Family.
- Step 2: Tap your name and tap Stop Using Family Sharing. Once you have left the family sharing group, you can change your App Store country by following the aforementioned manners.

Method 5: Cancel All Subscriptions
If you have any subscriptions, you must cancel them before changing your App Store country. Here are the steps below.
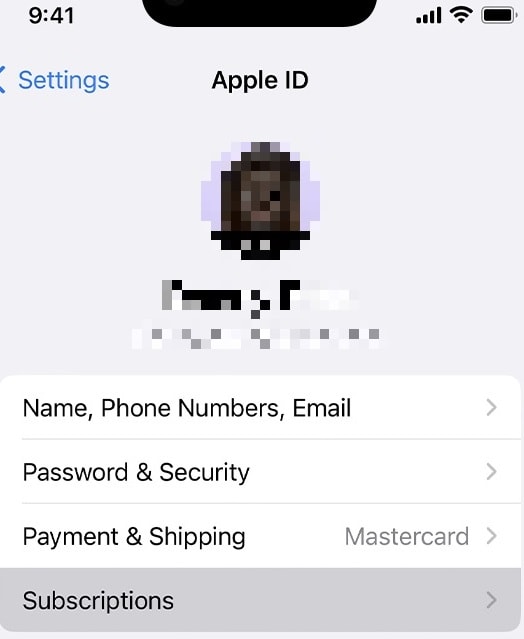
- Step 1: Open Settings on your Apple iPhone 8. Next, tap your name at the top of the screen.
- Step 2: Tap Subscriptions > Cancel Subscription. Once you cancel all of your subscriptions, you can change your App Store country.

Method 6: Using a VPN
You can also use a VPN to change your App Store country. However, this method is not recommended, as it can be unreliable and may result in your account being banned. Here are the steps below.
- Step 1: Install a VPN app from the App Store.
- Step 2: Connect to a server in your desired country. Open the App Store and see content from the connected country.
Method 7: Creating a New Apple ID
Finally, you can create a new Apple ID account with the country you want your App Store country to be. Here are the steps below.
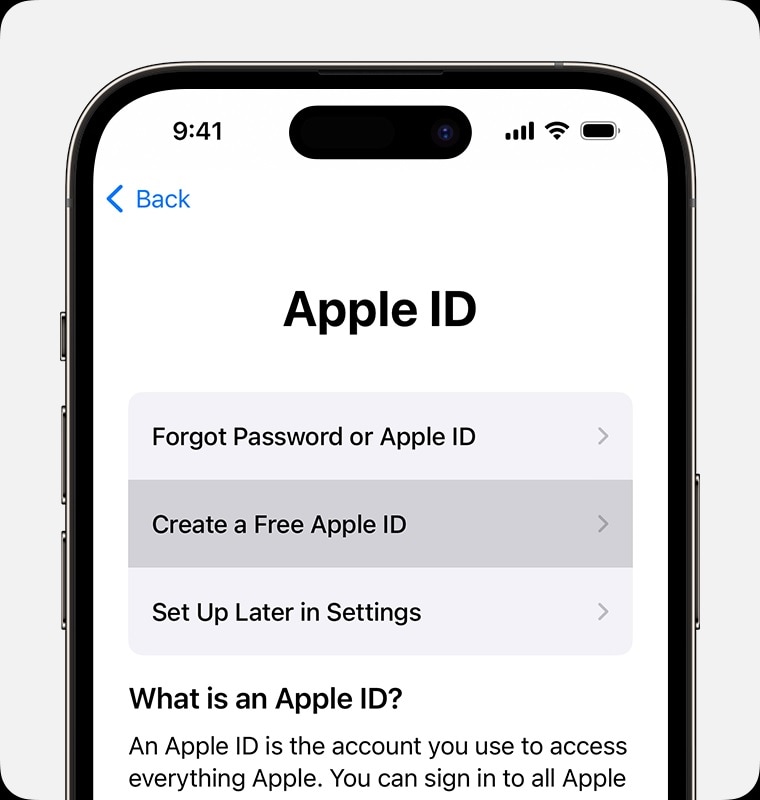
- Step 1: Sign out of your current Apple ID in Settings.
- Step 2: Create a new Apple ID with your desired country as the region.
Sometimes, changing your App Store country can lead to issues. It can lock you out of your Apple ID, or you’re forgetting your password. During these events, it can restrict your App Store access. In such cases, a tool like Dr.Fone - Screen Unlock (iOS) can come to the rescue.
Part 3. Changing Countries Not Going Your Way? Use Wondershare Dr.Fone – Screen Unlock
Dr.Fone - Screen Unlock (iOS) helps you regain access to your Apple ID and fix any login-related problems. It ensures that you can continue enjoying your App Store without any hindrance. It’s a safe and reliable software tool that is used by millions of people to unlock their devices. It is also easy to use, even if you are not tech-savvy.

Key Features
Dr.Fone - Screen Unlock (iOS) is a powerful tool that can help you to:
- **Unlock iOS Device Without Passcode.**Regain access to your locked iPhone or iPad without needing the passcode.
- **Remove All Lock Screen Types.**Versatile unlock support for 4-digit/6-digit passcodes, Touch ID, and Face ID lock screens.
- **Unlock Apple ID Without Password.**Effortlessly unlock your Apple ID without requiring the password, simplifying access.
How To Unlock Your Apple iPhone 8 in Seconds
Dr.Fone’s Screen Unlock tool offers a streamlined solution to get you back into your device within seconds. Here’s a simple guide on how to do it.
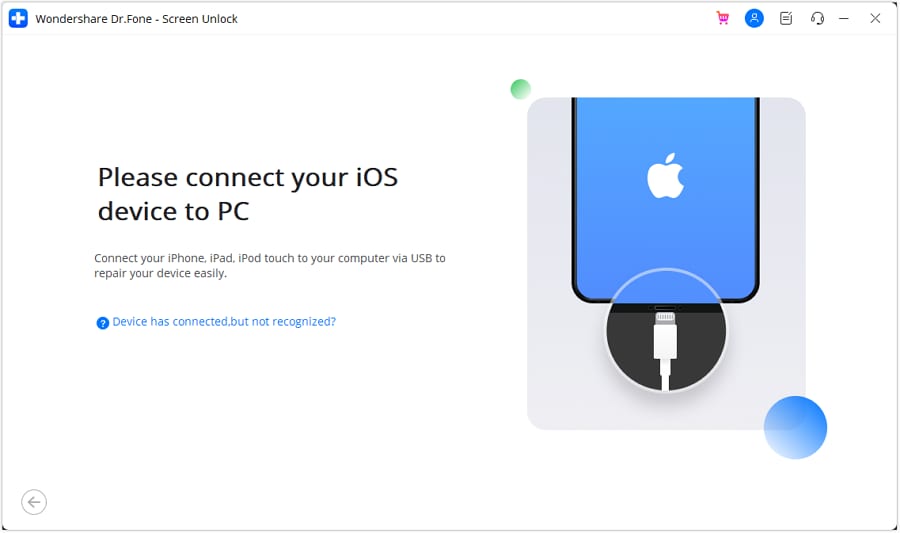
- Step 1: Download Dr.Fone - Screen Unlock (iOS) on your computer and install it. Next, launch the app.
- Step 2: Connect your locked Apple iPhone 8 to your computer using a compatible USB cable. Afterward, click Start on the program. Follow the on-screen prompts on Dr.Fone. It will tell you to boot differently into DFU mode. Once your device enters DFU mode, Dr.Fone will present device details, including phone generation, iOS version, and more.
- Step 3: Dr.Fone will download the necessary firmware for your device. Follow the on-screen instructions to finish the unlocking process. Once done, Dr.Fone will remove the activation lock from your device.

Conclusion
Changing your App Store country can open doors to region-specific apps, exclusive content, and timely updates. However, it’s important to consider the potential drawbacks, such as losing previous purchases.
When changing the App Store country on your Apple iPhone 8, it’s important to consider Apple ID access issues. You never know when you will get locked out or suddenly forget your password. Wondershare Dr.Fone - Screen Unlock (iOS) offers a reliable solution during these instances. The tool ensures uninterrupted access to your App Store and Apple ID account, making it a valuable resource for managing your digital experience seamlessly.
Guide on How To Change Your Apple ID Email Address On Apple iPhone 8
Your Apple ID email is the key to your digital world with Apple devices. It’s the address Apple recognizes you by, allowing you to access your apps, music, and more. But sometimes, life brings changes, and your Apple ID email may need an update.
This guide will take you through the simple process of changing your Apple ID email address, ensuring it’s easy to understand every step. Explore why you might want to make this change, shedding light on common scenarios where this adjustment can enhance your Apple experience. So dive in and explore!

Part I: Why Change Your Apple ID Email?
Your Apple ID email helps you access your apps, music, and more. But sometimes, you might need to change it for simple reasons. Let’s look at why you might want to change your Apple ID email in easy-to-understand terms.
- Your email address is part of your identity. Changing it to something that better suits you can make your Apple experience more personal.
- If you think someone else knows your old email password, changing it can keep your Apple account safer. A fresh email means a new layer of security.
- Maybe you used an old email you don’t want to use anymore. Changing it lets you keep your personal life separate from your Apple stuff.
- **Email Problems.**If your old email is full of spam or not working well, switching to a new one is a good idea. You’ll get a cleaner and more reliable inbox.
- **Sharing Devices.**If you share Apple devices with someone and want to keep your stuff separate, changing your Apple ID email can help you do that easily.
- Using a more professional email address for your Apple ID can make a better impression when using Apple services for work or business.
These are the simple reasons why you might want to change your Apple ID email. It’s all about making your Apple experience better, safer, and more suited to your needs.
Part II: Step-by-Step Guide: How to Change Apple ID Email
Before you jump into changing your Apple ID email address, there’s an essential step to take. Just like you’d secure your valuables before embarking on a journey, backing up your device before going through the email change process is vital. This step ensures that none of your precious data is lost during the transition.
A. How To Change Your Apple Email Address on Various Devices
Now, let’s explore three different methods of how to change your Apple ID email address, tailored to various user preferences.
Method 1: For Mac Users
If you’re a Mac enthusiast, changing your Apple ID email is straightforward:
- Step 1: Click the Apple logo at the top left corner of your screen.
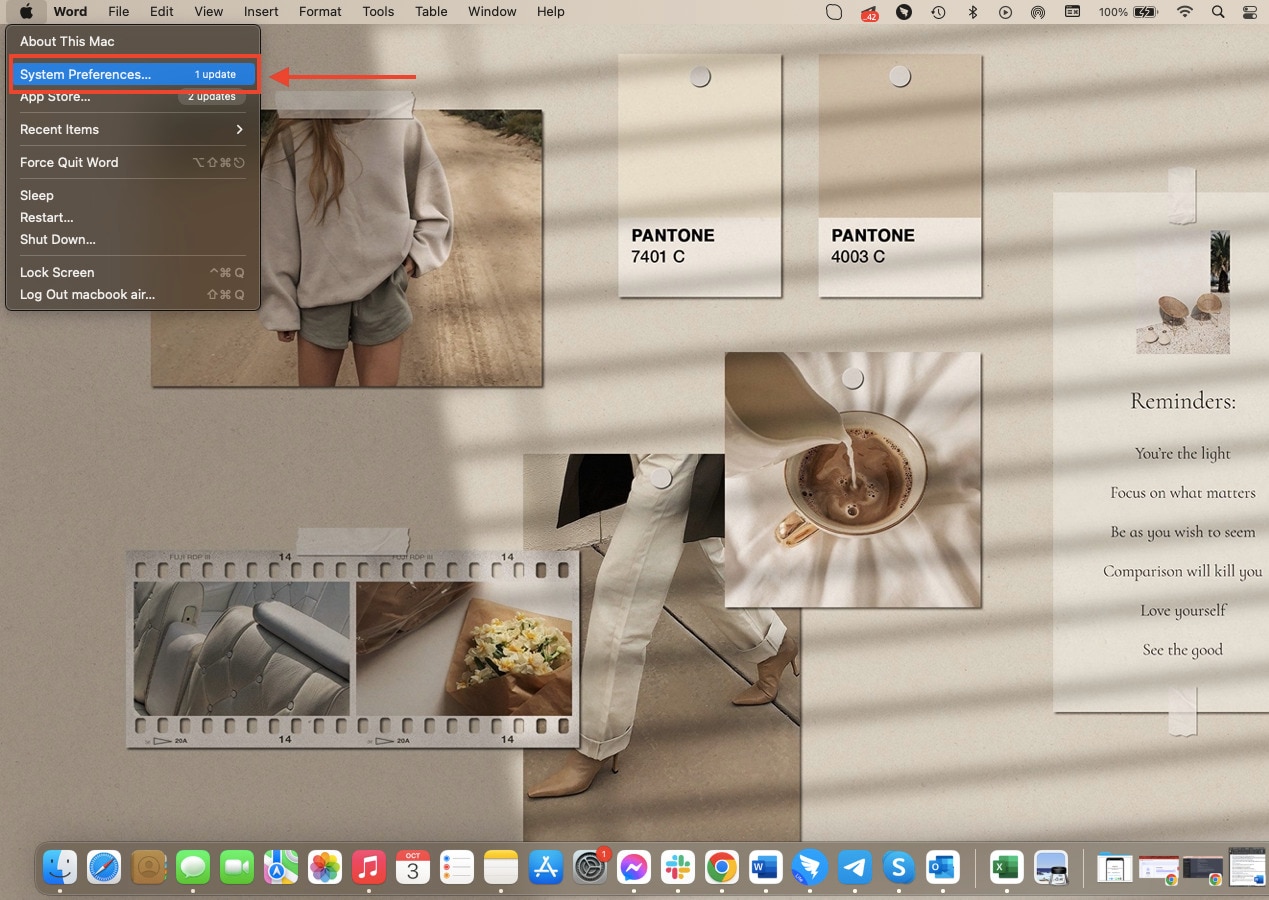
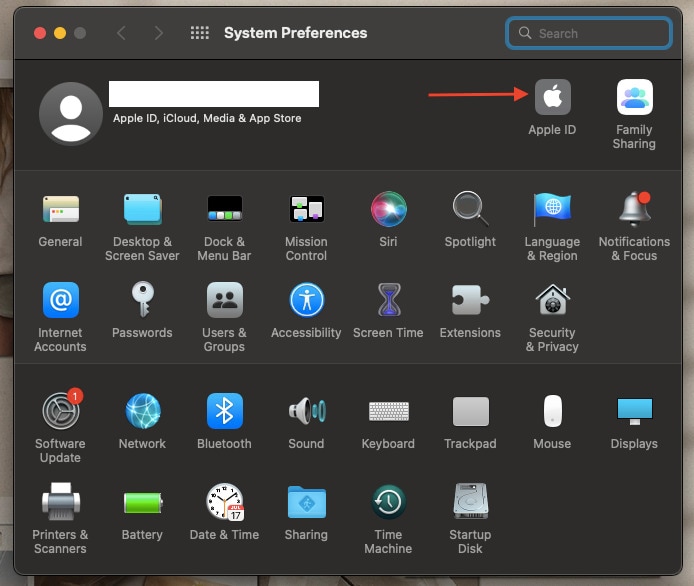
- Step 2: Click System Preferences, and then select Apple ID.
- Step 3: Navigate to the Name, Phone, Email section, then click Edit next to your email address.
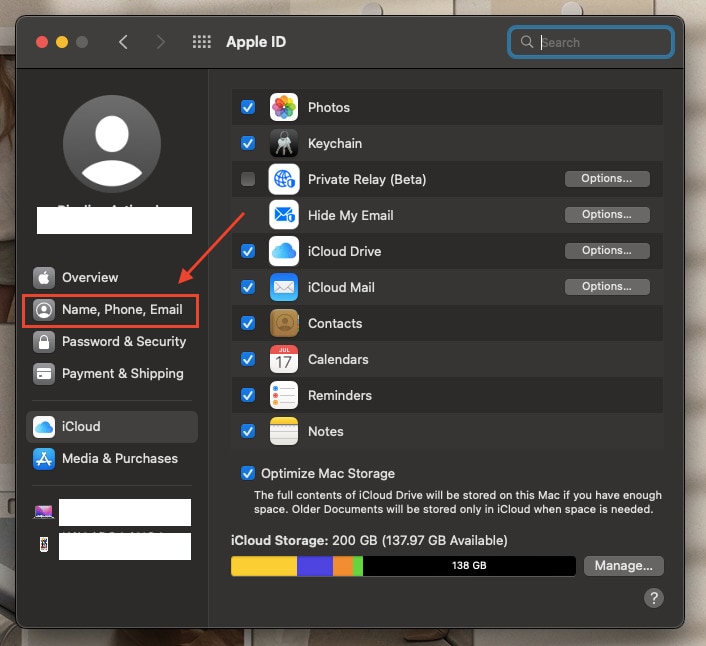
- Step 4: Input your new email address, and Apple will send a verification code to it.
- Step 5: Check your new email for the verification code, enter it, and voilà! Your Apple ID email is updated on your Mac.
Method 2: For Mobile Device Users
For those who prefer the convenience of mobile devices:
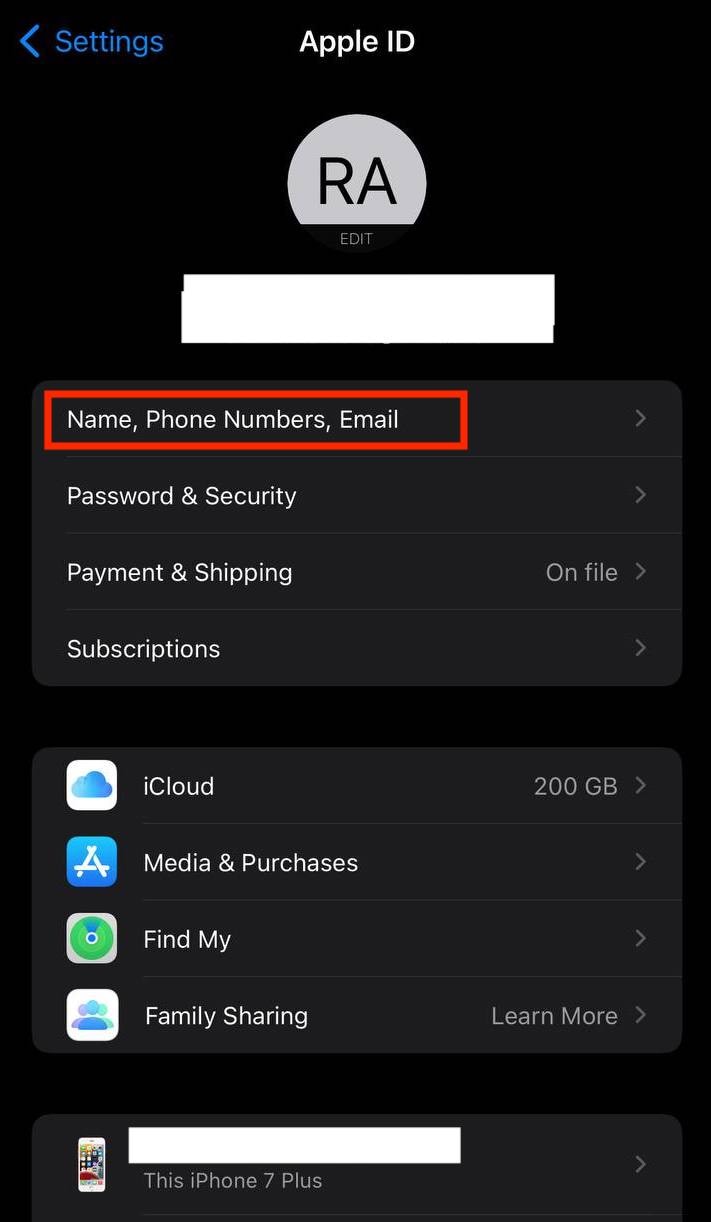
- Step 1: Open the Settings app on your Apple iPhone 8 or iPad, then tap your Apple ID at the top of the screen.
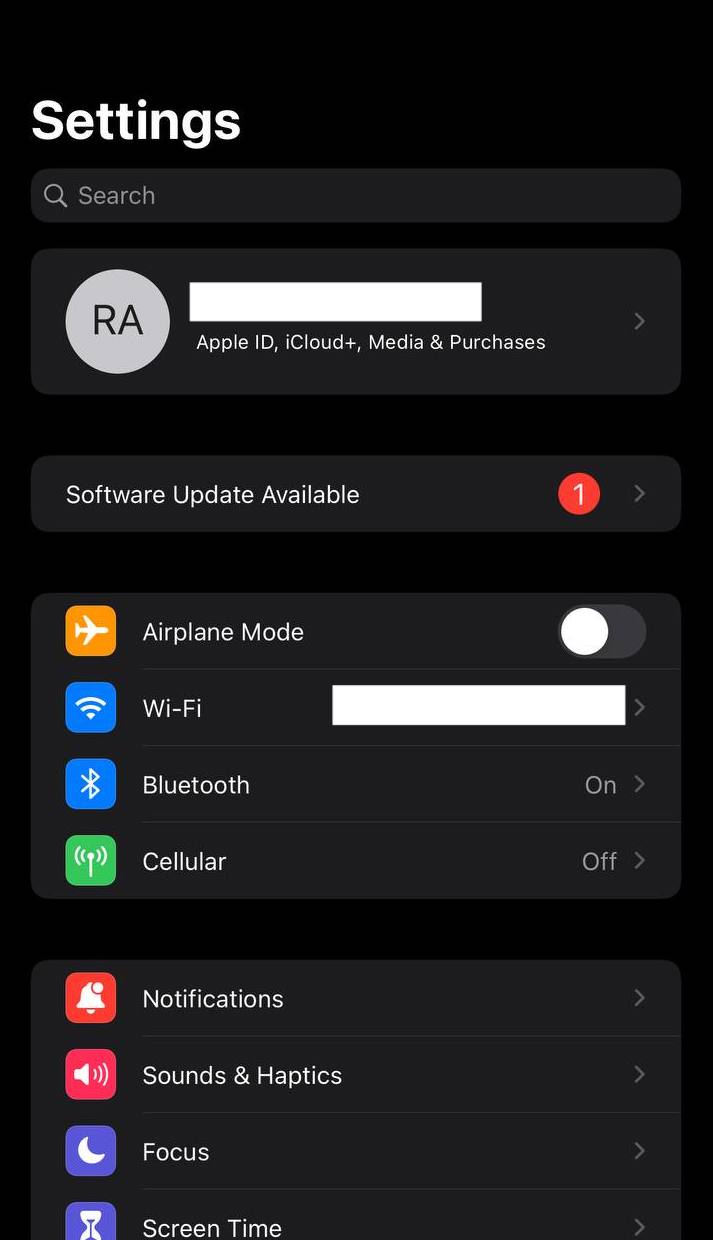
- Step 2: Tap Name, Phone Numbers, Email.
- Step 3: Tap Edit next to your email address, enter your new one, then tap Next.
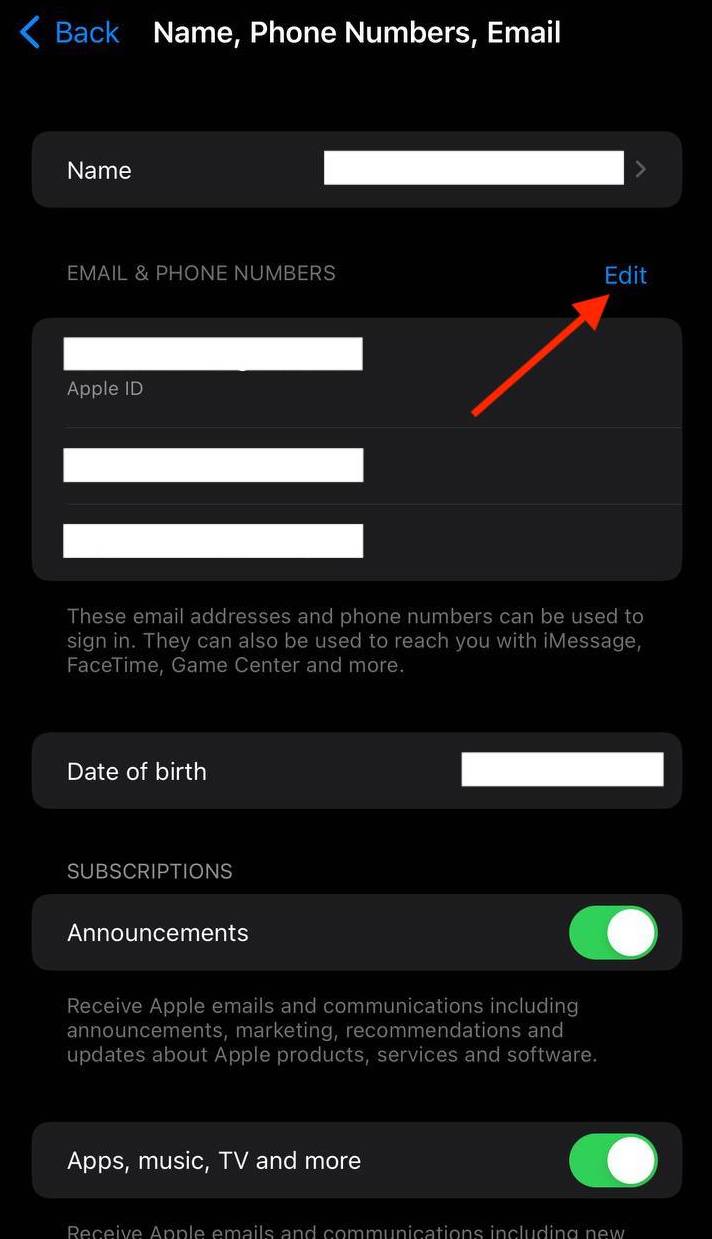
- Step 4: Apple will send a verification code to the new email. Enter it, and your Apple ID email on your mobile device is updated.
Method 3: For Browser Users
If you prefer the simplicity of a web browser:
- Step 1: Open the web browser your prefer and go to the Apple ID account management page.
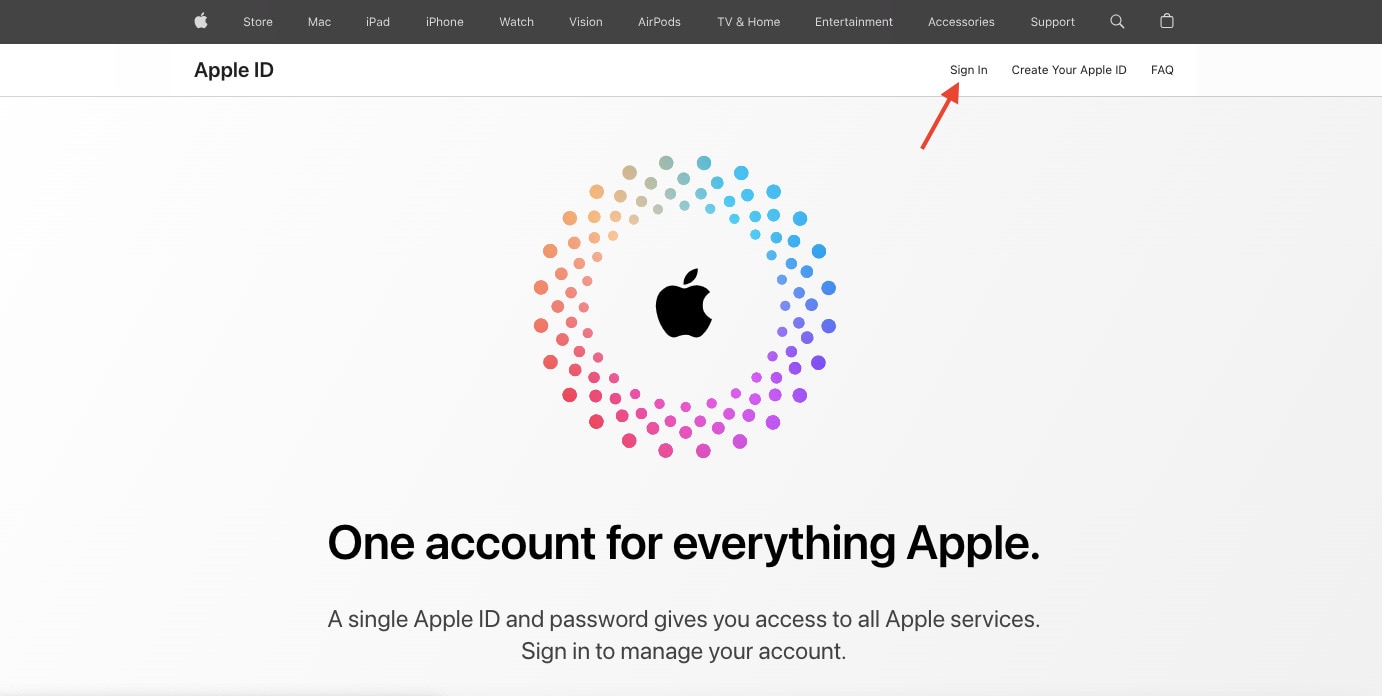
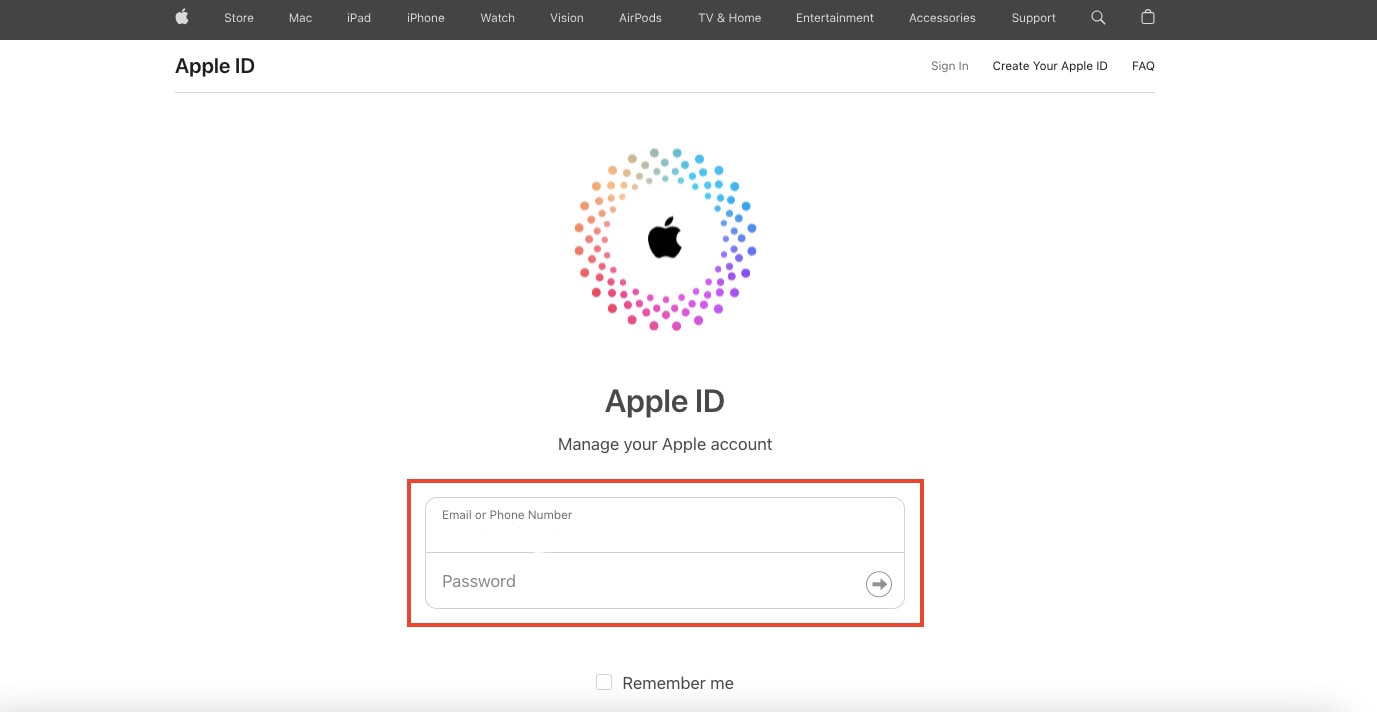
- Step 2: Click Sign In and tap your Email or Phone Number and Password.
- Step 3: Click Edit next to your email address in the Account section.
- Step 4: Input your new email address and click Continue.
- Step 5: A verification code will be sent to your new email. Enter it to confirm your email change.
B. Updating Your Apple ID
Now that you’ve successfully changed your Apple ID email, it’s crucial to ensure that all your Apple devices are on the same page:
- Step 1: Tap the Settings application on your Apple iPhone 8 or iPad.
- Step 2: Go to Update Apple ID Settings below your Apple ID settings.
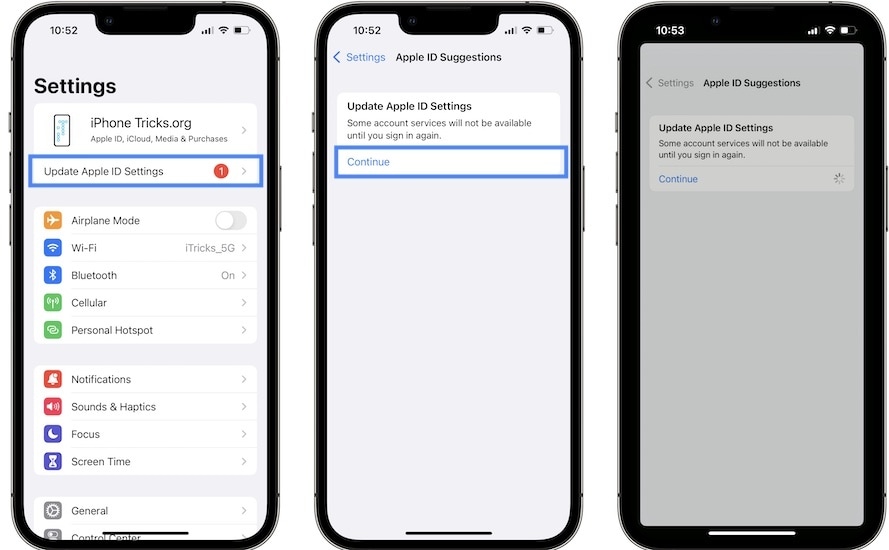
- Step 3: Tap Continue, then wait for a few moments. Your Apple ID will then get updated.
By following these steps, you’ll ensure that all your Apple devices are synced with your updated email address, providing a seamless and consistent Apple experience across all your gadgets. Now, with your new Apple ID email, you’re ready to explore the Apple ecosystem with renewed convenience and security.
Part III: Unlock iOS Screen With Wondershare Dr.Fone - Screen Unlock (iOS)
What if you find yourself in a situation where you want to change your Apple ID email address on your iOS device, but you’re locked out? Don’t worry; Dr.Fone - Screen Unlock (iOS) can rescue you. This handy tool is designed to help you unlock your iOS device, allowing you to change your Apple ID email address smoothly.

Key Features of Dr.Fone - Screen Unlock (iOS)
Check out the key features that Dr.Fone has to offer:
- **User-Friendly Interface.**Fone - Screen Unlock (iOS) is designed to be easy to use, making it accessible for users of all levels of technical expertise.
- It fits a wide range of iOS devices, including iPhones and iPads, ensuring that you can unlock your device no matter which one you have.
- **Multiple Unlock Modes.**Fone offers different unlock modes to cater to various scenarios. Whether you’ve forgotten your passcode, have a disabled device, or are dealing with a locked Apple ID, Dr.Fone has a solution.
- **No Data Loss.**One of the most significant advantages of Dr.Fone is that it unlocks your device without causing any data loss. Your photos, apps, and important information remain intact.
Step-by-Step Guide on Using Dr.Fone - Screen Unlock (iOS)
Outlined below is the step-by-step guide on how to use Dr.Fone – Screen Unlock for iOS devices:
- Step 1: When you’ve finished downloading and installing Wondershare Dr.Fone on your computer, go to Toolbox, then Screen Unlock, and choose iOS to open the tool in a new window.
- Step 2: Begin to pick the Unlock iOS Screen button in the new window to begin unlocking the screen of your iOS device. On the following screen, click the Start button to begin unlocking the iOS device.
Note: Ensure your device’s battery levels are enough before proceeding.

- Step 3: Following that, place your iDevice in Recovery Mode. Follow the on-screen instructions to set your iDevice into mode based on your phone model.
Note: If Recovery Mode does not work, try hitting the Try DFU Mode button at the bottom to access the instructions for putting the iDevice in DFU mode.

- Step 4: After successfully entering your device into Recovery Mode, the platform automatically recognizes the Device Model and shows it in the appropriate section. Modify the model and select the System Version to meet your needs if necessary. After that, select Start to begin unlocking your device’s screen.

- Step 5: The next screen shows the progress of your iOS firmware download. If at any point you decide you’d rather call it quits, hit the Stop button. If the iOS firmware takes a long time to download on your platform, you can copy the download link by clicking the Copy option.
- Step 6: After a successful download, the iOS firmware is checked and shown on the next screen. Select the Unlock Now option again to proceed with the unlocking procedure. A confirmation popup displays, requesting you to confirm the action. Enter the unlock code and press the Unlock button to continue.

- Step 7: You’ll see the unlocking status of your iOS device on the following screen. Don’t forget that keeping the gadget plugged in is necessary to avoid bricking it.
- Step 8: Click the Done button once the iDevice has been unlocked. If you’re still stuck with a locked iPhone, iPad, or iPod, select Try Again to retry the process.

By using Dr.Fone - Screen Unlock (iOS), you can regain access to your iOS device and continue with the process of changing your Apple ID email address hassle-free. It’s a reliable and user-friendly solution that ensures you can enjoy the benefits of the new email address without losing any of your precious data.
You May Also Like:
How to Show Email Password on iPhone and Find It Back
A Detailed Guide to Fix All iPad Email Problems [2023]
How to Fix Email Disappeared from iPhone?
Conclusion
This guide easily explored the process of changing your Apple ID email address. It started by understanding why this change might be necessary and provided straightforward methods for Mac, mobile, and browser users to accomplish it seamlessly.
But what if you’re locked out of your iOS device? Don’t fret; Dr.Fone - Screen Unlock (iOS) is a user-friendly tool that can help you regain access to your device. It ensures a smooth transition to your new email. Unlock new possibilities with Dr.Fone, a reliable companion in managing your iOS device. Explore its features and simplify your Apple journey today!
Unlock Apple iPhone 8 Without Passcode Easily
In the ever-growing world of smartphones and the latest tech, Apple has always earned its place among the top. However, as is bound to happen with every other device, you can frequently face issues with your Apple iPhone 8 along the way.
One of the most common troubles to arise for smartphone owners is accidentally locking your Apple iPhone 8 due to multiple reasons. It is a rather frequently occurring incident that can prove to be quite devastating in different scenarios. Well, now you need not fret any longer.
In this article, you will find a compilation of all the best methods to unlock the Apple iPhone 8 without passcode and how to change or remove it easily. Let’s begin!
Part 1: How to Unlock Apple iPhone 8 Without Passcode?
Accidentally locking your Apple iPhone 8 can be very troublesome. It can prove to be a rather upsetting situation where one just doesn’t know what to do. In such cases, it is important to know how to unlock Apple iPhone 8 without the passcode. Several third-party tools are available that do the job for you.
The Dr.Fone – Screen Unlock software by Wondershare is considered to be the best choice in this regard. It is used to remove screen locks of almost all types from a wide range of phones. Not only does the program removes screen passcodes for free, but it is also incredibly easy to use.
The program also serves some amazing additional features such as:
- Dr.Fone removes several different types of screen locks, including passwords, pins, patterns, and even fingerprints.
- It is very easy to use. This serves as a great advantage to people that are not very tech-savvy. Now, you no longer need large algorithms or spend a great amount of money to unlock your Apple iPhone 8.
- The program is compatible with a large number of devices from various companies. It works for iOS, Samsung, Huawei, Xiaomi, etc.
- It is compatible with all the latest versions of iOS 14 and Android 10.0.
With a few simple steps, you can unlock your Apple iPhone 8 using Dr.Fone. Firstly, download and launch the application on your computer, be it Mac or Windows. Then, proceed as mentioned below.
Step 1: Connect your Apple iPhone 8 to the Computer
The first step you need to connect your Apple iPhone 8 to your computer. Launch Dr.Fone and among all the tools visible on the screen, click on “Screen Unlock.
After that, select the option of “Unlock iOS Screen” to unlock your Apple iPhone 8 within seconds.

Step 2: Boot iPhone in DFU Mode
On the screen, you will see instructions to enter DFU mode. Follow them and boot your Apple iPhone 8 in DFU.
Step 3: Confirmation of Model
Next, confirm the model of your device model and system version that the tool has detected. If the system has made an error in identifying your device and want to change it, simply select the right option from the dropdown menu.
Step 4: Download Firmware
Once you have selected the model, click on the “Start” or “Download” button to let the program download the firmware for your device.
Step 5: Unlock iPhone
When the firmware is downloaded successfully, all you have to do is click on the “Unlock Now” button to unlock your Apple iPhone 8 . It is important to note that it will result in complete erasure of your phone data, but there isn’t any other way of doing it at the moment.

Part 2: Remove Passcode by Restoring Apple iPhone 8/Apple iPhone 8 Plus
If your Apple iPhone 8 has been accidentally locked or disabled, there is an effective method to restore it. You can erase your Apple iPhone 8 data and restore it from iTunes if you have previously backed up with it. Backing up data regularly is an advisable way to avoid the trouble of losing it forever.
Here are the steps to recover Apple iPhone 8 via iTunes backup.
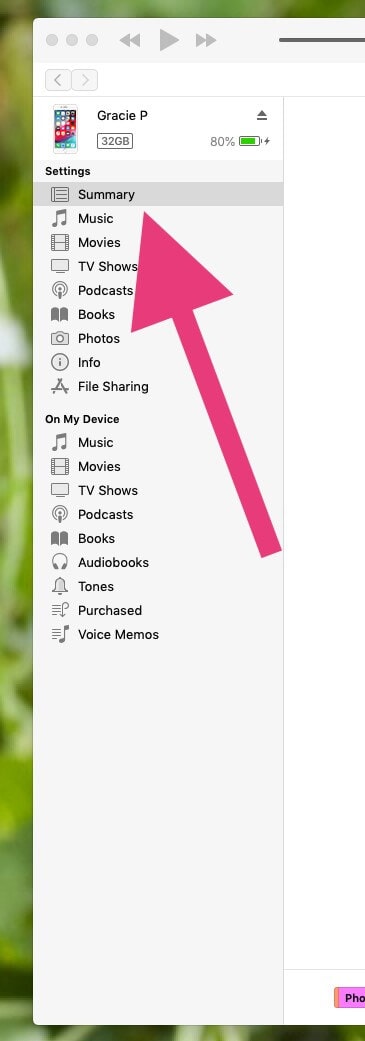
Plug your Apple iPhone 8 into your computer and open iTunes.
Click on “Summary,” which shall be visible on the left side of the screen.
From there, look for the “Restore Backup” option and click on it. A confirmation window will pop up. Confirm your action.
You shall be asked to enter your iTunes account information. Enter the previously used account to set up the Apple iPhone 8 and navigate through the instructions to register.
Select a suitable backup that you wish to use for the restore.
The last step is to click on “Restore.” iTunes will restore your Apple iPhone 8’s data and settings.


Part 3: How to Change Passcode on Apple iPhone 8?
If you wish to know how to change the passcodes on Apple iPhone 8, you are at the right place. Changing the passcode on one’s device is a rather mundane task and is not at all as laborious a task as it may seem. Various types of passcodes are available to be configured in your device, as suited by a user’s personal preference.
If you wish to change the passcode on Apple iPhone 8 , simply follow the steps given below.
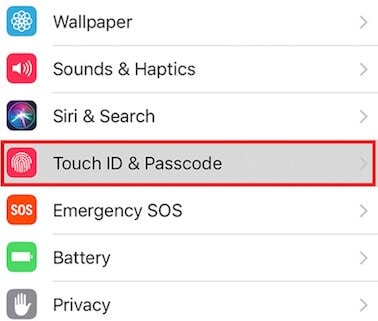
Go to the “Settings” panel of your Apple iPhone 8.
Scroll down until you see the option “Touch ID & Passcode” and click on it.
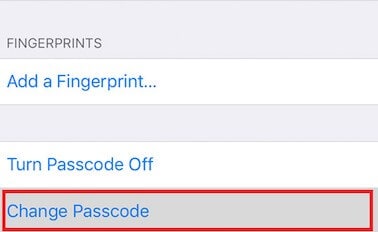
Type in your current passcode to proceed.
Here, click on the option “Change Passcode.”
Once again, enter your current password.
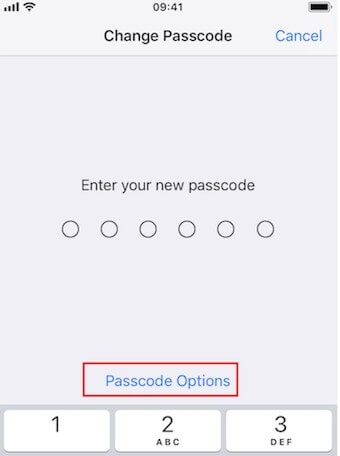
Now, type in your new password. You can change the type of passcode by clicking on the “Passcode Options.” The new passcode type can be a numeric code, alphanumeric code, a 4-digit, or a 6-digit code.
Select a specific passcode type, enter your new password and click on “Next.”
Enter your new password once again for confirmation and conclude the process by clicking on “Done.”

Closing
Now you know what to do the next time you forget your passcode. Using the simple methods and techniques mentioned above, you can easily restore your Apple iPhone 8 the passcode, or you can unlock your Apple iPhone 8 without knowing the passcode, avoiding much trouble. Hopefully, this could prove to be of service to you.
- Title: In 2024, How To Change Country on App Store for Apple iPhone 8 With 7 Methods | Dr.fone
- Author: Amelia
- Created at : 2024-07-15 05:41:08
- Updated at : 2024-07-16 05:41:08
- Link: https://iphone-unlock.techidaily.com/in-2024-how-to-change-country-on-app-store-for-apple-iphone-8-with-7-methods-drfone-by-drfone-ios/
- License: This work is licensed under CC BY-NC-SA 4.0.