
Unlocking Apple iPhone 13 Passcode without a Computer | Dr.fone
Unlocking Apple iPhone 13 Passcode without a Computer
You can still utilize a PIN if your Apple iPhone 13’s Touch or Face ID is not working. Yet, consider the possibility that you may forget your Apple iPhone 13 password too. So, how to unlock disabled iPhone without computer? Do you need to connect it to your PC, run iTunes, and follow the system? Not really.
Entering the wrong password a few times will lock your Apple iPhone 13. What you want to do right now is sidestep the password so you can begin using it again. Whether you have more up-to-date models like iPhone 14, or an older one like iPhone 4, some tools can help you.
Therefore, this guide explains how to unlock iPhone passcode without computer. In addition, this guide elaborates on the safest methods available in the market to help you secure your Apple iPhone 13. So, keep reading and find out about unlocking an iPhone without a computer.
Part 1: Can I Unlock My iPhone Passcode without Computer?
Yes, you can open the Apple iPhone 13 password without needing a PC.
Moreover, there are more than a few simple methods for doing such. Also, you don’t need to bother with any technical information. Users can now unlock their iPhones through the Erase iPhone, Find My, and Siri. Even if these methods don’t work in your situation, you can employ other professional tools. One such tool is Dr.Fone.
Dr.Fone-Screen Unlock by Wondershare is an expert tool to remove such issues. It is a safe method for everyone new to the technical world. The process is basic, assuming you follow the step-by-step guide below.
Part 2: 3 Methods to Unlock Disabled iPhone without a computer?
1. “Erase iPhone” Option
You want to use this method when you fail to remember your Apple iPhone 13 PIN. It is the most straightforward method for opening your Apple iPhone 13, assuming you forgot your password.
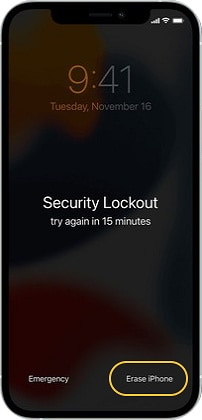
Since iOS 15.2, Apple presented an “Erase iPhone” choice from the Security Lockout window. This window appears from the seventh time you enter an incorrect code. The steps beneath work if your Apple iPhone 13 or iPad runs iOS 15.2 or later and has an internet connection:
- When you don’t know the lock screen PIN, please enter your password several times from your Lock Screen until it warns you the next time. Then do this step again until you see the Erase iPhone toward the side of the screen.
- Tap Erase iPhone, then click again to affirm your action.
- Enter your Apple account credentials to sign out of your Apple ID on the phone.
- Tap Erase iPhone back to erase all your files and settings forever.
- Right when the phone restarts, comply with the on-screen steps. Yet again, set your phone, and restore your information and settings from a backup. Presently set another password for your phone.
Guidelines to Restore a Locked iPhone Running iOS 15.1 or Earlier:
- Regardless, put your Apple iPhone 13 into DFU mode.
- Then, connect it to a PC or Mac through a Lightning USB.
- Tap your Apple iPhone 13 in the Finder sidebar on Macintosh or iTunes on the PC.
- Pick Restore when you see the decision to Restore. Let the download finish, and your phone leaves the recovery mode screen. Yet again, then switch off your Apple iPhone 13 and begin.
- Disconnect your iDevice, then turn it on and set it up. That is all you must do.
2. Use Find My
Apple permits clients to erase iPhone data to protect it from others remotely. Nonetheless, your lock screen can save your data if you don’t erase the Apple iPhone 13 device. Nobody can open the screen except if they enter the right passcode. After too many incorrect attempts, your Apple iPhone 13 will be locked. So nobody can then touch your data.
If you have enabled the “Find My” choice before failing to remember your Apple iPhone 13 PIN, there is an opportunity for you to eliminate the lock. That is to use iCloud.
Prerequisites:
- The locked device ought to have the Find My component enabled.
- The locked iPhone ought to be signed in to your iCloud ID.
- It ought to have an internet connection, be it data or Wi-Fi.
- It will help if you remember your Apple ID credentials.
To open iPhone through iCloud:
Step 1. Visit the iCloud.com page and sign in with your Apple ID and password.
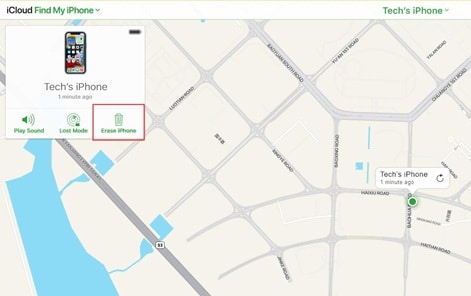
Step 2. Click the “Find iPhone” choice from the various accessible choices.
Step 3. Click “All Devices” and pick the gadget you want to open.
Step 4. Click the “Erase iPhone” button. In this manner, set up the phone and another lock screen PIN. With iCloud, you can open your iDevice without contacting your device.
3. Use Siri (Only for iOS 8.0 to 10.1)
There is an issue with Siri that you can use how to unlock iPhone passcode without computer. This arrangement probably won’t work consistently, yet it deserves checking out. The bug works on any phone running on iOS 8 up to iOS 10.1
- Initiate Siri on your iDevice. You should simply long press the Home button. Then, ask Siri what the time is, “Hello Siri, what time is it?”
- Siri will then show you the time. There will be a clock symbol bordering it. Tap on the clock, and you can get to the World clock. Click on the “+” sign to add another watch.

- You will get a bar where you have to enter a city. First, write anything to make sure you can write. Then, tap on the text and click “Select all” afterward.
- You will now get new choices, including cut, copy, and so on. Tap on the “Share” button to proceed. You will get options for sharing the text. Click on the Message icon. Your device will open another window. Now, you begin drafting another message. Go to the “To” field, and type any text. Click back to proceed with opening an iPhone without a PC.
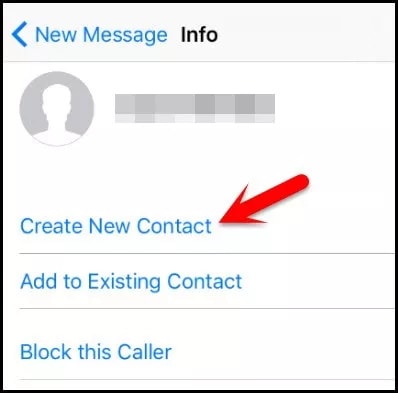
- The text will become green. Yet again, now that your text is chosen, click on “+” to add a symbol. When you tap it, another window will open. Click on “Create new contact” to proceed. You will now see a window where you can add another contact. Tap on “Add Photo” to move.
- Click the “Select/Pick Photo” button to choose a photograph from your library. When the library opens, you can see the collections. Do not click anywhere. Wait for a couple of moments, and afterward, tap on the Home button. You will then access the Home screen. That’s how to unlock disabled iPhones without computer.
Bonus Tips: Easy App to Unlock Your Apple iPhone 13
Dr.Fone-Screen Unlock
We, as a whole, realize that expert software is the quickest and simplest method for opening an iPhone. These devices are helpfully intended to make life simpler; thus, they do.
Dr.Fone-Screen Unlock is a special tool that eliminates iPhone screen lock in minutes with no confusing steps. The team at Dr.Fone has years of insight into iPhone lock issues. Besides, it is developed, so any non-specialist with no technical information can use it. Here’s how to unlock disabled iPhone without computer:
Step 1. Plug the iDevice into your system
Run the Dr.Fone on your system and select the “Screen Unlock” option from the main menu.

Use a connector to connect your Apple iPhone 13 to the PC. After this, click the “Unlock iOS Screen” option on the program.

Step 2. Access the Recovery or DFU Mode
Before the Apple iPhone 13 lock screen removal, we need to boot the phone in Recovery or DFU. If you have to do so, follow the steps given in the image below:

We suggest you open the recovery mode to remove the iOS screen lock. However, if you can’t figure out how to do so, go for the DFU mode.
Step 3. Affirm Device Model information
After going to the DFU mode, Dr.Fone will show the information about your Apple iPhone 13. From the following screen, confirm your phone model and iOS version. If it is isn’t correctly given, select the correct data pair from the drop-down menu. Then download the firmware package for your Apple iPhone 13.

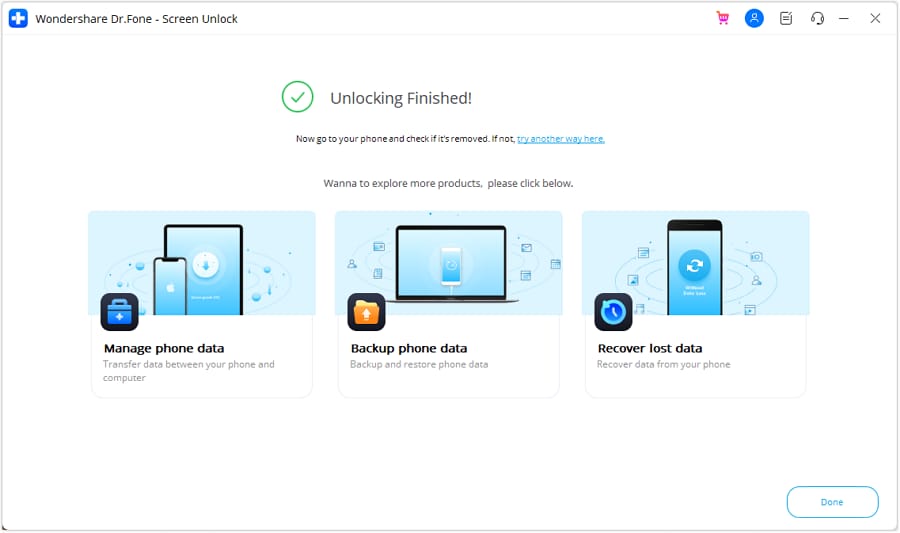
Step 4. Open the Lock
Click Unlock Now after downloading the firmware.

After a short while, your Apple iPhone 13 will be opened effectively. However, this process will erase every bit of data off your phone. Honestly speaking, there is no answer for this issue without data loss.
The Bottom Line
It is the end of a detailed guide with the top strategies on how to unlock disabled iPhones without computer. You should get the right approach per your circumstance and follow the steps.
If you don’t know which strategy will turn out best for you, we suggest utilizing Dr.Fone-Screen Unlock. It has a close to 100% success rate and is not difficult to use for individuals without a tech foundation. So, install it on your system for a quicker result.
How Do You Remove Restricted Mode on Apple iPhone 13
Restricted Mode on iPhone is useful for controlling access to certain content. If you need to remove these restrictions, learn how to disable Restricted Mode on your Apple iPhone 13 by reading the article. The feature provides a layer of security and content filtering. However, it can limit functionality in some apps.
Follow the steps outlined in the page’s latter part to learn how to turn off Restricted Mode on your Apple iPhone 13. This will grant you unrestricted access to all apps and content, ensuring a smoother and more flexible user experience. To know more, let’s get started.

Part 1. What Is the iPhone’s Restricted Mode?
iPhone’s Restricted Mode is a comprehensive set of features to enhance user control in family-oriented contexts. It acts as a comprehensive filter, safeguarding users from unwanted content. Restricted Mode employs several key functionalities, such as:
- **Content filtering.**Content filtering filters out inappropriate content from various sources, including apps, websites, and search results.
- Functionality restrictions. Restricted Mode can also turn off specific functionalities like in-app purchases and the Apple iPhone 13 device camera. It ensures a more controlled and secure user experience.
- **4-digit passcode.**The inclusion of a 4-digit passcode adds an extra layer of security. It prevents unauthorized changes to the Apple iPhone 13 settings or Apple ID.
- **Parental controls.**Targeting family use, Restricted Mode incorporates robust parental controls. Parents can manage and monitor screen time for a balanced, age-appropriate digital experience for their children.

Part 2. Why Can’t I Remove Restricted Mode?
If you want to know how to remove Restricted Mode on your Apple iPhone 13, it’s not as simple as you may have desired. Here are several reasons:
- Forgotten Passcode
If you’ve forgotten the passcode set for Restricted Mode, unlocking it becomes challenging. Security measures are in place to prevent unauthorized changes, and bypassing it can be complex.
- Parental Controls
For users under parental guidance, restrictions are often set by parents or guardians. It’s to ensure a safe and controlled digital environment. Removing Restricted Mode might require parental consent or a passcode.
- Software Updates
Occasionally, issues arise during iOS updates, causing bugs or glitches that may affect the removal of Restricted Mode. These technical issues can hinder the smooth operation of device features.
- Factory Restrictions
In cases of secondhand or refurbished iPhones, the Apple iPhone 13 device may have restrictions that limit the removal of Restricted Mode. These restrictions are set to maintain the Apple iPhone 13 device’s integrity and compliance with certain standards.
These factors are crucial for users attempting to remove Restricted Mode. Each scenario may necessitate a different approach or solution.
Enabling Restricted Mode on your Apple iPhone 13 is prudent, especially for parents. It ensures a secure and controlled digital environment for their children. Follow these simple steps to turn on Restricted Mode:
- Step 1: Go to Settings > Screen Time > Content & Privacy Restrictions on your Apple iPhone 13. Next, Toggle the switch next to Content & Privacy Restrictions to turn it on.

- Step 2: The device will prompt you to set a passcode. Choose a secure 4-digit code required to make changes or deactivate the Restricted Mode. You can customize various settings, such as app usage, web content, and privacy settings. Tailor these restrictions according to your preferences and the intended user.
Part 4. 3 Ways to Turning Off Restricted Mode on iPhone
If you want to know how to turn off Restricted Mode on your Apple iPhone 13, here are three efficient methods to do so. Whether on a specific iOS version or facing a forgotten passcode, these provide solutions for every scenario.
Method 1: Turn Off Restricted Mode on iOS 12 and Above
For users on iOS 12 and above, turning off Restricted Mode is straightforward:
- Step 1: Open the Settings app on your Apple iPhone 13 and scroll down to find Screen Time > Content & Privacy Restrictions. Enter your passcode when prompted.

- Step 2: Toggle off the switch next to Content & Privacy Restrictions. This action turns off Restricted Mode on your Apple iPhone 13.
Method 2: Turn Off Restricted Mode on iOS 11 and Below
For those using iOS 11 and below, the steps are a bit different:
- Step 1: Go to Settings > General. Scroll down to find the Restrictions option.

- Step 2: Toggle off the switch next to Restrictions. The action turns off Restricted Mode on iOS 11 and below.
Method 3: Turn Off Restricted Mode Using Dr.Fone - Screen Unlock (iOS)
There may be situations where removing Restricted Mode on your Apple iPhone 13 becomes challenging. If you can’t unlock your Apple iPhone 13 screen time, then you need a specialized tool like Wondershare Dr.Fone. The platform’s Unlock Screen Time Passcode feature can assist in its removal in quick and easy steps.
Key features
Packed with essential features, Dr.Fone ensures a seamless experience in removing Restricted Mode your device:
- Removes all types of lock screens. Dr.Fone - Screen Unlock (iOS) is equipped to handle various lock screens. It provides a versatile solution for users dealing with Restricted Mode passcode issues.
- **No need for an Apple ID password.**Unlike many other tools, Dr.Fone allows you to unlock without Apple ID password. It streamlines the unlocking process, making it more accessible for users.
- **Unlocks Without Data Loss.**You regain access to your Apple iPhone 13 without compromising your valuable information.
- High Success Rate: Dr.Fone - Screen Unlock (iOS) boasts a high success rate, assuring users of a reliable and effective solution.
How To Turn Off Restricted Mode Using Dr.Fone
Here’s how to disable Restricted Mode on iPhone without a password using Dr.Fone. Follow the steps:
- Step 1: Begin by downloading and installing Dr.Fone on your computer. Next, click Toolbox > Screen Unlock > iOS. Choose Unlock Screen Time Passcode from the next window to start the process.

- Step 2: Ensure your Apple iPhone 13 is connected to the computer using a USB cable. Wait for Dr.Fone to detect your Apple iPhone 13 automatically. Next, click the Unlock Now button.
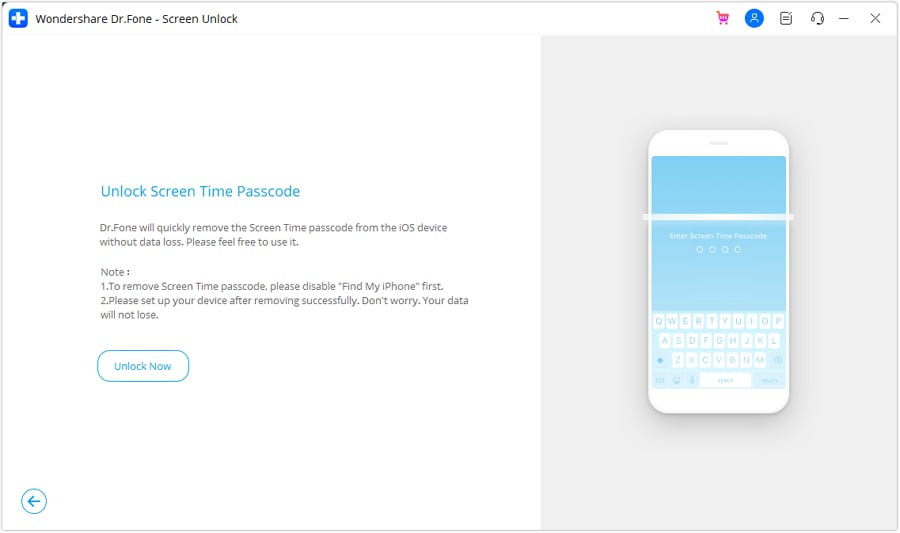
- Step 3: Follow the on-screen instructions. Afterward, Dr.Fone will initiate the unlocking process to remove the Restricted Mode passcode. Once removed, click the Done button to finish.
Tips: Are you searching for a powerful Screen Unlock tool? No worries as Dr.Fone is here to help you. Download it and start a seamless unlock experience!
Bonus. How To Turn Restricted Mode On or Off on YouTube
YouTube’s Restricted Mode on iPhone is valuable for users seeking a more controlled and family-friendly viewing experience. It serves to screen out mature content and ensures a safer environment, especially for younger audiences. Here’s a breakdown of what YouTube’s Restricted Mode does:
Screens Out Mature Content
Restricted Mode filters content that may not be suitable for all audiences, blocking videos with explicit or sensitive material.
Comment Viewing Restrictions
With Restricted Mode enabled, users cannot view comments on videos, offering an additional layer of protection and privacy.
Browser and Device Level Functionality
YouTube’s Restricted Mode operates on both the browser and device levels. Once activated, it applies across various platforms, ensuring consistent content filtering.
Different from Age-Restricting Videos
It’s important to note that Restricted Mode differs from age-restricting videos. While age restriction applies to specific videos, Restricted Mode filters content across the entire platform, providing a broader safety net.
How To Turn Restricted Mode On or Off on YouTube
Follow the steps to learn how to disable Restricted Mode on iPhone when using YouTube.
- Step 1: Go to your profile picture on the YouTube app and tap on Settings. Next, toggle the switch next to Restricted Mode on or off.

- Step 2: Go to the YouTube website if you’re on a browser. Next, scroll down to the bottom of the page and click on Restricted Mode. Toggle the switch on or off.
You May Also Like:
How to Turn Off Screen Time without Passcode
100% Working - Screen Time Passcode Not Working Solutions
Conclusion
Managing how to disable Restricted Mode on iPhone and YouTube ensures a safer digital environment. On iPhone, employ various methods like navigating settings or using Dr.Fone - Screen Unlock (iOS) for forgotten passcodes. On YouTube, easily toggle Restricted Mode in-app or on the browser for a more controlled viewing experience.
Remember, Dr.Fone becomes a valuable ally when facing a passcode challenge. These versatile solutions grant you control over content accessibility and privacy, enhancing your digital experience. You can easily navigate and customize your device’s restrictions by mastering these techniques.
Easy Steps on How To Create a New Apple ID Account On Apple iPhone 13
Your Apple ID is your gateway to a world of apps and services, making it an essential part of your Apple experience. Whether you’re a new Apple user or simply looking to start fresh, creating a new Apple ID can open the doors to endless possibilities.
This guide will walk you through creating a new account for Apple devices in an easy-to-understand manner. From setting up your email address to securing your account, this article covered you every step of the way. Embark on this journey and learn how to create a new Apple ID account effortlessly.
Part 1: Why Create a New Apple ID?
You might need to create a new Apple ID to enhance your Apple experience. Let’s dive into why it’s a good idea:
A. Reasons for Creating a New Apple ID Account
Here’s a breakdown of the reasons why you should create a new Apple ID for your Apple iPhone 13:
- Your Apple ID is like your digital identity. Creating a new one lets you choose a unique email address that suits you, adding a personal touch to your Apple journey.
- Maybe you’ve been using an email for your Apple ID that you don’t want to use anymore. Creating a new one helps keep your personal and Apple-related emails separate.
- **Switching Devices.**When you switch to a new Apple device, like getting a new iPhone or iPad, creating a unique Apple ID ensures a fresh start tailored to your new gadget.
- **Separation of Accounts.**Sometimes, you may want to keep your work-related apps and data separate from your ones. Creating a new Apple ID helps you achieve this separation.
- If you’re using Apple services for different purposes, such as work and personal use, having separate Apple IDs can help keep everything organized and distinct.
B. Scenarios Where a New ID Is Needed
Below are the common scenarios where a new Apple ID might be needed:
- **New Apple Device.**When you purchase a new Apple device, like an iPhone or iPad, you’ll need a new Apple ID to set it up and make it truly yours.
- **Shared Device.**If multiple people use the same device, creating a new Apple ID for each user ensures that everyone has their own personalized experience.
- **Change of Email.**If your current email address associated with your Apple ID is changed or you prefer a new one, creating a unique Apple ID with the updated email is the solution.
- **Work and Personal.**To keep your work-related apps and data separate from your personal ones, having separate Apple IDs for each purpose is practical and organized.
- **Starting Fresh.**Sometimes, you might want a fresh start with your Apple experience, and creating a new Apple ID provides a clean slate.
Creating a new Apple ID isn’t just about getting a new email; it’s about tailoring your Apple experience to your needs, whether for personalization, privacy, or organization. Now that you know why it’s essential, let’s explore how to create it in the next section.
Part 2: Step-by-Step Guide: How To Create a New Apple ID Account
Creating a new Apple ID for free is a straightforward process. Let’s break it down into simple steps:
A. Registering a New Apple ID
These are the steps for registering a new Apple ID:
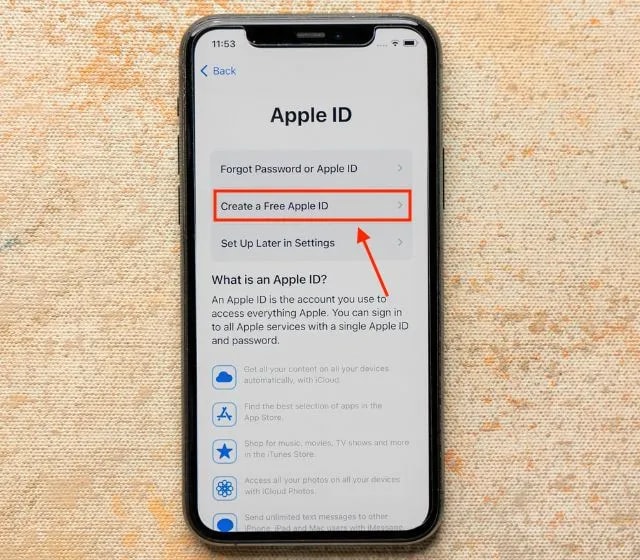
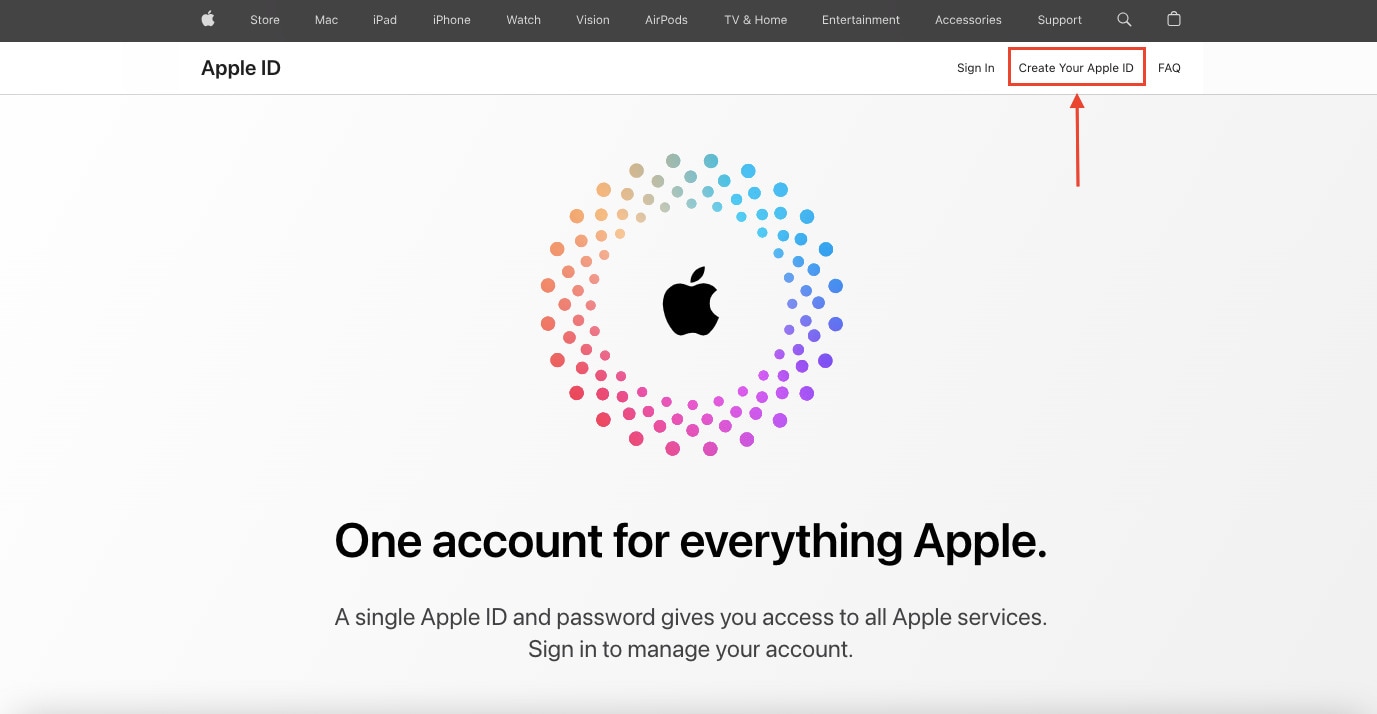
- Step 1: Open your web browser and visit the Apple ID account management page. Click the Create Your Apple ID button to begin.
- Step 2: On the registration page, you’ll be asked to provide your First name and Last name. Make sure to use the name associated with your new Apple ID. Next, you’ll need to enter your preferred email address. This one will be your new Apple ID.
Tip: Choose an email that’s easy to remember and access.
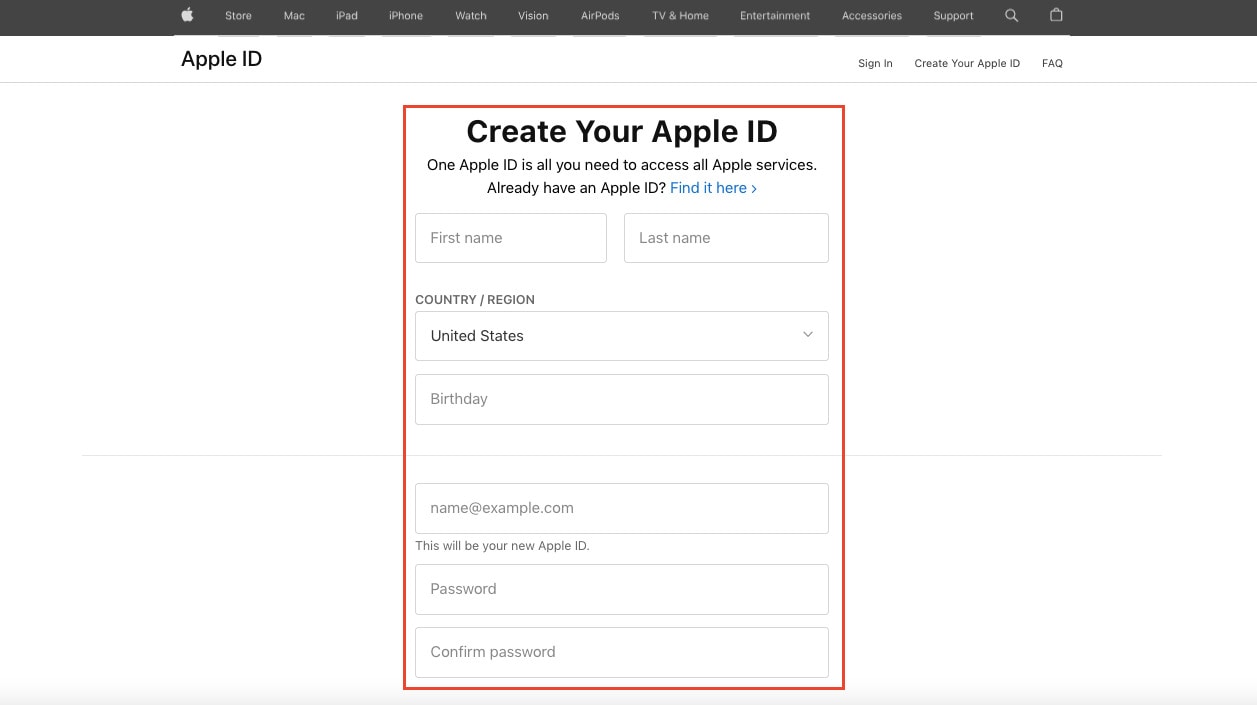
- Step 3: Create a strong password that combines letters, numbers, and symbols. This password is essential for the security of your account, so make it unique and hard to guess. Confirm your password by entering it again in the designated field.
B. Verifying Your Identity
The next step is verifying your identity. Check out the steps below:
- Step 4: Apple takes your security seriously. You may be asked to provide a phone number to verify your identity. This number can be used for account recovery or two-factor authentication. The phone number you provided will receive a verification code. Enter this code in the space provided to confirm your identity.
Note: It’s crucial to ensure that your phone number is accurate and accessible. This number will help you recover your account in case you forget your password or encounter any issues. Apple may use this phone number for two-factor authentication, adding an extra layer of security to your account.
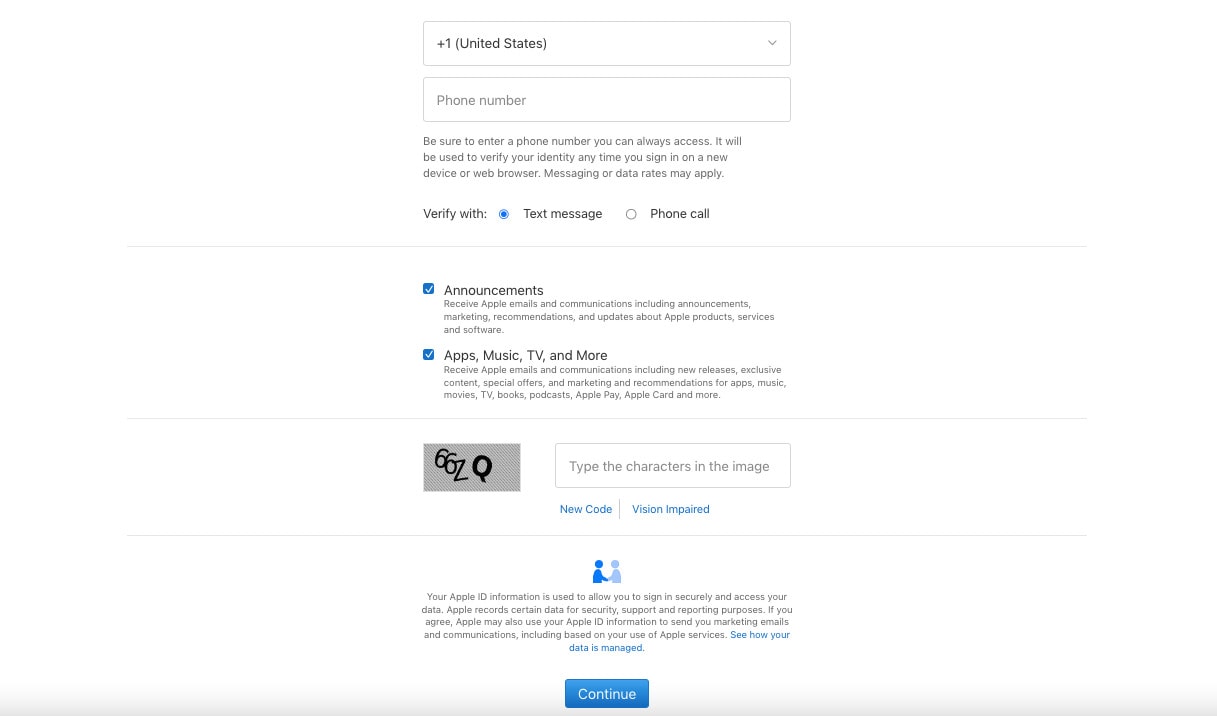
- Step 5: Apple may sometimes ask you to complete a CAPTCHA or verify your identity to prevent automated account creation.
C. Setting Up Security Questions
The next process will be setting up security questions for your account:
- Step 6: Apple asks you to choose and answer security questions. These questions provide an additional layer of protection for your account. Select questions that you can easily remember and that others can’t guess.
D. Finalizing the Process
To finalize the creation process, refer to the steps given below:
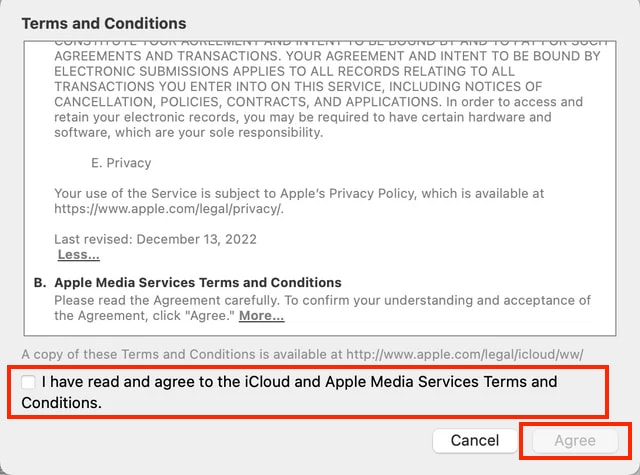
- Step 7: Read through Apple’s Terms and Conditions and Privacy Policy. Once you’ve understood them, tick the box to confirm that you’ve read and agree to the iCloud and Apple Media Services Terms and Conditions. Then click Agree to proceed. Remember that it’s essential to be familiar with Apple’s policies to ensure a secure and smooth experience.
- Step 8: After completing these steps, Apple will send a confirmation email to the address you provided. Go to your email and open the verification link to confirm your new Apple ID.
Congratulations! You’ve successfully created a new Apple ID. With this account, you can now access Apple’s services, including the App Store, iCloud, and more. Remember to keep your login credentials secure and use them to personalize your Apple experience fully.
Part 3: Effortlessly Remove Your Apple ID Using Wondershare Dr.Fone - Screen Unlock (iOS)
You can embark on an enhanced Apple experience after successfully creating your new Apple ID. Removing the previous one is essential when you create it, especially if you’ve acquired a second-hand device or no longer want the previous user’s associated credentials.
This step ensures that your new Apple ID takes center stage, granting you full control over your device and its associated services. But if you encounter difficulties when removing the previous Apple ID from your device, Dr.Fone - Screen Unlock (iOS) is a reliable and user-friendly solution.

Key Features of Dr.Fone - Screen Unlock (iOS)
This versatile tool offers the following key features in the context of Apple ID issues:
- **User-Friendly Interface.**Fone - Screen Unlock (iOS) is designed to be straightforward, making it accessible to users of all levels of technical expertise.
- It is usable with a wide range of iOS devices, ensuring you can remove the previous Apple ID from your device, regardless of the model.
- **Multiple Unlock Modes.**Fone offers various unlock modes to cater to different scenarios, including removing the previous Apple ID. This flexibility ensures that you have the right solution for your specific situation.
- **Data Security.**Fone - Screen Unlock (iOS) prioritizes data security, ensuring that your personal information and content remain intact during the Apple ID removal process.
Step-by-Step Guide on Using Dr.Fone Screen Unlock (iOS)
Check out the steps on how to remove an Apple ID account using Dr.Fone below:
- Step 1: Launch Wondershare Dr.Fone on your PC to use the Screen Unlock function and then navigate to Toolbox. Click the Screen Unlock section, then choose iOS.
- Step 2: If you want to proceed with deleting your Apple ID, you’ll need to go to the next window and select the Remove AppleID option from the menu.
- Step 3: When you hook up your iOS device to a computer, the next screen will report on its connectivity. Select the Unlock Now button to proceed.

- Step 4: Before the Apple ID can be unlocked, the next step is for the platform to ask a series of questions. Verify that a screen lock is active on your iOS device. However, please lock your iOS device before proceeding with the Yes option.

- Step 5: Check if Two-Factor Authentication is set up on all your iOS devices. If not, switch it on before confirming your decision to unlock your Apple ID.

- Step 6: After you have confirmed these settings, you will be taken to a screen with on-screen instructions for entering Recovery Mode on your iDevice. If the steps for your specific iOS device don’t work, try tapping Try DFU Mode in the app’s bottom left corner. To continue with the unlocking process, this will launch the DFU Mode instructions.

- Step 7: Once Recovery Mode has been activated, the Apple iPhone 13 device’s information will be shown on the subsequent screen. Once the Device Model has been identified, all that remains is to choose the appropriate System Version and click Start. However, if there are disagreements in recognition, pick the details by hand and move forward.
- Step 8: The appropriate iOS firmware begins downloading, showing its status on the following screen. Click the Copy button to copy the direct URL to download iOS firmware for systems with sluggish firmware download speeds.
- Step 9: The platform checks the downloaded firmware and displays its details on the following screen. To proceed with unlocking your Apple ID, click the Unlock Now button. To proceed, you will be prompted to input a code into a confirmation window. Enter the code and then click the Unlock button.

- Step 10: The following screen shows the unlocking status of your Apple ID. Don’t let the Apple iPhone 13 device lose its connection under any circumstances. The screen prompts the process of completing the Apple ID once the ID has been unlocked. If the Apple ID has been unlocked, click Done to proceed. If that fails, click the Try Again button and give it another shot.

Conclusion
This guide has simplified the process of creating a new Apple ID, ensuring you can effortlessly personalize, secure, and organize your digital experience. Creating a new Apple ID is easy, and it allows you to tailor your Apple journey to your preferences. Remember, it’s all about you, your privacy, and your convenience.
Should you encounter any challenges while managing your Apple ID, such as removing a previous one, consider Dr.Fone - iOS Screen Unlock tool. This user-friendly resource stands ready to assist, ensuring a seamless and secure Apple experience. Explore the possibilities and make the most of your Apple adventure!
Also read:
- [New] 2024 Approved Hack the Art World Essential Free 3D PSD Files
- [New] Integrating Azure Transcription in Your Apps
- [New] Resolving Common Instagram Video Glitches for 2024
- [Updated] In 2024, Syncing Screen and Video with Ease
- 2024 Approved Free Professional YouTuber Backgrounds
- Expert Advice on Overcoming Gameplay Hiccups - Fixing Stutters & Increasing FPS in Naraka: Bladepoint
- How Can I Unlock My iPhone 15 Plus After Forgetting my PIN Code? | Dr.fone
- How Do You Remove Restricted Mode on Apple iPhone 14 Pro Max | Dr.fone
- In 2024, 3 Ways to Erase iPhone 11 Pro Max When Its Locked Within Seconds | Dr.fone
- In 2024, How To Unlock Apple iPhone 13 Pro Max Without Swiping Up? 6 Ways | Dr.fone
- Step-by-Step Fixes to Address Your ICUE Device Detection Errors
- The Ultimate Guide to Logitech M510 Driver Installation and Optimization
- The Ultimate Off-Roader's Compan Cupant: A Detailed Review of the Top Race RC Rock Crawler
- What Does Jailbreaking Apple iPhone 11 Pro Max i Do? Get Answers here | Dr.fone
- Title: Unlocking Apple iPhone 13 Passcode without a Computer | Dr.fone
- Author: Amelia
- Created at : 2024-12-15 00:23:10
- Updated at : 2024-12-21 23:39:44
- Link: https://iphone-unlock.techidaily.com/unlocking-apple-iphone-13-passcode-without-a-computer-drfone-by-drfone-ios/
- License: This work is licensed under CC BY-NC-SA 4.0.