
Unlocking iPhone 13 mini Passcode without a Computer | Dr.fone
Unlocking Apple iPhone 13 mini Passcode without a Computer
You can still utilize a PIN if your Apple iPhone 13 mini’s Touch or Face ID is not working. Yet, consider the possibility that you may forget your Apple iPhone 13 mini password too. So, how to unlock disabled iPhone without computer? Do you need to connect it to your PC, run iTunes, and follow the system? Not really.
Entering the wrong password a few times will lock your Apple iPhone 13 mini. What you want to do right now is sidestep the password so you can begin using it again. Whether you have more up-to-date models like iPhone 14, or an older one like iPhone 4, some tools can help you.
Therefore, this guide explains how to unlock iPhone passcode without computer. In addition, this guide elaborates on the safest methods available in the market to help you secure your Apple iPhone 13 mini. So, keep reading and find out about unlocking an iPhone without a computer.
Part 1: Can I Unlock My iPhone Passcode without Computer?
Yes, you can open the Apple iPhone 13 mini password without needing a PC.
Moreover, there are more than a few simple methods for doing such. Also, you don’t need to bother with any technical information. Users can now unlock their iPhones through the Erase iPhone, Find My, and Siri. Even if these methods don’t work in your situation, you can employ other professional tools. One such tool is Dr.Fone.
Dr.Fone-Screen Unlock by Wondershare is an expert tool to remove such issues. It is a safe method for everyone new to the technical world. The process is basic, assuming you follow the step-by-step guide below.
Part 2: 3 Methods to Unlock Disabled iPhone without a computer?
1. “Erase iPhone” Option
You want to use this method when you fail to remember your Apple iPhone 13 mini PIN. It is the most straightforward method for opening your Apple iPhone 13 mini, assuming you forgot your password.
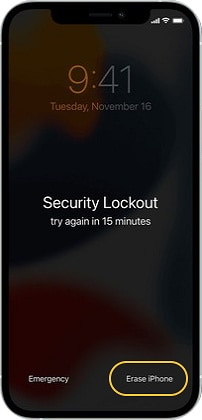
Since iOS 15.2, Apple presented an “Erase iPhone” choice from the Security Lockout window. This window appears from the seventh time you enter an incorrect code. The steps beneath work if your Apple iPhone 13 mini or iPad runs iOS 15.2 or later and has an internet connection:
- When you don’t know the lock screen PIN, please enter your password several times from your Lock Screen until it warns you the next time. Then do this step again until you see the Erase iPhone toward the side of the screen.
- Tap Erase iPhone, then click again to affirm your action.
- Enter your Apple account credentials to sign out of your Apple ID on the phone.
- Tap Erase iPhone back to erase all your files and settings forever.
- Right when the phone restarts, comply with the on-screen steps. Yet again, set your phone, and restore your information and settings from a backup. Presently set another password for your phone.
Guidelines to Restore a Locked iPhone Running iOS 15.1 or Earlier:
- Regardless, put your Apple iPhone 13 mini into DFU mode.
- Then, connect it to a PC or Mac through a Lightning USB.
- Tap your Apple iPhone 13 mini in the Finder sidebar on Macintosh or iTunes on the PC.
- Pick Restore when you see the decision to Restore. Let the download finish, and your phone leaves the recovery mode screen. Yet again, then switch off your Apple iPhone 13 mini and begin.
- Disconnect your iDevice, then turn it on and set it up. That is all you must do.
2. Use Find My
Apple permits clients to erase iPhone data to protect it from others remotely. Nonetheless, your lock screen can save your data if you don’t erase the Apple iPhone 13 mini device. Nobody can open the screen except if they enter the right passcode. After too many incorrect attempts, your Apple iPhone 13 mini will be locked. So nobody can then touch your data.
If you have enabled the “Find My” choice before failing to remember your Apple iPhone 13 mini PIN, there is an opportunity for you to eliminate the lock. That is to use iCloud.
Prerequisites:
- The locked device ought to have the Find My component enabled.
- The locked iPhone ought to be signed in to your iCloud ID.
- It ought to have an internet connection, be it data or Wi-Fi.
- It will help if you remember your Apple ID credentials.
To open iPhone through iCloud:
Step 1. Visit the iCloud.com page and sign in with your Apple ID and password.
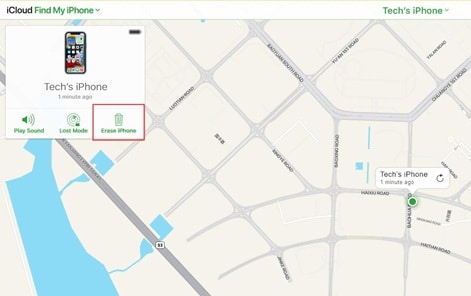
Step 2. Click the “Find iPhone” choice from the various accessible choices.
Step 3. Click “All Devices” and pick the gadget you want to open.
Step 4. Click the “Erase iPhone” button. In this manner, set up the phone and another lock screen PIN. With iCloud, you can open your iDevice without contacting your device.
3. Use Siri (Only for iOS 8.0 to 10.1)
There is an issue with Siri that you can use how to unlock iPhone passcode without computer. This arrangement probably won’t work consistently, yet it deserves checking out. The bug works on any phone running on iOS 8 up to iOS 10.1
- Initiate Siri on your iDevice. You should simply long press the Home button. Then, ask Siri what the time is, “Hello Siri, what time is it?”
- Siri will then show you the time. There will be a clock symbol bordering it. Tap on the clock, and you can get to the World clock. Click on the “+” sign to add another watch.

- You will get a bar where you have to enter a city. First, write anything to make sure you can write. Then, tap on the text and click “Select all” afterward.
- You will now get new choices, including cut, copy, and so on. Tap on the “Share” button to proceed. You will get options for sharing the text. Click on the Message icon. Your device will open another window. Now, you begin drafting another message. Go to the “To” field, and type any text. Click back to proceed with opening an iPhone without a PC.
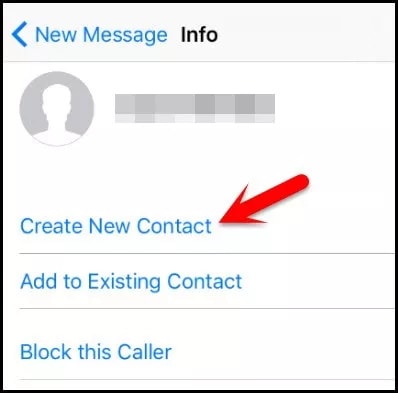
- The text will become green. Yet again, now that your text is chosen, click on “+” to add a symbol. When you tap it, another window will open. Click on “Create new contact” to proceed. You will now see a window where you can add another contact. Tap on “Add Photo” to move.
- Click the “Select/Pick Photo” button to choose a photograph from your library. When the library opens, you can see the collections. Do not click anywhere. Wait for a couple of moments, and afterward, tap on the Home button. You will then access the Home screen. That’s how to unlock disabled iPhones without computer.
Bonus Tips: Easy App to Unlock Your Apple iPhone 13 mini
Dr.Fone-Screen Unlock
We, as a whole, realize that expert software is the quickest and simplest method for opening an iPhone. These devices are helpfully intended to make life simpler; thus, they do.
Dr.Fone-Screen Unlock is a special tool that eliminates iPhone screen lock in minutes with no confusing steps. The team at Dr.Fone has years of insight into iPhone lock issues. Besides, it is developed, so any non-specialist with no technical information can use it. Here’s how to unlock disabled iPhone without computer:
Step 1. Plug the iDevice into your system
Run the Dr.Fone on your system and select the “Screen Unlock” option from the main menu.

Use a connector to connect your Apple iPhone 13 mini to the PC. After this, click the “Unlock iOS Screen” option on the program.

Step 2. Access the Recovery or DFU Mode
Before the Apple iPhone 13 mini lock screen removal, we need to boot the phone in Recovery or DFU. If you have to do so, follow the steps given in the image below:

We suggest you open the recovery mode to remove the iOS screen lock. However, if you can’t figure out how to do so, go for the DFU mode.
Step 3. Affirm Device Model information
After going to the DFU mode, Dr.Fone will show the information about your Apple iPhone 13 mini. From the following screen, confirm your phone model and iOS version. If it is isn’t correctly given, select the correct data pair from the drop-down menu. Then download the firmware package for your Apple iPhone 13 mini.

Step 4. Open the Lock
Click Unlock Now after downloading the firmware.

After a short while, your Apple iPhone 13 mini will be opened effectively. However, this process will erase every bit of data off your phone. Honestly speaking, there is no answer for this issue without data loss.
The Bottom Line
It is the end of a detailed guide with the top strategies on how to unlock disabled iPhones without computer. You should get the right approach per your circumstance and follow the steps.
If you don’t know which strategy will turn out best for you, we suggest utilizing Dr.Fone-Screen Unlock. It has a close to 100% success rate and is not difficult to use for individuals without a tech foundation. So, install it on your system for a quicker result.
Learn How To Lock Stolen Your Apple iPhone 13 mini Properly
When it comes to security in smartphones, Apple stands at the forefront. The Activation Lock is a robust barrier to preventing unauthorized access and device theft. Losing your Apple iPhone 13 mini can be a disturbing event, as accidents are inevitable. Taking prompt action to stop unauthorized data access becomes important. This guide offers a step-by-step approach to how to lock a stolen iPhone.

Part 1. Major Threats To Consider When iPhone Is Stolen
A lost iPhone can become susceptible to a myriad of threats. It could compromise your privacy, security, and personal data. Here are the reasons why learning how to lock your Apple iPhone 13 mini when lost is essential:
- Unauthorized Access to Personal Data: Thieves can exploit an unsecured Apple iPhone 13 mini to gain unauthorized access to personal information. These include contacts, messages, emails, and photos.
- **Financial Exploitation:**With access to your Apple iPhone 13 mini, thieves may attempt to get stored payment methods.
- Identity Theft: Stolen iPhones often contain a wealth of sensitive information. This makes them a prime target for identity theft.
- Compromised Social Media Accounts: Using social media applications on your smartphone carries potential risks in the event of device loss. Unauthorized access to your social media accounts can lead to many problems, including misinformation and compromised privacy.
Part 2. Use Find My To Locate Stolen iPhone
On learning about how do I lock my stolen iPhone, Apple’s robust Find My feature emerges as a beacon of hope. It uses a combination of GPS, Wi-Fi, and Bluetooth signals to locate your Apple iPhone 13 mini accurately.

Key Scenarios Where Find My Works
Find My can be a source to track stolen iPhones, but certain scenarios are associated with its operations. To know more about these scenarios, this section continues the discussion further below:
- iPhone Turned On:Find My can provide real-time location tracking when your stolen iPhone is still powered on and connected to the internet.
- **iPhone Turned Off or In Airplane Mode:**The last known location before the Apple iPhone 13 mini device was powered down or put in Airplane Mode is accessible, offering a starting point for recovery efforts.
- **Offline Finding with Bluetooth:**The Find My service leverages Bluetooth technology to create a vast network of Apple devices. With these, it can securely help locate your Apple iPhone 13 mini, even offline.
- **Activation Lock Integration:**This service is also integrated with Activation Lock, adding an extra layer of security. The Activation Lock remains active if a thief attempts to erase your device.
How To Use Find My To Locate Your Stolen iPhone
- Step 1. Access the Find My app on a trusted device and open it. If you can’t access one, use the iCloud website to access Find My service.

- Step 2. After logging in, select the lost device, and you can see its last recorded location on the map.

Part 3. Using Lost Mode To Lock Stolen iPhone
Lost Mode locks the Apple iPhone 13 mini device and allows users to showcase a personalized message on the screen. This can help greatly in the safe return of the smartphone. The following are the simple steps you need to follow to learn how to block stolen iPhone with Lost Mode:
Activating Lost Mode Using Your Smartphone
- Step 1. Within the Find My app, tap “Devices” from the bottom toolbar and select your lost device. Now, scroll down to “Mark As Lost” and tap “Activate.”

- Step 2. You will now be given a summary of the Lost Mode; tap “Continue” to proceed. On the following screen, add a phone number, tap “Next,” and add a message that will be displayed on the lost device.

- Step 3. After adding a message, tap “Next” on the following screen and press “Activate” from the top right corner.

Activating Lost Mode Using iCloud Website
- Step 1. Access the iCloud website via your computer’s web browser. Sign in using your Apple ID, continue to click the “Grid” icon in the top right corner, and select “Find My.”

- Step 2. In Find My, add your Apple ID password again to access “All Devices.” Now, choose the lost device from the list of all devices in the top left corner. Then, click “Mark As Lost,” and the following pop-up Lost Mode prompt, tap “Next.”

- Step 3. Now go on to add your phone number and tap “Next.” Follow it by providing the message you want to display and click “Activate” to enable Lost Mode.

Part 4. Can’t Find Stolen Phone? Erase iPhone Completely
When efforts to locate a stolen iPhone fail, the need to protect sensitive data intensifies. As a result, the option to erase the Apple iPhone 13 mini device becomes a crucial step instead of how to lock the Apple iPhone 13 mini when lost. Here’s how to protect against the potential misuse of your information by erasing your device via Find My:
- Step 1. After accessing Find My service, choose the lost device from the list and click “Erase This Device.”

- Step 2. Select “Continue” on the erased iPhone screen for the Find My app. Once you’ve added the number, press “Erase” in the top right corner and follow the on-screen instructions to finish the procedure.

- Step 3. If using the iCloud website, tap “Erase This Device” and click “Next” on the upcoming prompt. You will be asked to enter the Apple ID password, after which you can use the on-screen guidelines to finish the process.

Part 5. Other Things To Do iPhone Is Stolen
There are additional measures you can take to enhance your overall security apart from understanding how do I lock my stolen iPhone. The following are some options you should utilize in case of device loss:
To Do List #1. Report to Police
If your Apple iPhone 13 mini is stolen, it is crucial to immediately inform your local law enforcement agency. It facilitates the recovery process and assists in combatting criminal activities. Provide essential details about your Apple iPhone 13 mini, such as the Model, color, and IMEI number. Share information about your efforts to locate the stolen iPhone using Find My.

To Do List #2. Make an Insurance Claim With AppleCare
You can claim insurance if you have AppleCare+ coverage for your Apple iPhone 13 mini. AppleCare+ with Theft and Loss for iPhone includes protection against theft and loss incidents. It offers up to two incidents of such coverage every 12 months.
To qualify for theft or loss coverage, it is necessary for Find My to be enabled on your device at the time it goes missing. Moreover, it should remain enabled alongside Lost Mode throughout the claims process.

To Do List #3. Remove iPhone From Trusted Devices (2FA)
After your Apple iPhone 13 mini is stolen, it becomes essential to bolster the security of your online accounts. It is particularly essential for those safeguarded by Two-Factor Authentication (2FA), which needs to be removed:
From iOS Device Settings
- Step 1. Access Settings on an iOS device logged in with the same Apple ID as the lost one. Here, tap on your name on the following screen and scroll down.

- Step 2. Simply select the misplaced device, and in the subsequent interface, press “Remove from Account” to eliminate it from the list of trusted devices.

From the Apple ID Website
- Step 1. If you cannot reach a secure device, visit the http://appleid.apple.com website and sign in with the identical Apple ID.

- Step 2. Once logged in, click “Devices” from the left side and select the lost device. To remove this device as a trusted device, click “Remove from Account.”

Part 6. Precautions To Take for Avoiding Losing iPhone
Users can proactively adopt specific measures to reduce the likelihood of such an occurrence. The following essential precautions are recommended while learning how to block your Apple iPhone 13 mini when stolen:
Precaution #1. Enable Find My on Device
Activating Find My increases the likelihood of recovering your device. Take the following steps to enable the Find My feature on your Apple iPhone 13 mini:
- Step 1. On your iOS device, navigate to “Settings” and tap the Apple ID on the top. Now, scroll down and press “Find My” on the following screen.

- Step 2. Next, tap “Find My iPhone,” on the ensuing window, toggle “Find My iPhone.” This will enable the Find My service on your device.

Precaution #2. Enable Separation Alerts on iPhone
Enabling “Separation Alerts” assists in preventing the loss of your Apple iPhone 13 mini by alerting you when you distance yourself from it. Follow these steps to enable Separation Alerts on your Apple iPhone 13 mini:
- Step 1. Navigate to and launch the Find My app on your Apple iPhone 13 mini. Select the Apple iPhone 13 mini device from the “Devices” tab for which you want to enable separation alerts.

- Step 2. From the available options, tap “Notify When Left Behind,” and on the following screen, toggle “Notify When Left Behind.” You can also add locations on this screen by tapping “New Location,” for which you don’t want to receive a left-behind notice.

Precaution #3. Enable 2FA on iPhone
Activating Two-Factor Authentication (2FA) enhances the security of your Apple iPhone 13 mini. The mandatory secondary verification step makes 2FA crucial in securing your accounts. Follow these steps to enable 2FA on your Apple iPhone 13 mini:
- Step 1. Access the Settings app on your iOS device and tap your name/Apple ID. Find and tap “Sign-In & Security” to proceed further.

- Step 2. On the following screen, tap “Turn On Two-Factor Authentication.” Follow it by tapping “Continue” afterward, and use the on-screen instructions to complete the process.

Bonus Tip. Find Stolen iPhone Back but Locked? Unlock With Wondershare Dr.Fone
Recovering your stolen iPhone successfully can be a joyous event. Yet, the frustration of discovering your device locked due to a forgotten password can be disheartening. Wondershare Dr.Fone - Screen Unlock (iOS) offers a solution to regain access to your device. This robust tool is crafted to help users unlock various iOS screen lock scenarios.
It provides a hassle-free solution for those locked out of their devices. This powerful tool effortlessly removes various lock screens on iPhones and iPads. It can bypass the iCloud activation lock without the need for a password.
Key Features of Wondershare Dr.Fone
- If you are using iTunes for backup but have forgotten the iTunes backup encryption passcode, Dr.Fone can remove it without data loss.
- This tool can remove Apple ID from your Apple iPhone 13 mini or iPad if you have forgotten its password.
- You can free up your device by removing MDM and carrier locks using Dr.Fone.
Steps To Unlock Your Locked iOS Device Using Wondershare Dr.Fone
Wondershare Dr.Fone is a comprehensive toolkit that addresses many iOS-related issues. It offers a user-friendly solution to unlock your Apple iPhone 13 mini with the help of the following steps:
- Step 1. Launching Wondershare Dr.Fone and Accessing Toolbox
Once you have installed and launched Wondershare Dr.Fone, access the “Toolbox” tab. Click “Screen Unlock,” and on the following screen, choose “iOS.” Click “Unlock iOS Screen” on the following screen and link your iOS device to the computer.

- Step 2. Entering Recovery Mode and Choosing System Version
The next step requires you to put your device in Recovery Mode, for which you can follow the instructions given on-screen. After your device is in Recovery Mode, Dr.Fone will display its “Model.” Now choose the appropriate “System Version” and click “Start.” Here, Dr.Fone will start downloading the required firmware. Once it is downloaded and verified, tap “Unlock Now.”
- Step 3. Acknowledging Data Loss Warning and Initiating Unlock Process
To show your acknowledgment of the warning, enter the asked code, which is “000000.” Afterward, click “Unlock” to initiate the screen unlocking process. Once the process is complete, tap “Done” to conclude the procedure.

Conclusion
Knowing how to lock stolen iPhones is essential for safeguarding personal and sensitive data. Apple’s Find My empowers users to remotely locate, lock, and erase their lost devices. If you have recovered your stolen device but it is locked, Wondershare Dr.Fone emerges as the top choice to unlock it within minutes.
Tips: Are you searching for a powerful Screen Unlock tool? No worries as Dr.Fone is here to help you. Download it and start a seamless unlock experience!
Easy Steps on How To Create a New Apple ID Account On Apple iPhone 13 mini
Your Apple ID is your gateway to a world of apps and services, making it an essential part of your Apple experience. Whether you’re a new Apple user or simply looking to start fresh, creating a new Apple ID can open the doors to endless possibilities.
This guide will walk you through creating a new account for Apple devices in an easy-to-understand manner. From setting up your email address to securing your account, this article covered you every step of the way. Embark on this journey and learn how to create a new Apple ID account effortlessly.
Part 1: Why Create a New Apple ID?
You might need to create a new Apple ID to enhance your Apple experience. Let’s dive into why it’s a good idea:
A. Reasons for Creating a New Apple ID Account
Here’s a breakdown of the reasons why you should create a new Apple ID for your Apple iPhone 13 mini:
- Your Apple ID is like your digital identity. Creating a new one lets you choose a unique email address that suits you, adding a personal touch to your Apple journey.
- Maybe you’ve been using an email for your Apple ID that you don’t want to use anymore. Creating a new one helps keep your personal and Apple-related emails separate.
- **Switching Devices.**When you switch to a new Apple device, like getting a new iPhone or iPad, creating a unique Apple ID ensures a fresh start tailored to your new gadget.
- **Separation of Accounts.**Sometimes, you may want to keep your work-related apps and data separate from your ones. Creating a new Apple ID helps you achieve this separation.
- If you’re using Apple services for different purposes, such as work and personal use, having separate Apple IDs can help keep everything organized and distinct.
B. Scenarios Where a New ID Is Needed
Below are the common scenarios where a new Apple ID might be needed:
- **New Apple Device.**When you purchase a new Apple device, like an iPhone or iPad, you’ll need a new Apple ID to set it up and make it truly yours.
- **Shared Device.**If multiple people use the same device, creating a new Apple ID for each user ensures that everyone has their own personalized experience.
- **Change of Email.**If your current email address associated with your Apple ID is changed or you prefer a new one, creating a unique Apple ID with the updated email is the solution.
- **Work and Personal.**To keep your work-related apps and data separate from your personal ones, having separate Apple IDs for each purpose is practical and organized.
- **Starting Fresh.**Sometimes, you might want a fresh start with your Apple experience, and creating a new Apple ID provides a clean slate.
Creating a new Apple ID isn’t just about getting a new email; it’s about tailoring your Apple experience to your needs, whether for personalization, privacy, or organization. Now that you know why it’s essential, let’s explore how to create it in the next section.
Part 2: Step-by-Step Guide: How To Create a New Apple ID Account
Creating a new Apple ID for free is a straightforward process. Let’s break it down into simple steps:
A. Registering a New Apple ID
These are the steps for registering a new Apple ID:
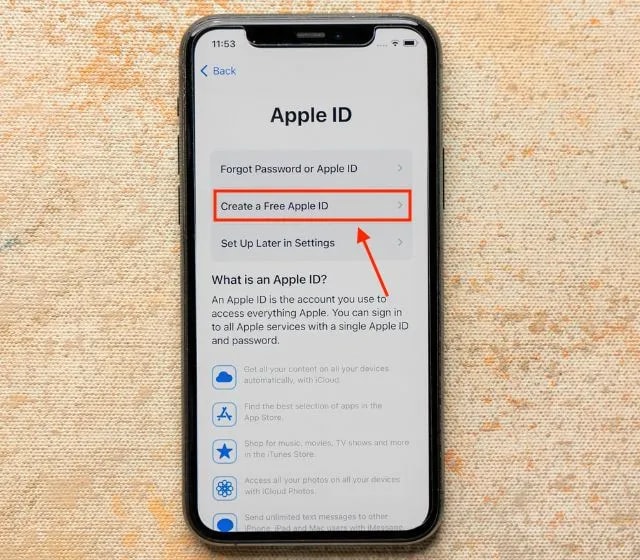
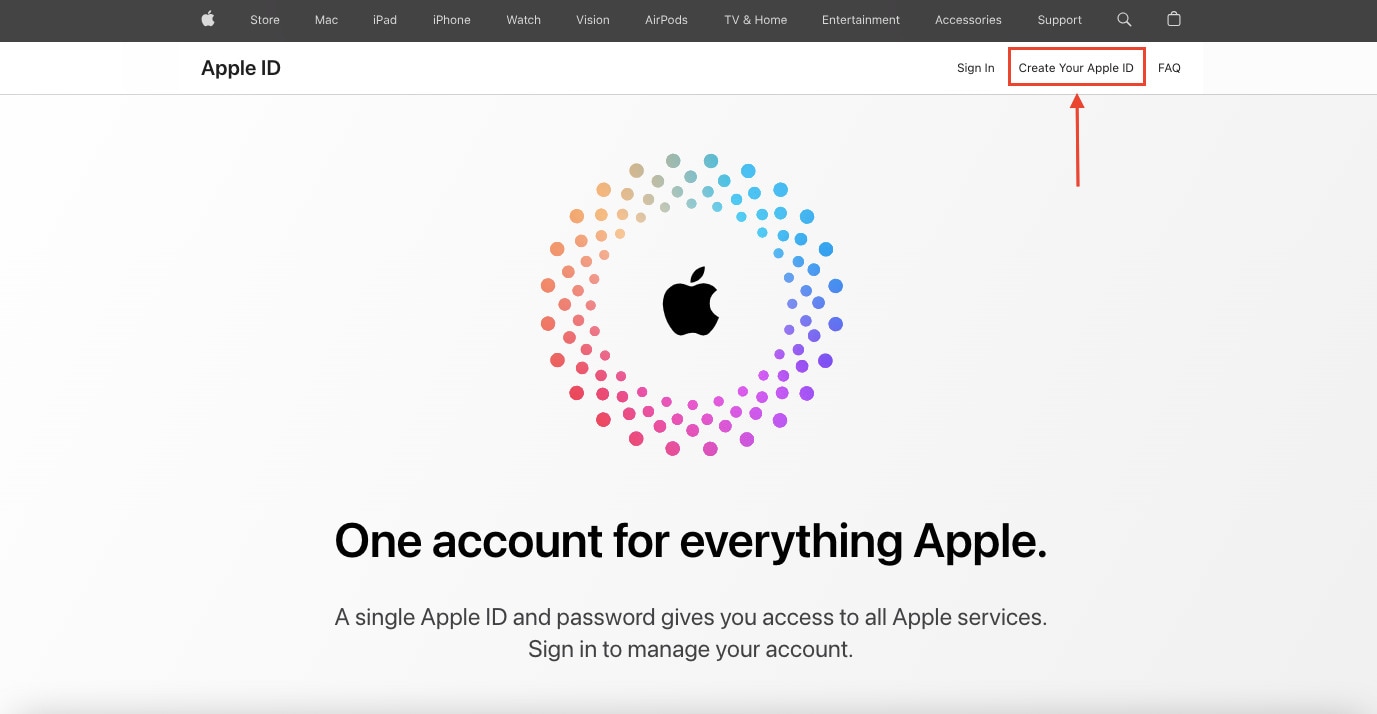
- Step 1: Open your web browser and visit the Apple ID account management page. Click the Create Your Apple ID button to begin.
- Step 2: On the registration page, you’ll be asked to provide your First name and Last name. Make sure to use the name associated with your new Apple ID. Next, you’ll need to enter your preferred email address. This one will be your new Apple ID.
Tip: Choose an email that’s easy to remember and access.
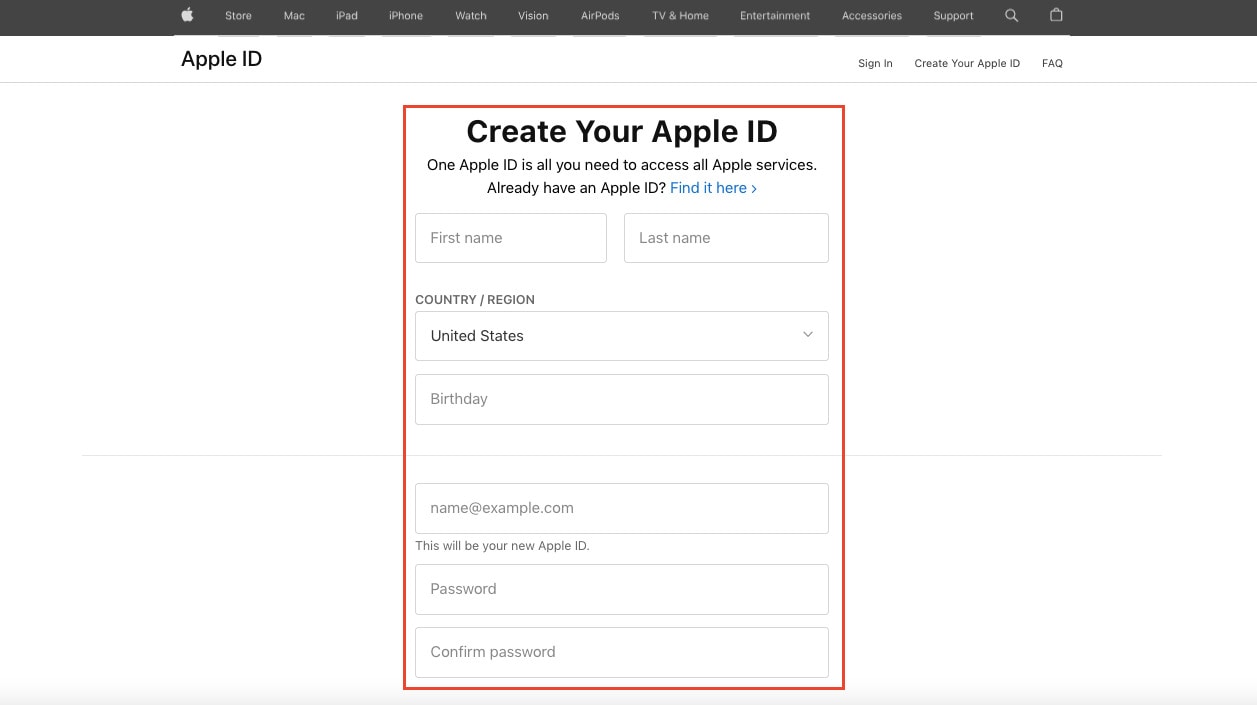
- Step 3: Create a strong password that combines letters, numbers, and symbols. This password is essential for the security of your account, so make it unique and hard to guess. Confirm your password by entering it again in the designated field.
B. Verifying Your Identity
The next step is verifying your identity. Check out the steps below:
- Step 4: Apple takes your security seriously. You may be asked to provide a phone number to verify your identity. This number can be used for account recovery or two-factor authentication. The phone number you provided will receive a verification code. Enter this code in the space provided to confirm your identity.
Note: It’s crucial to ensure that your phone number is accurate and accessible. This number will help you recover your account in case you forget your password or encounter any issues. Apple may use this phone number for two-factor authentication, adding an extra layer of security to your account.
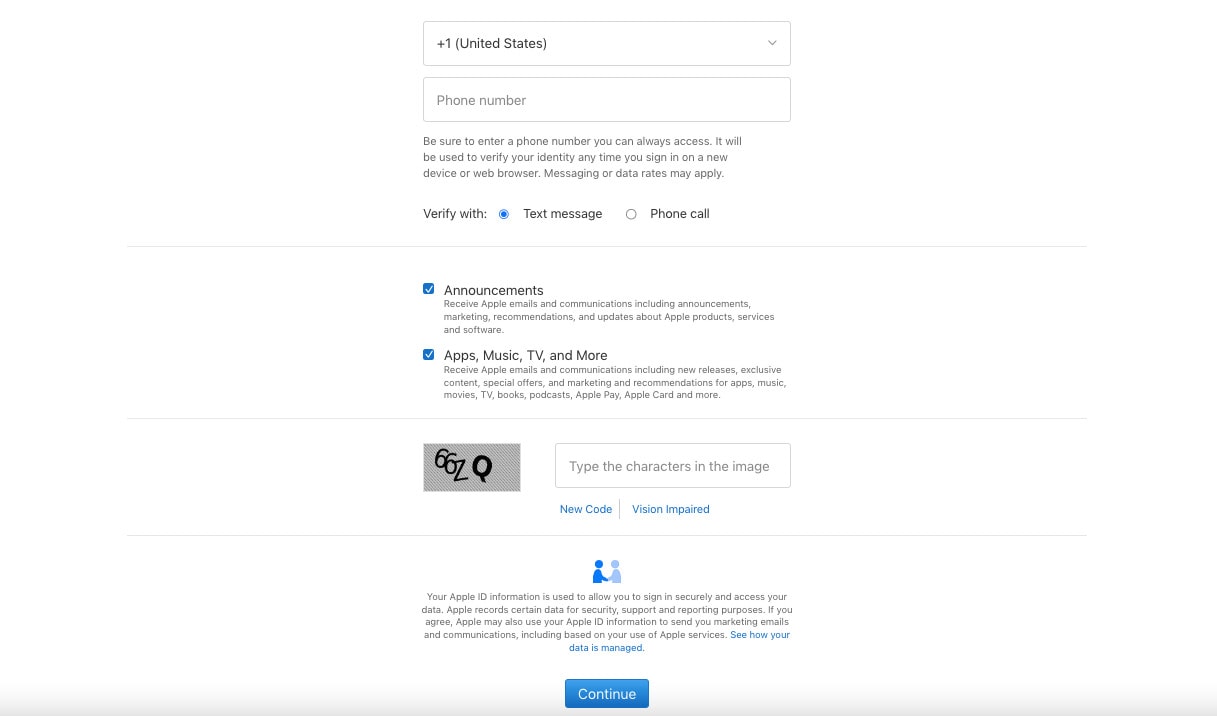
- Step 5: Apple may sometimes ask you to complete a CAPTCHA or verify your identity to prevent automated account creation.
C. Setting Up Security Questions
The next process will be setting up security questions for your account:
- Step 6: Apple asks you to choose and answer security questions. These questions provide an additional layer of protection for your account. Select questions that you can easily remember and that others can’t guess.
D. Finalizing the Process
To finalize the creation process, refer to the steps given below:
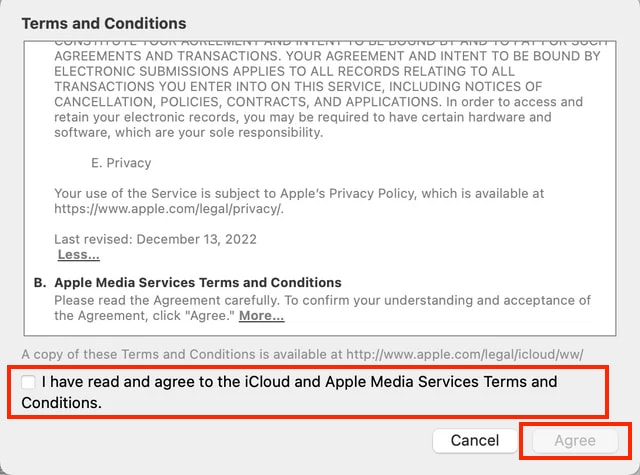
- Step 7: Read through Apple’s Terms and Conditions and Privacy Policy. Once you’ve understood them, tick the box to confirm that you’ve read and agree to the iCloud and Apple Media Services Terms and Conditions. Then click Agree to proceed. Remember that it’s essential to be familiar with Apple’s policies to ensure a secure and smooth experience.
- Step 8: After completing these steps, Apple will send a confirmation email to the address you provided. Go to your email and open the verification link to confirm your new Apple ID.
Congratulations! You’ve successfully created a new Apple ID. With this account, you can now access Apple’s services, including the App Store, iCloud, and more. Remember to keep your login credentials secure and use them to personalize your Apple experience fully.
Part 3: Effortlessly Remove Your Apple ID Using Wondershare Dr.Fone - Screen Unlock (iOS)
You can embark on an enhanced Apple experience after successfully creating your new Apple ID. Removing the previous one is essential when you create it, especially if you’ve acquired a second-hand device or no longer want the previous user’s associated credentials.
This step ensures that your new Apple ID takes center stage, granting you full control over your device and its associated services. But if you encounter difficulties when removing the previous Apple ID from your device, Dr.Fone - Screen Unlock (iOS) is a reliable and user-friendly solution.

Key Features of Dr.Fone - Screen Unlock (iOS)
This versatile tool offers the following key features in the context of Apple ID issues:
- **User-Friendly Interface.**Fone - Screen Unlock (iOS) is designed to be straightforward, making it accessible to users of all levels of technical expertise.
- It is usable with a wide range of iOS devices, ensuring you can remove the previous Apple ID from your device, regardless of the model.
- **Multiple Unlock Modes.**Fone offers various unlock modes to cater to different scenarios, including removing the previous Apple ID. This flexibility ensures that you have the right solution for your specific situation.
- **Data Security.**Fone - Screen Unlock (iOS) prioritizes data security, ensuring that your personal information and content remain intact during the Apple ID removal process.
Step-by-Step Guide on Using Dr.Fone Screen Unlock (iOS)
Check out the steps on how to remove an Apple ID account using Dr.Fone below:
- Step 1: Launch Wondershare Dr.Fone on your PC to use the Screen Unlock function and then navigate to Toolbox. Click the Screen Unlock section, then choose iOS.
- Step 2: If you want to proceed with deleting your Apple ID, you’ll need to go to the next window and select the Remove AppleID option from the menu.
- Step 3: When you hook up your iOS device to a computer, the next screen will report on its connectivity. Select the Unlock Now button to proceed.

- Step 4: Before the Apple ID can be unlocked, the next step is for the platform to ask a series of questions. Verify that a screen lock is active on your iOS device. However, please lock your iOS device before proceeding with the Yes option.

- Step 5: Check if Two-Factor Authentication is set up on all your iOS devices. If not, switch it on before confirming your decision to unlock your Apple ID.

- Step 6: After you have confirmed these settings, you will be taken to a screen with on-screen instructions for entering Recovery Mode on your iDevice. If the steps for your specific iOS device don’t work, try tapping Try DFU Mode in the app’s bottom left corner. To continue with the unlocking process, this will launch the DFU Mode instructions.

- Step 7: Once Recovery Mode has been activated, the Apple iPhone 13 mini device’s information will be shown on the subsequent screen. Once the Device Model has been identified, all that remains is to choose the appropriate System Version and click Start. However, if there are disagreements in recognition, pick the details by hand and move forward.
- Step 8: The appropriate iOS firmware begins downloading, showing its status on the following screen. Click the Copy button to copy the direct URL to download iOS firmware for systems with sluggish firmware download speeds.
- Step 9: The platform checks the downloaded firmware and displays its details on the following screen. To proceed with unlocking your Apple ID, click the Unlock Now button. To proceed, you will be prompted to input a code into a confirmation window. Enter the code and then click the Unlock button.

- Step 10: The following screen shows the unlocking status of your Apple ID. Don’t let the Apple iPhone 13 mini device lose its connection under any circumstances. The screen prompts the process of completing the Apple ID once the ID has been unlocked. If the Apple ID has been unlocked, click Done to proceed. If that fails, click the Try Again button and give it another shot.

Conclusion
This guide has simplified the process of creating a new Apple ID, ensuring you can effortlessly personalize, secure, and organize your digital experience. Creating a new Apple ID is easy, and it allows you to tailor your Apple journey to your preferences. Remember, it’s all about you, your privacy, and your convenience.
Should you encounter any challenges while managing your Apple ID, such as removing a previous one, consider Dr.Fone - iOS Screen Unlock tool. This user-friendly resource stands ready to assist, ensuring a seamless and secure Apple experience. Explore the possibilities and make the most of your Apple adventure!
Also read:
- [New] Unveiling Professional Techniques for APS HDR Creation
- [Updated] 2024 Approved Elevate Your Farming Game to Immortal Status with These #7-14 Mods
- [Updated] Cutting Edge Techniques for Free-From Photo Backgrounds
- [Updated] In 2024, The Pathway to Proficient ZOOM Communication Maximizing Meeting Engagement
- Best 3 Itel A60 Emulator for Mac to Run Your Wanted Android Apps | Dr.fone
- Diagnosing and Fixing Issues with Your Hard Disk: Expert Advice From YL Computing's Team of Specialists
- Easy Steps on How To Create a New Apple ID Account On iPhone 8 Plus | Dr.fone
- Forgot Locked iPhone 12 mini Password? Learn the Best Methods To Unlock | Dr.fone
- From First Use to Expertise A Comprehensive FCP Guidebook for 2024
- In 2024, 8 Safe and Effective Methods to Unlock Your iPhone 11 Pro Max Without a Passcode | Dr.fone
- In 2024, How to Turn Off Find My iPhone SE (2020) when Phone is Broken? | Dr.fone
- In 2024, How to Unlock Apple iPhone 12 Pro without Passcode or Face ID | Dr.fone
- In 2024, Prototypical 360° Rotation Camera Study
- Retrieve Forgotten Passwords From Your Mac with Simple Tricks
- Title: Unlocking iPhone 13 mini Passcode without a Computer | Dr.fone
- Author: Amelia
- Created at : 2024-12-17 16:07:12
- Updated at : 2024-12-20 16:20:20
- Link: https://iphone-unlock.techidaily.com/unlocking-iphone-13-mini-passcode-without-a-computer-drfone-by-drfone-ios/
- License: This work is licensed under CC BY-NC-SA 4.0.